Hooray! You Pumpkin-Spice-latte’d your way through your own apple trees and/or every apple orchard in town and found yourself barricaded in your kitchen with no less than 20 pounds of apples. You already baked everything in your recipe book and your family can’t eat another apple pie, crumble, sauce, or turnover. You’ve given away apples to neighbors, mail carriers, random people walking their dog by your house. There are still apples in your kitchen. The time has come to accept your fate of freezing fresh apples.
Freezing fresh fruits and vegetables is a great way to enjoy locally grown food all year round. It’s important to know that the texture of apples changes after freezing and thawing. Because of this, freezing fresh apples for baking is my favorite use. Here is the easiest way to freeze your apples and enjoy them all year long.
Discover 7 top tips for growing, harvesting, and enjoying tomatoes from your home garden—when you access the FREE guide The Best Way to Grow Tomatoes, right now!
Hey there, kitchen warriors! Got a pile of apples sittin’ on your counter, threatenin’ to go all brown and mushy before you can bake that pie? Well, I’ve been there, and lemme tell ya, blanching cooking apples is the game-changer you didn’t know you needed. It’s this super simple trick that keeps your apples lookin’ fresh, tastin’ great, and ready for action—whether you’re tossin’ ‘em in a dessert or savin’ ‘em for later. At our lil’ cooking corner, we’re all about makin’ life easier, so stick with me as I break down how to blanch cooking apples step by freakin’ step. You’ll be a pro in no time!
Why the Heck Should You Blanch Cooking Apples?
Before we dive into the nitty-gritty let’s chat about why blanching is worth your time. It ain’t just some fancy chef move—it’s practical as heck. Here’s the deal
- Keeps ‘Em Pretty: Cut apples turn brown faster than you can say “apple pie.” Blanching stops that pesky browning in its tracks by turnin’ off the enzymes causin’ the mess. Your apples stay lookin’ fresh and appetizin’.
- Texture Magic: It softens the apples just a tad, so they’re easier to work with in recipes. Plus, it stops ‘em from turnin’ into a soggy disaster when you cook ‘em later.
- Flavor Boost: Got some super tart apples? Blanching mellows that sharpness a bit, balancin’ things out for a better bite.
- Saves ‘Em for Later: Wanna freeze apples for months down the road? Blanching is your best bud—it keeps the quality high and fights off freezer burn.
So, whether you’re preppin’ for a big bake-off or just tryin’ to not waste food, blanching cooking apples is the way to go. Now, let’s get to the good stuff—how to do it!
Pickin’ the Right Apples for Blanching
Not all apples are cut out for this gig, ya know. Some are great for munchin’ raw, but when it comes to cookin’ and blanching, you gotta choose wisely Here’s my go-to list of apple varieties that hold up like champs
- Granny Smith: These bad boys are tart and firm, perfect for holdin’ their shape when cooked. They’re my top pick for pies and sauces.
- Honeycrisp: Sweet-tart and crispy, they’re awesome even after a quick blanch. Might soften a lil’ more than others, but dang, they taste good.
- Braeburn: A nice mix of sweet and tart with a solid texture. Super versatile for any dish.
- Cortland: Juicy with a hint of tartness, killer for pies and stuff like chutneys.
- Northern Spy: An old-school apple with a balanced flavor. Keeps real nice, even after blanching.
Steer clear of apples like Red Delicious or Fuji—they get all mushy and sad when cooked. You want somethin’ sturdy that won’t fall apart on ya. Got it? Good, let’s move on to the main event.
How to Blanch Cooking Apples: Step-by-Step Awesomeness
Alright, roll up them sleeves, ‘cause we’re gettin’ hands-on Blanching cooking apples ain’t hard, but you gotta follow the steps to nail it. I’ve messed this up before by skippin’ stuff, so learn from my oopsies and do it right Here’s the breakdown
-
Prep Your Apples Like a Boss
Start by givin’ your apples a good rinse under cold water to kick off any dirt. Peel ‘em if you want (I usually do, ‘cause it makes things smoother later). Use a sharp knife or an apple corer to yank out the cores. Then, slice ‘em into whatever shape you’re feelin’—wedges for pies, cubes for sauces, or thin slices for tarts. Keep the pieces kinda uniform so they cook even-like. -
Set Up Your Boilin’ Station
Grab a big ol’ pot and fill it with water. Crank the heat and get that water to a rollin’ boil. While it’s heatin’ up, prep an ice bath—fill a huge bowl with ice and cold water. This is key to stoppin’ the cookin’ process after blanching, so don’t skip it! -
Add a Lil’ Anti-Browning Trick
Here’s my secret sauce—toss a tablespoon of lemon juice into the boilin’ water. It helps keep them apples from turnin’ brown even more. You don’t gotta do this, but I swear it works like a charm. -
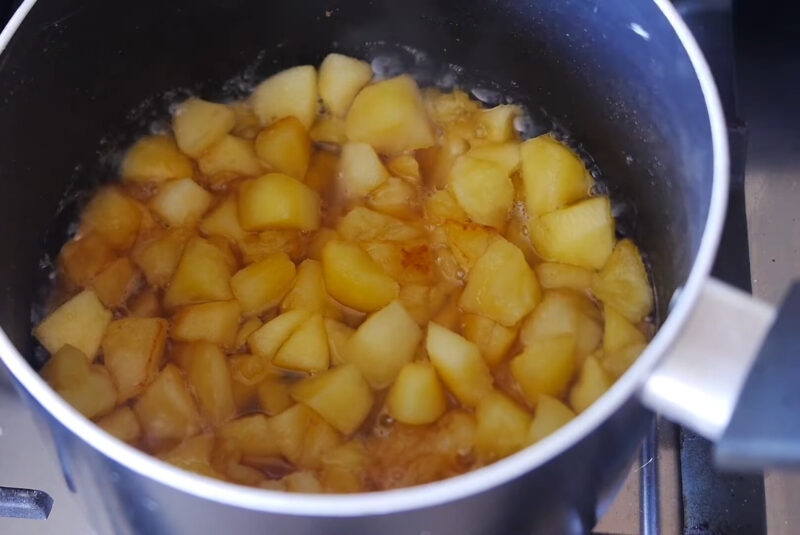
Blanch Them Babies
Work in small batches—don’t crowd the pot or the water temp drops and messes things up. Gently drop your apple pieces into the boilin’ water. Make sure the water gets back to boilin’ quick. Let ‘em sit there for about 2-3 minutes. Smaller pieces might need less time, bigger ones a tad more. You’re lookin’ for a slight soften—don’t let ‘em get mushy! -
Ice Bath Time
Soon as the timer’s up, scoop them apples out with a slotted spoon and dunk ‘em straight into that ice bath. This stops the cookin’ dead in its tracks and locks in the texture and color. Let ‘em chill there for 5-10 minutes ‘til they’re totally cool. -
Dry and Store
Drain the apples good and pat ‘em dry with paper towels. Extra moisture is the enemy if you’re freezin’ ‘em. At this point, you can use ‘em right away in a recipe or store ‘em for later. If you’re not usin’ ‘em now, keep readin’ for freezin’ tips.
Holy moly, that’s it! You’ve just blanched your cooking apples. Feels kinda empowerin’, don’t it? But wait, there’s more to make sure you’re gettin’ the most outta this.
Tips to Blanch Like a Freakin’ Pro
I’ve done this a buncha times, and lemme tell ya, a few lil’ tricks can save you from headaches. Here’s what I’ve learned the hard way:
- Don’t Overcrowd: I said it before, but seriously, blanch in small batches. If the water don’t stay hot, your apples won’t cook even.
- Time It Right: Set a timer, fam. Over-blanchin’ turns your apples into baby food, and ain’t nobody want that.
- Keep the Ice Bath Cold: If the ice melts, add more. Warm water won’t stop the cookin’, and you’ll end up with sad, overdone apples.
- Use the Right Tools: A slotted spoon is your bestie for movin’ apples from hot to cold without splashin’ everywhere.
- Dry ‘Em Good: If you’re freezin’, make sure they’re dry as a bone to avoid ice crystals messin’ with the texture.
Wanna quick reference for blanchin’ times based on size? I gotchu with this lil’ table:
| Apple Piece Size | Blanching Time |
|---|---|
| Thin Slices | 1.5-2 minutes |
| Medium Wedges | 2-3 minutes |
| Large Chunks | 3-4 minutes |
Stick to these ranges, and you’ll be golden. Adjust a smidge based on how firm your apples are—some varieties cook faster than others.
Freezin’ Blanched Apples for Later Use
If you’re like me, you prob’ly got more apples than you can use in one go. Freezin’ ‘em after blanching is the way to keep that fall flavor all year. Here’s how we do it at my house:
- Flash Freeze First: Don’t just chuck ‘em in a bag—they’ll stick together in a big frozen clump, and good luck pryin’ ‘em apart. Spread the blanched and dried apple pieces on a parchment-lined bakin’ sheet in a single layer. Pop it in the freezer for 1-2 hours ‘til they’re solid.
- Bag ‘Em Up: Once they’re frozen hard, toss ‘em into freezer-safe bags or containers. Label ‘em with the date so you don’t forget. They’ll keep for 8-12 months without losin’ much quality.
- No Re-Freezin’: Once you thaw ‘em, use ‘em up quick. Re-freezin’ messes with the texture big time, and they’ll turn to mush.
This trick means you’ve always got apples ready for a quick dessert or sauce. It’s like havin’ a lil’ piece of autumn stashed away for a rainy day!
Creative Ways to Use Blanched Cooking Apples
Now that you’ve got a stash of perfectly blanched apples, what the heck do ya do with ‘em? Oh man, the options are endless, and I’ve tried a bunch. Here are some ideas to get ya started:
- Pies and Crumbles: These are my go-to. Blanched apples make the fillin’ texture spot-on—not too hard, not too soft. Just add your spices and bake away.
- Sauces and Chutneys: Cook down blanched apples into a smooth applesauce or a tangy chutney to pair with pork or cheese. It’s stupid easy and tastes fancy.
- Salads: Toss some blanched apple slices into a salad for a sweet crunch. Pairs awesome with nuts and a lil’ honey dressin’.
- Baked Goodies: Mix ‘em into muffins, cakes, or quick breads. They add moisture and flavor without turnin’ your batter to soup.
- Breakfast Vibes: Throw blanched apples into oatmeal or pancakes for a cozy mornin’ treat. Add a sprinkle of cinnamon, and you’re livin’ the dream.
I once made a killer apple crumble with blanched Granny Smiths, and my fam couldn’t stop ravin’ about it. Experiment a lil’—you might stumble on your own signature dish!
Variations to Mix Things Up
If you’re feelin’ adventurous, there’s more than one way to blanch cooking apples. I’ve dabbled with a couple tweaks, and they can switch up the game dependin’ on what you’re makin’:
- Steam Blanchin’: Instead of boilin’, set up a steamer basket over hot water and steam the apple slices for 4-5 minutes. It’s gentler and can keep more nutrients, I reckon.
- Sweet Syrup Style: If you’re goin’ for dessert vibes, blanch ‘em in a light sugar-water syrup. Just mix some sugar into the water before boilin’. Gives a lil’ extra sweetness for pies or tarts.
- Canning Instead: Wanna store ‘em without a freezer? Blanch, then can your apples usin’ proper canning methods. It’s a whole other beast, but worth it if you’re into preservin’.
These ain’t must-dos, just fun ways to play around. Stick with the basic method if you’re new to this, and branch out once you’re comfy.
Common Hiccups and How to Fix ‘Em
Even with a solid plan, stuff can go sideways when you’re blanchin’ cooking apples. I’ve had my share of flubs, so here’s how to dodge ‘em or fix ‘em up:
- Apples Still Brownin’: If they’re still turnin’ after blanchin’, you mighta missed some spots with the lemon juice or didn’t submerge ‘em fully. Double-check next time, and make sure that ice bath is ready right away.
- Too Mushy: Overdid the blanchin’ time, huh? Cut it back by 30 seconds next round and test a piece. Better under than over.
- Freezer Clumps: Forgot to flash freeze and now they’re a solid brick? Thaw what you need and use it for somethin’ like applesauce where shape don’t matter.
Mistakes happen, y’all. Don’t sweat it—just tweak and try again. Cookin’ is all about learnin’ as you go.
Why Blanching Beats Other Methods
You might be thinkin’, “Why not just freeze ‘em raw or somethin’?” Fair question. I’ve tried other ways, and here’s why blanchin’ wins for me:
- Vs. Freezin’ Raw: Raw apples go brown and get weirdly grainy in the freezer. Blanchin’ stops that nonsense and keeps the quality up.
- Vs. Microwave Blanchin’: Some folks say you can “blanch” in the microwave, but I ain’t a fan. Results are spotty, and texture gets wonky. Stick to the stovetop method for surefire success.
- Vs. Just Cookin’ Right Away: If you ain’t got time to use all your apples now, blanchin’ lets you prep ahead without losin’ flavor or looks.
It’s a lil’ extra work upfront, but the payoff is huge when you’ve got perfect apples waitin’ for ya months later.
A Lil’ Personal Note on Apple Lovin’
I gotta confess, apples are kinda my jam. Growin’ up, my grandma used to drag me to the orchard every fall, and we’d come back with buckets of ‘em. I didn’t get the whole blanchin’ thing back then—thought it was just extra hassle. But after ruinin’ a batch of pie fillin’ with browned, mushy apples, I gave it a shot. Dang skippy, it changed everythin’! Now, I blanch a big haul every season and got apples ready for whatever crazy recipe I dream up. It’s like a lil’ hug from autumn whenever I pull ‘em out the freezer.
So, what’re you waitin’ for? Grab them apples, set up your pot, and get to blanchin’. You’ll thank me when you’re bitin’ into a perfect pie in the dead of winter. Drop a comment or shoot me a message if you try this out—I’m dyin’ to hear how it goes for ya. Let’s keep this kitchen party rollin’!
Peel, core, and cut
You don’t have to peel your apples. For instance, if you plan to use them in smoothies, leaving the peels on can add good fiber and nutrients and won’t affect the recipe since it’s getting pulverized. I like to peel mine so I have options. (And I add the scraps to my compost pile!)
You can cube up your apples or slice depending on how you think you’ll use them in the future. Cubes are great for smoothies, baking, and applesauce. Slices are good for pies and some other baked recipes. If you’re not sure what you’ll be using them for, I recommend freezing fresh apples in both cubes and slices.
Soak your sliced or cubed apples for five minutes in water with about two tablespoons of lemon juice. This step is optional but I find it helps prevent my apples from turning brown.
Arrange your apples on a parchment-lined baking sheet and freeze for at least four hours. Try to space out the apples so they’re not touching too much. This will prevent your apples from freezing in a large clump and allow you to portion out your apples for later use.
Important Prep Tip: Check to make sure your baking sheet will fit in your freezer beforehand! My freezer is laughably narrow, so I make this mistake often. It’s easier to shuffle around frozen meats and veggies in your freezer without juggling a baking sheet filled with apples.
Transfer to a freezer bag, label, and date
Freezing fresh apples will stay good up to a year, though I find the six-month mark is when the flavor starts to go and they start becoming more ice than apples. In most recipes, you won’t have to thaw your apples before cooking. Though, you may need to adjust your bake time.
How to Freeze Apples
FAQ
How to freeze cooking apples for later use?
… apples and eating apples using the same method: freeze them sliced or whole on a baking tray, then transfer them to freezer bags for long-term cold storage
How to store cooking apples for winter?
How to store apples short term. To store apples over winter, wrap each one in a single sheet of newspaper and place them in single layers on a tray. If you have the space and a large apple tree, you may want to invest in an apple rack.
Do you Blanch apples before cooking?
Blanching helps to preserve the color, texture, and flavor of the apples. Cool in Ice Water: After blanching, quickly transfer the apple slices to a bowl of ice water to halt the cooking process. This will help the apples retain their crispness and prevent them from becoming mushy.
How do you cool apples after blanching?
The ice bath is critical for rapidly cooling the apples after blanching, preventing them from overcooking. 3. Blanching the Apples: Gently add the apples to the boiling water. Ensure the water returns to a boil quickly. Blanch the apples for a brief period, typically 2-3 minutes.
How do you Blanch apples in a crock pot?
Bring water to a boil: Fill a large pot with water and bring it to a boil over high heat. Add apples and blanch: Once the water is boiling, carefully add the apple slices to the pot. Blanch the apples for the recommended time, which varies depending on the thickness of the slices.
How do you Blanch apples in a ice bath?
Boiling Water and Ice Bath: Prepare a large pot of boiling water. Simultaneously, prepare an ice bath by filling a large bowl with ice and water. The ice bath is critical for rapidly cooling the apples after blanching, preventing them from overcooking. 3. Blanching the Apples: Gently add the apples to the boiling water.
Can You Blanch apples in the microwave?
A: While it is possible to “blanch” apples in the microwave, it is not recommended. The results are often inconsistent, and the apples may not retain their desired texture. The traditional boiling water method is more reliable. Q: Do I need to add anything to the boiling water when blanching apples?
How do you keep apples from mushy After blanching?
Monitor the Time: Keep a close eye on the blanching time. Over-blanching will result in mushy apples. Use a Slotted Spoon: A slotted spoon is ideal for transferring the apples from the boiling water to the ice bath. Proper Storage: Blanched apples can be stored in the refrigerator for up to 3 days.