I used to be a total Apple Pie hater. It’s always too mushy and bland. But no longer! I’ve found the perfect method to make the Best Homemade Apple Pie of your life! This classic recipe has a double crust (you won’t miss that crumble), a cooked filling for the best texture and flavor, and is super easy. I’ll show you how to make it from scratch! Originally published on November 16, 2011. UPDATE! Don’t miss the Dutch Apple Pie version of this recipe!
How’s everyone’s October coming along? It’s finally cooling down here. We finished summer off strong just last week with a steak of 97 degree days, of course. Totally normal here in Sacramento, but it seems to surprise us every year anyway. “The Target dollar section is telling me that it’s fall! What even is this 100 degree day??”
My brother sent me this tweet yesterday that said, “Why would I spend $5 on a bag of apples at the store when I can wear warm fall clothes in 88 degrees weather and pay $36 for our family to pick them ourselves.” Ha! That one got me. (Because it’s not as Instagrammable to take your family photos in the produce section at the grocery store??)
We did indeed head up to Apple Hill a couple weeks ago. It’s a bunch of apple farms all next to each other, where you can pick your own apples and eat doughnuts and pretend it’s not hot. We always buy a ridiculous amount of apple cider so that we can boil it down to make these Caramel Apple Cider-Reduction Milkshakes. (We added a slice of today’s Apple Pie to the shake this time, too. HEAVEN.)
Hey there pie lovers! If you’ve ever bitten into an apple pie and thought, “Meh this ain’t it,” or worse, sliced into a soggy mess, then stick with me. I’m spillin’ all my hard-earned secrets on what’s the trick to a great apple pie. Trust me, I’ve botched enough pies to know what works and what don’t. At our lil’ kitchen table, we’ve turned apple pie into a legit art form, and I’m here to share the magic so you can whip up a pie that’ll have folks beggin’ for seconds.
Right off the bat, lemme lay down the big tricks to a killer apple pie
- Pick the right apples—mix tart and sweet for that perfect zing.
- Cook the filling first—no more watery disasters.
- Keep that crust flaky—cold butter and a chilly vibe are your BFFs.
- Add sneaky flavors—a lil’ somethin’ extra makes it pop.
- Patience, my friend—let it cool before you dive in.
Now, let’s get cozy and dig into each of these, plus a few more hacks I’ve picked up along the way Grab a coffee, ‘cause we’re gonna chat pie like it’s the only thing that matters.
Why Apple Pie Ain’t Just Dessert
Before we get to the nitty-gritty, lemme tell ya why I’m obsessed with nailing apple pie. It’s more than just a sweet treat; it’s like a warm hug from grandma, a slice of fall on a plate. But man, I’ve had my share of pie fails—think rubbery crusts and fillings that taste like cardboard. One Thanksgiving, I served a pie so mushy, my cousin straight-up asked if it was applesauce. Ouch. That lit a fire under me to figure this out, and now, I’m passin’ the torch to you.
A great apple pie comes down to balance—crisp crust, tender but not sloppy apples, and flavors that sing. It ain’t rocket science, but it does need some love and a few insider moves. Let’s break it down.
Trick #1: Choose Your Apples Like a Boss
First things first, the heart of your pie is the apples. You can’t just grab whatever’s on sale and call it a day. Nah, the trick is mixing different kinds to get a balance of tart and sweet. I usually go for a combo of super tart ones, some middle-of-the-road fellas, and a couple sweet ones. Think along the lines of a Granny who’s sharp and sassy, a Golden type that’s mellow, and a Gala that’s got a sugary vibe. This mix gives your pie depth—ain’t no one-note flavor here.
Here’s how I pick ‘em:
- Tart apples—these cut through the sugar and keep things lively.
- Sweet apples—they bring the cozy, dessert-y feel.
- In-betweeners—these tie it all together.
Oh, and steer clear of using just one type, especially the super mealy ones that turn to mush when baked. You know the kind—red and way too soft. Mix it up, and use a hefty amount, like around 5 pounds before you peel ‘em. Why so many? ‘Cause they shrink when cooked, and you want a tall, proud pie, not a sad, flat one.
Pro tip: Peel those bad boys. I know, it’s a pain, but leaving the skin on messes with the texture. I tried it once to “save time,” and it was like chewin’ on leather bits. Hard pass.
Trick #2: Cook That Filling Beforehand
Here’s a game-changer I wish I’d known years back—cook your apple filling before it even sees the pie crust. I used to just toss raw apples in with sugar and hope for the best, but that’s a recipe for a watery, undercooked mess. Pre-cooking is where it’s at, fam.
Here’s the deal:
- Slice up your apples thin, like 1/8 inch if you can. Thinner cooks faster.
- Toss ‘em in a big skillet with some sugar, a bit of brown sugar for that caramel vibe, and spices like cinnamon and nutmeg. No extra liquid—they’ll release plenty on their own.
- Cook on medium heat for about 20 minutes, stirrin’ every few minutes with a lid on to trap steam. You’ll get this gooey, caramel-ish sauce that’s pure gold.
- Cool it down after. I pop mine in the freezer for a quick chill, ‘cause hot filling in cold dough is a no-no.
Why bother? Cooking gets rid of excess water, so your pie ain’t a swamp. Plus, it locks in the texture—however “al dente” they are now is how they’ll stay after baking. If you like ‘em softer, cook longer; if you want a bite, cut it short. Total control, baby.
Trick #3: Flaky Crust or Bust
Now, let’s talk crust. A great apple pie needs a crust that’s buttery, flaky, and don’t fall apart. I’ve had crusts turn tough as cardboard, and it’s ‘cause I didn’t respect the golden rule: keep everything cold. I’m talkin’ cold butter, cold kitchen, cold vibes.
Here’s my go-to:
- Cold fats—use chilled butter straight from the fridge. When it melts in the oven, it creates lil’ pockets of steam for that flaky magic. Warm butter? You’re toast. It blends too much, and you get a dense mess.
- Chill twice—after mixin’ your dough, refrigerate it for a couple hours. Then, after rollin’ it out and shapin’ it in the pie dish, chill again for another hour. Cold dough in a hot oven equals puff perfection.
- Hands over tools—mix the dough with your fingers, not a machine. You feel when it’s just right, not overworked. Overworkin’ makes it tough, and nobody wants that.
Another sneaky move? Add a splash of somethin’ strong—like a cold shot of vodka—instead of all water to the dough. It slows down the gluten stuff, keepin’ the crust tender and easy to handle. Just don’t drink the rest while bakin’, ha!
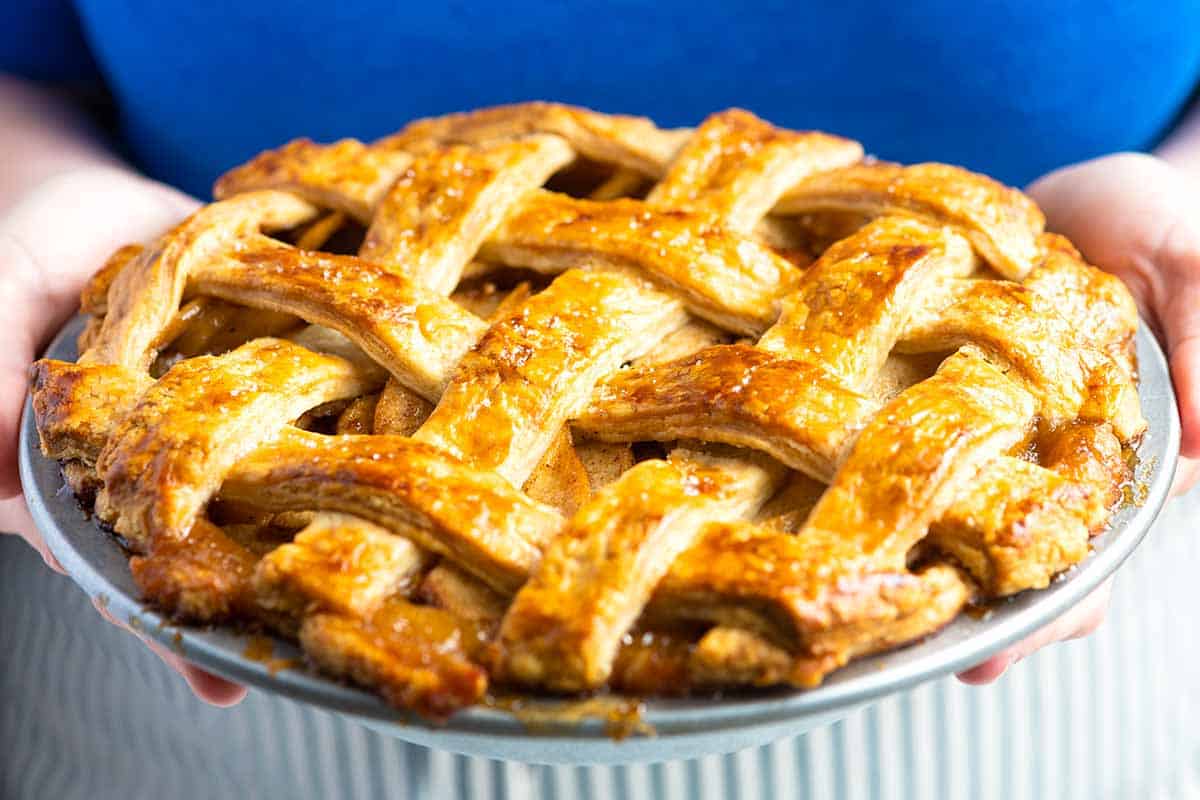
And for looks, try a lattice top. It’s not just pretty; it lets steam escape, keepin’ the crust crisp. I ain’t no artist, but cuttin’ even strips and weavin’ ‘em ain’t as hard as it looks. Makes ya feel like a pro.
Trick #4: Flavor Twists That Wow
Alright, your apples and crust are on point, but a great pie needs a lil’ personality. I’m not sayin’ go wild, but a couple extras can elevate your game. Here’s what I sneak in:
- Lemon zest and juice—just a bit brightens up the apples and keeps ‘em from browning while you prep. Lime works too for a funky twist.
- Spice it right—cinnamon is a must, but I also toss in nutmeg and a pinch of somethin’ unique like cardamom. It’s got this warm, fancy vibe that makes folks go, “What’s in this? It’s amazin’!”
- No butter in filling—I know, sounds weird, but butter can dull the apple flavor. Save it for the crust where it shines.
Oh, and use a thickener in the filling. A few tablespoons of flour or a sprinkle of cornstarch keeps it gooey, not runny. I forgot this once, and my pie was basically soup. Lesson learned.
Trick #5: Baking Like You Mean It
Bakin’ an apple pie ain’t just settin’ a timer and prayin’. There’s a rhythm to it. Here’s how I roll:
- Preheat proper—get that oven screamin’ hot, like 425°F, before droppin’ the pie in. Start high for 15 minutes to brown the edges, then lower to 350°F for another 40-45 minutes to cook through.
- Protect the edges—halfway through, cover the crust edges with a foil ring so they don’t burn. I make mine by foldin’ foil into a square, cuttin’ out the center, and crimpin’ it on. Easy peasy.
- Check doneness—look for golden edges and a slightly golden top. If you’ve got a lattice, the filling should be bubblin’ nice.
I also bake on a hot sheet or stone. It helps the bottom crust cook even, no soggy bottoms here. Nothin’ worse than a raw underbelly on your pie, trust me.
Trick #6: Cool It, Hotshot
I get it, the smell of fresh-baked apple pie is torture, and you wanna slice in ASAP. But hold up—lettin’ it rest is crucial. Cut too soon, and the filling spills everywhere like lava. I’ve ruined a good pie or two with impatience.
Give it at least 2-4 hours to cool on a rack. Room temp lets the juices set, so each slice holds together. If you’re in a rush, a quick stint in the freezer speeds things up, but don’t skip this step. It’s the difference between a pretty slice and a hot mess.
Bonus Tips to Seal the Deal
Alright, we’ve covered the biggies, but here’s a few more nuggets I’ve picked up from trial and error:
- Egg wash for shine—before bakin’, brush the top crust with a mix of milk and a beaten egg. It gives a golden, glossy finish that looks straight outta a bakery.
- Sugar sprinkle—a lil’ raw sugar on top adds crunch and sparkle. Regular sugar works too if that’s what ya got.
- Don’t store too soon—you don’t gotta fridge it right away. The sugar keeps it safe on the counter for a couple days, covered up. After that, pop it in the fridge, but warm a slice before eatin’ ‘cause cold crust ain’t the same.
And hey, if you’re makin’ ahead, you can freeze the whole unbaked pie or just the filling. For the pie, assemble it, skip the egg wash, and freeze wrapped tight. Bake straight from frozen, addin’ 20 minutes to the time. For filling, cool it, bag it, and freeze in the shape of your pie dish. Future you will thank ya.
My Pie Flop That Turned Into a Win
Lemme share a quick story. Few years back, I was all set to impress at a family reunion with my “perfect” apple pie. I skipped pre-cookin’ the apples ‘cause I was lazy, didn’t chill the dough long enough, and cut into it hot. Disaster. The filling was a puddle, crust soggy as heck. My aunt still teases me ‘bout it. But I learned, y’all. Next time, I followed every trick—cooked the apples, chilled everything, waited to slice. That pie? Gone in minutes. Redemption tastes sweet.
Pairin’ Your Pie for Max Vibes
Now, a great apple pie don’t need much, but I gotta say, servin’ it with a scoop of vanilla ice cream is non-negotiable at my house. The cold creaminess with warm pie? Heaven. Or drizzle some caramel sauce if you’re feelin’ fancy. It’s like givin’ your pie a lil’ black-tie outfit.
Common Pie Pitfalls and How to Dodge ‘Em
I’ve seen a lotta pie struggles, so here’s a quick cheat sheet to avoid ‘em:
- Soggy bottom crust—always preheat the oven fully, use a hot bakin’ sheet, and keep dough cold when it goes in.
- Runny filling—pre-cook apples to lose water, and don’t skip a thickener like flour or cornstarch.
- Tough crust—don’t overmix the dough, and keep fats cold. Hands over machines, remember?
- Burnt edges—foil shield halfway through bakin’ saves the day.
Mixin’ It Up for Dietary Needs
Got folks with dietary quirks? You can still make a bangin’ pie. Swap butter for a cold veggie shorten’ if they’re off dairy. Gluten-free? There’s flours for that now; just follow a trusted mix. The tricks still apply—cold, chill, cook first. Taste don’t gotta suffer.
Why Homemade Beats Store-Bought Every Time
I ain’t knockin’ a quick store pie in a pinch, but homemade got soul. You control the apples, the sweetness, the crust. Plus, the smell of it bakin’? That’s therapy right there. When I bake a pie, it’s like I’m tellin’ my peeps I care enough to spend hours on ‘em. Can’t buy that feelin’.
Tools That Make Life Easier
You don’t need a fancy kitchen, but a few gadgets help:
- Good peeler—saves time on apple prep.
- Big skillet—for pre-cookin’ that huge pile of apples.
- Rollin’ pin—even pressure for even crust.
- Pie dish—deep 9-inch is my jam for a tall pie.
Ain’t gotta break the bank, just use what feels right in your hands.
Final Thoughts on Pie Perfection
So, what’s the trick to a great apple pie? It’s a buncha lil’ things done with heart—pickin’ the right apples, cookin’ ‘em first, keepin’ that crust cold and flaky, sneakin’ in bold flavors, and givin’ it time to set. I’ve burned, sogged, and mushed my way to learnin’ this, and now you got the shortcut. Next time you’re hankerin’ to bake, roll up your sleeves and try these moves. I betcha your pie will be the talk of the table.
Got a pie story or a trick I didn’t mention? Drop it in the comments—I’m all ears. And hey, if this helped ya out, share it with your bakin’ buddies. Let’s spread the pie love, y’all!
Best Apple Pie ingredients
See recipe card below for all the details!
- 1 homemade double pie crust
- Lemon zest
- Juice from half a lemon
- 5 pounds apples (see above to pick a good variety)
- Brown sugar
- Granulated sugar
- All purpose flour
- Cinnamon
- Nutmeg
- Cardamom (optional)
- Vanilla
- Milk (for brushing on pie)
- Egg (optional, for brushing on pie)
- Raw sugar
- Kosher salt
How to tell when your Homemade Apple Pie is done
The nice thing about this recipe is that your apples are already cooked exactly how you want them, so you only need to worry about getting the crust baked right. (If you used raw apples, you would have to be sticking a fork in your pie to make sure they were tender.)
The pie is done when the edges of the crust are a deep golden brown, and the top of the pie is just turning golden. Be sure to use a pie shield made of tin foil as discussed above to get even browning.
And voila! A beautiful apple pie for fall! Here is the hard part: don’t slice into your pie for 2-4 hours. I know, I know, it’s tough. But the liquid in your pie needs time to come to room temperature so it doesn’t completely fall apart when you cut into it. You can put it in the freezer to speed up the cooling process if you want.
The Only APPLE PIE Recipe You’ll Need
FAQ
What is the secret to a good apple pie?
- Keep Your Ingredients Cold.
- Stick With an All-Butter Crust.
- Make a Butter-Flour Paste.
- Use Vodka (or Don’t)
- Fold in Liquid With a Spatula.
- Choose Tart Apples.
- Go Easy on the Seasoning.
- Par-Cook Your Apples.
What are the 5 tips for pie perfection?
- Measure By Weight, Not Volume.
- Don’t Overwork Your Pie Dough.
- Keep The Dough Cool.
- Pretreat The Filling (And The Crust)
- Be Patient Before Serving.
What is the 1 ingredient upgrade for the best apple pie according to a blue ribbon pie champ?
Beyond making your own crust and using great apples, one of Sharon’s tips stuck out to me: put a little sour cream in the apple pie filling. It makes a noticeable difference, adding delightful flavor and texture to the finished pie.
What is the secret ingredient in apple pie?
And the secret is…? Boiled cider, which gives this pie over-the-top flavor. In addition, an extra-long 2-hour bake yields a rich gold, nearly caramelized filling, and spectacular crust, both top and bottom.