Hey there, folks! Ever thought about makin’ your own apple cider vinegar right in your kitchen? I sure didn’t until a couple years back when my neighbor dumped a whole bag of bruised apples on me after a backyard harvest. “Figure somethin’ out,” she said. Well, I did—and let me tell ya, whipping up apple cider vinegar with the mother is one of the coolest (and easiest) things I’ve ever done. No store-bought stuff can match the tangy kick of homemade, plus you get that funky “mother” full of good-for-you bacteria. Today I’m gonna walk you through the whole deal—step by step, no fluff—so you can brew your own batch and feel like a kitchen wizard.
What’s Apple Cider Vinegar with Mother Anyway?
Before we get our hands dirty, let’s break it down real simple. Apple cider vinegar (or ACV as I call it) is basically fermented apple juice that’s turned sour and acidic. The “mother” is this weird, cloudy, gelatinous blob that forms during the process. It’s a colony of beneficial bacteria and yeast—kinda like the soul of your vinegar. That mother is what makes homemade ACV so special; it’s packed with probiotics and enzymes you won’t find in the filtered, pasteurized junk from the supermarket.
Why bother making it at home? Well, for one, it’s dirt cheap if you’ve got apples or scraps lyin’ around Two, you control what goes in—no weird additives. And three, it’s just plain satisfyin’ to watch nature do its thing Plus, that raw, unfiltered ACV with mother is a powerhouse for health—some folks swear by it for digestion, skin care, and even as a cleaning hack. So, let’s roll up our sleeves and get fermentin’!
What You’ll Need to Get Started
Alright, let’s gather our gear. You don’t need much, and most of this stuff is probably sittin’ in your kitchen already. I’ll list out the basics, then tweak it depending on which method you pick (more on that in a sec).
- Apples or Apple Scraps: Bruised apples, peels, cores—whatever you’ve got. Organic is best if you can swing it, ‘cause pesticides ain’t friendly to fermentation.
- Water: Filtered or non-chlorinated. Tap water can mess with the bacteria, so boil it first if you’re unsure.
- Sugar: Just a lil’ bit to feed the yeast. Regular cane sugar works fine.
- Glass Jar: Big, wide-mouthed one. A gallon jar is perfect. Don’t use plastic—trust me, it can leach nasty stuff into your brew.
- Breathable Cover: Think coffee filter, muslin, or tight-weave cheesecloth. You wanna let air in but keep bugs out.
- Rubber Band: To secure that cover tight.
- Wooden Spoon: For stirrin’. Metal can mess with the process, so stick to wood.
- Optional: pH Strips: If you wanna get fancy and test acidity, but honestly, your taste buds work just fine.
Got all that? Sweet. Now, there’s a few ways to make ACV with mother, dependin’ on what you’ve got on hand. I’ve tried ‘em all, and I’m gonna lay out three solid methods so you can pick what fits your vibe.
Method 1: Apple Scraps – The Frugal Way
This is my go-to, ‘cause I hate wastin’ food. If you’ve been peelin’ apples for pie or just got some sad-lookin’ ones, this method turns trash into treasure. Here’s how we do it
Ingredients (for about a gallon jar)
| Item | Amount | Notes |
|---|---|---|
| Apple Scraps | Enough to fill 3/4 of jar | Cores, peels, bruised bits. Organic if possible. |
| Filtered Water | Enough to cover scraps | Leave 1 inch headspace. |
| Sugar | 1-2 tablespoons | Helps kickstart fermentation. |
Steps to Brew
- Prep Your Scraps: Chop up them apple bits if they’re big. Toss ‘em into your glass jar ‘til it’s about three-quarters full. Don’t pack it too tight—leave room for liquid.
- Mix Sugar Water: Dissolve that sugar in a bit of warm water (not hot, just warmish). Pour it over the scraps, then fill the jar with more filtered water ‘til the apples are covered. Leave an inch or so at the top for bubblin’.
- Cover It Up: Slap on your breathable cover—a coffee filter works like a charm—and secure it with a rubber band. This lets air in for the fermentation magic but keeps pesky fruit flies out.
- First Ferment – Apple Cider Stage: Stash the jar in a cool, dark spot. Aim for 65-80°F (18-27°C). Too hot or cold, and things get wonky. Let it sit for 2-3 weeks. Stir it every couple days with that wooden spoon to stop mold from creepin’ in. You’ll see bubbles and maybe a foamy top—that’s the yeast turnin’ sugar into alcohol. Smells boozy? You’re on track.
- Second Ferment – Vinegar Time: After 2-3 weeks, strain out the apple solids using a cloth or fine sieve into a clean glass jar. If you’ve got a mother from a previous batch, add it now to speed things up. If not, no worries—it’ll form on its own. Cover it again with the breathable lid and put it back in that dark spot for 4-6 more weeks. Check it now and then; you’ll see a cloudy layer or blob formin’—that’s your mother!
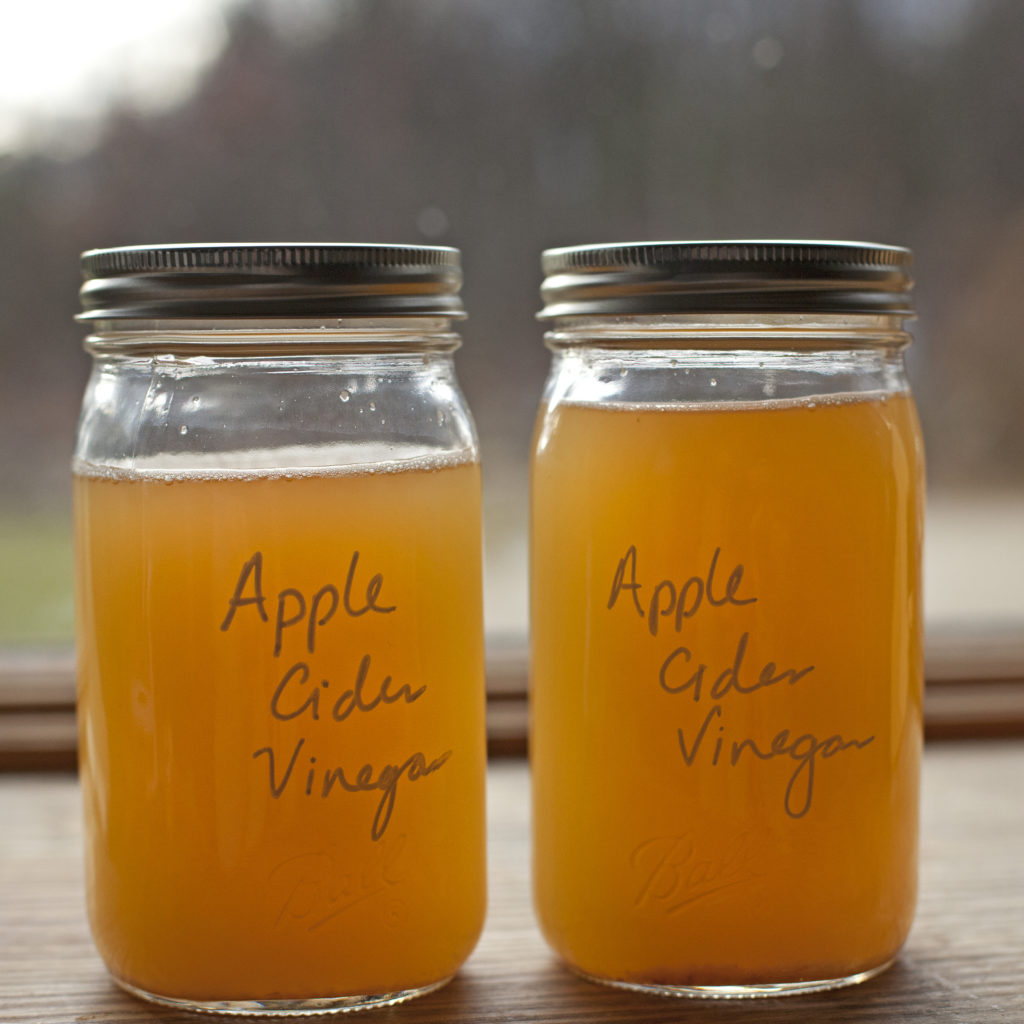
- Taste and Test: Around 6-8 weeks total, start tastin’. It should be sharp and tangy, not sweet. If you’ve got pH strips, aim for 2-3. Too sweet? Let it sit longer. Once it’s right, strain it again if you want it clearer, then bottle it in sterilized glass bottles.
- Store It: Keep it in a cool, dark place. The mother might keep growin’ in the bottle, and that’s totally fine. Shake it up before usin’ if you want them good bacteria in every sip.
Method 2: Apple Juice – The Quick ‘n’ Easy Fix
If you ain’t got scraps but got some apple juice in the pantry, this is for you. It’s faster to set up, though the wait time is still about the same. I tried this when I was lazy, and it worked a treat.
Ingredients (for a quart jar)
| Item | Amount | Notes |
|---|---|---|
| Apple Juice | 4 cups | 100% juice, no preservatives. Raw or pasteurized is okay. |
| ACV Starter (with Mother) | 1/4 to 1/3 cup | From a previous batch or store-bought with mother. |
Steps to Brew
- Pour the Juice: Grab a clean glass jar and pour in room-temp apple juice. Cold juice can slow things down or risk mold, so let it warm up first if it’s been in the fridge.
- Add Starter: Mix in that ACV starter with the mother. If your starter is homemade and mild, use a bit more (like 1/3 cup). This drops the pH quick to keep mold at bay.
- Cover and Wait: Pop on a tight-weave breathable cover (coffee filter, rubber band—y’know the drill). Stick it in a dark spot outta sunlight for about 30 days.
- Check Progress: After a week or two, it’ll get murky. A new mother might form on top—sweet! Taste it at 30 days. Still sweet? Give it a few more days. Once it’s tangy, bottle it up in glass.
- Store: Same deal—cool, dark place. Use it or keep the mother growin’ for your next batch.
Method 3: Whole Apples – The Fancy Route
Got some fresh apples and wanna go full-on homestead? This method uses whole fruit or chunks, plus a lil’ sugar water. It’s more work, but the flavor can be richer. Here’s how I did it once for kicks.
Ingredients (for a quart jar)
| Item | Amount | Notes |
|---|---|---|
| Small Apples | 2-3 | Skins and cores okay, remove seeds. |
| Filtered Water | 4 cups | Non-chlorinated. |
| Sugar | 1/4 cup | Pure cane sugar. |
| ACV Starter (with Mother) | 1/4 to 1/3 cup | Optional but speeds things up. |
Steps to Brew
- Sugar Water Base: Heat up 1 cup of water (not boilin’, just warm) in your glass jar and dissolve the sugar. Let it cool to room temp, then add the other 3 cups of water.
- Prep Apples: Chop up them apples, ditch the seeds (they can make it bitter), and toss ‘em into the sugar water.
- Add Starter: Pour in your ACV starter if you’ve got it. Stir gently.
- Cover It: Secure a breathable cover with a rubber band. You know by now—air in, bugs out.
- Ferment: Hide it in a dark, cool spot (65-80°F) for about 30 days. Check after a week or two for murkiness or a new mother formin’. Taste at 30 days—tangy means ready, sweet means wait.
- Bottle Up: Strain if you want, then pour into glass bottles. Store in a cool spot.
Tips to Nail Your Ferment (And Avoid Disaster)
Alright, makin’ ACV with mother ain’t rocket science, but it can go sideways if you’re not careful. I’ve had a batch or two turn into a moldy mess, so lemme save you the headache with some hard-earned wisdom.
- Temp Matters: Keep it between 65-80°F (18-27°C). Too cold, and it stalls. Too hot, and you might kill the good bacteria. I keep mine in a cupboard away from the stove.
- No Plastic, Ever: Stick to glass jars. Plastic can react with the acid and leach weird chemicals. Learned that the hard way when a cheap container warped on me.
- Fruit Fly Defense: Them lil’ buggers love fermentin’ stuff. Use a tight cover, and if they’re still buzzin’ around, smear a tiny bit of Vaseline on the jar rim. Works like a trap.
- Mold Watch: If you see fuzzy green or black spots, that’s mold, not mother. The mother looks slimy or cloudy, not hairy. Mold means toss it and start over—don’t risk it.
- Stir Early On: In the first ferment (especially with scraps), give it a gentle stir every few days to keep things movin’ and stop mold from settlin’.
- Patience, My Friend: Don’t rush it. If it’s still sweet after the recommended time, just wait longer. Rushing can leave you with weak vinegar.
- Starter Strength: If usin’ homemade ACV as a starter for a new batch, use a tad more than the recipe says ‘cause it’s often less potent than store-bought.
What If Things Go Wrong?
Even with all the care, stuff happens. Here’s how to troubleshoot some common hiccups I’ve run into.
- It’s Not Gettin’ Sour: Might need more time. Make sure it’s in a warm-enough spot. If you’ve got an old mother or starter, add a spoonful to kickstart it.
- Smells Rotten, Not Tangy: If it’s a rancid or putrid stink, somethin’s off. Could be contamination. Dump it and sanitize everything before tryin’ again.
- Mother Sank—Is That Bad?: Nah, it’s fine. The mother can float, sink, or just chill in the middle. Doesn’t change the quality one bit.
- Too Much Sediment: That’s just the mother growin’. If you don’t like the look, strain it before bottlin’. I leave mine in for the health perks.
Why the Mother Is Your BFF
That funky blob ain’t just for show. The mother is what sets your homemade ACV apart from the clear, lifeless stuff at the store. It’s full of good bacteria—think of it like the probiotics in yogurt, but for vinegar. Some folks even eat bits of it straight (I ain’t that brave, but you do you). Plus, you can reuse the mother for batch after batch. Just scoop some out with a bit of vinegar and toss it into your next jar. It’s like a pet that keeps givin’ back.
Ways to Use Your Homemade ACV
Now that you’ve got this golden elixir, what the heck do you do with it? Oh, man, the options are endless. Here’s a few ideas me and my crew swear by:
- In the Kitchen: Drizzle it on salads as a dressing—mix with olive oil and a pinch of salt. Use it in marinades for chicken or pork; it tenderizes like nobody’s business.
- Health Shot: Mix a tablespoon with water and a dab of honey for a mornin’ gut boost. Tastes like fire, but some swear it keeps ‘em regular.
- Cleanin’ Hack: Dilute with water in a spray bottle for a natural cleaner. It cuts grease and smells fresh (kinda). I use it on countertops all the time.
- Hair Rinse: Weird, right? But a splash in water after shampoo leaves your hair shiny. Don’t overdo it, though, or you’ll smell like a pickle.
- Skin Toner: Dab a diluted mix on your face with a cotton ball. It’s supposed to balance skin pH, but test a small spot first—I got a lil’ rash once from goin’ too strong.
Let’s Get Brewin’ Together!
Makin’ apple cider vinegar with the mother is one of them projects that feels like magic, but it’s dead simple once you get the hang of it. Whether you’re usin’ up scraps, pourin’ in juice, or choppin’ fresh apples, you’re tappin’ into a process as old as time. Sure, it takes patience—anywhere from a month to two—but the payoff is worth it. You end up with a tangy, powerful brew that’s all yours, plus a lil’ mother to keep the cycle goin’.
I’m stoked to hear how your batch turns out. Got questions or a funny fail to share? Drop a comment below—I’m all ears. And if you’re nervous, don’t be. Worst case, you toss a bad batch and try again. Best case, you’ve got a pantry staple that’ll impress the heck outta your friends. So, grab them apples (or scraps) and let’s ferment somethin’ awesome. Cheers to DIY, y’all!

Homemade ACV With “The Mother”
There is no denying the laundry list of health benefits to raw, unfiltered, apple cider vinegar. Whether it be used for cosmetic or internal purposes, a simple google search will yield millions of reasons why you should add it to your diet or beauty regimen. I personally have used it for years on my hair and face, as well as a substitute (in most cases) for plain white vinegar in recipes. The stuff is just plain ole’ good, and good for you. I always bought Bragg’s with “the mother”, because if you’re going to buy it, in my opinion it really is the best. But a couple years ago during apple season I thought shoot I can just make it myself no problem! So, I did! And it really is as easy as I detail below. All it takes is some patience and you can have homemade, raw, unfiltered, apple cider vinegar with that wonderful “mother” at your fingertips! Give it a try and see for yourself.
If you’re relatively new to the ACV world and aren’t familiar with “the mother” let me enlighten you. The mother is what makes ACV so awesome, and houses all of the nutrition and benefits. Without it, well, you would have filtered apple cider vinegar and I can’t imagine such a world. It’s the cream to milk, the fat to a ribeye, the whey to yogurt! Without it, ACV would lose what makes it so incredible. It is that floaty, chunky, wonderful goodness that settles at the bottom of a jar and is a byproduct of the fermentation process.
The process of making ACV is just simple fermentation. All you need is some apple cores/peels/whatever apple scraps you have, some water, raw sugar, a jar, and time:
- Collect any peels, cores, or other apple scraps you have collected. Place in a sterilized mason jar (of any size depending on how many scraps you have) and fill the jar 3/4 full with scraps
- Make a simple syrup with a ratio of 2 tsp raw sugar dissolved in 1 cup of water. So if you are making your ACV in a quart jar which is four cups, I figure a 3 cup simple syrup solution is needed. Pour your simple syrup solution over the apples leaving a few inches headspace, pushing down and around the inside of the jar with a knife to remove any air bubbles. If needed add more simple syrup so the apples are completely submerged. This is key! The apples have to be submerged at all times, otherwise this can promote mold growth which would require you to pitch the entire contents of the jar.
- The keep the apple scraps submerged you can buy fancy fermentation lids that hold contents down with a valve on top that allows fermentation to happen. I don’t have those and really don’t see the need. So, I put a bunch of pie weights in saran wrap and twist it up nice and tight and place it in the jar on top of the scraps. Give it a firm push down, and this will weigh down the scraps keeping them below the simple syrup level.
- Place a breathable top (I.e paper towel, coffee filter, cheesecloth) over the top of the jar and secure it with a rubber band or jar ring. I personally double layer, because as fermentation happens you will bring fruit flies out of the woodwork. A double layer will prevent them from getting into the jar.
So now that your jar is assembled, you want to put it in a relatively warm and dark place (I used my kitchen pantry on a high shelf) and pseudo forget about it! The first few days check on it, as you want to make sure that the apples are staying submerged in the liquid. If not, add more weight. This is the key part that can cause this to take a hard turn towards the trash. If you see bubbling and a scum forming at the top – wonderful! That’s fermentation and mother forming friend.
Let that baby sit for 3-4 weeks in that same relatively warm and dark place then remove the apple scraps. It should have a sweet smell at this point. I poured the contents of my jar out into a colander over a bowl, then added the strained liquid back into the same jar. Replace with the same breathable covered top and put back into the same relatively warm and dark place. Then forget it about it even longer! Let it sit for a month or so, go over and take a whiff through your breathable top. Does it smell vinegary? If it does, good for you, you have a warmer house than me and it fermented a little quicker. Does it still smell a tad sweet? Then let it sit another week or so and check on it again. Once it has that distinct vinegar smell, take a spoonful of that bad boy and give er’ a taste. You’ll know if it’s vinegar or not! Once you have achieved the vinegar state, recover with a sealed lid and put it in your pantry and enjoy!
When making your first batch of ACV, you are also “creating” the mother. Because of this, you want to use raw sugar, and you also will likely not get a large amount of mother in your first batch. However, when you make your second batch, you should reserve some of your ACV from the first batch to add to the second replacing some of the simple syrup to kickstart the fermentation process and make a stronger mother culture. You could also use some store-bought (raw, unfiltered, with mother) such as Bragg’s in your first batch to make that first mother strong as well. Either way, as long as your keep your apple scraps submerged, and your jar in a relatively warm and dark place, fermentation and the mother will happen and you will create some delicious and good for you homemade raw, unfiltered, apple cider vinegar!
Easy Homemade Apple Cider Vinegar with the Mother – Healthy DIY
FAQ
How do you get the mother in apple cider vinegar?
To make an Apple Cider Vinegar (ACV) mother, you can start from scratch using apple scraps, sugar, and water or use an existing store-bought mother. For a DIY mother, submerge apple scraps (peels and cores) in a jar, cover them with a sugar-water solution, add a cheesecloth or coffee filter, and let it ferment at room temperature. After 2-4 weeks of fermentation, strain the liquid and let the new, cloudy liquid sit for another month or two; this liquid will contain your new mother, which is a gelatinous, SCOBY-like film.
What does apple cider vinegar with the mother do to you?
Apple cider vinegar with ‘the mother’
Some people give the mother credit for ACV’s health benefits. And it’s thought to contain small amounts of probiotics (healthy bacteria) that are good for gut health. But research hasn’t shown that the mother offers any particular health benefit.
What is the difference between apple cider vinegar and apple cider vinegar with mother?
The difference is the presence of the mother, a cloudy, stringy substance in the “with mother” version, which consists of yeast and acetic acid bacteria formed during fermentation. Regular apple cider vinegar (ACV) has been filtered to remove the mother, resulting in a clear product. ACV with the mother is considered more natural and may offer enhanced health benefits due to the probiotics, enzymes, and prebiotics it contains.
How do you take apple cider vinegar with your mother?
The most common is as a daily drink. Many people take a couple of teaspoons of Apple Cider Vinegar with Mother, mixed with around 8 oz of water. It’s worth diluting it because Apple Cider Vinegar with Mother neat can be harsh on your throat and damaging to your teeth.
Does apple cider vinegar have a mother?
There are plenty of brands of apple cider vinegar that contain a mother. However, not all store-bought cider vinegar is cultured. Less expensive brands are colored and flavored like ACV, but they’re not actually cultured apple cider vinegar. How do you know which brands are cultured?
How do you make apple cider vinegar?
S crap apple vinegar is made using the cores and peels of apple juice, mixed with raw sugar to feed the ferment. It’s not as acidic or flavorful as ACV. But it is a good way to use up apple scraps! (I always make a few batches during apple season). The EASIEST way to make apple cider vinegar is to inoculate juice with a vinegar mother.
Why should you make homemade apple cider vinegar?
However, if you’re health conscious and want to buy the premium kind, like the raw, organic, version that comes with the mother, it can start to cost you some serious bucks. So an obvious reason for making homemade apple cider vinegar is to save some money!
Why is apple cider vinegar called the mother of vinegar?
This gelatinous substance, comprised of bacteria and yeast, is what gives apple cider vinegar its distinctive appearance and unique properties. It’s often referred to as the “heart” of the vinegar, as it’s responsible for fermenting the liquid and giving it its characteristic taste and smell. But why is the mother of vinegar so important?
How do you know if apple cider vinegar has a mother?
Cultured apple cider vinegar will have dark floating bits that settle on the bottom of the bottle. This is the mother. Look for brands that are labeled raw, unpasteurized, or with mother. A few of the brands that I have successfully used are Viva Naturals, Bragg, and Dynamic Health. What if my vinegar made a rubbery disk?
Can I add vinegar if I have a mother?
If you have a mother, or starter vinegar, you can add it now, but it is not necessary. Replace the cloth and let it acidify for another 4 weeks. Taste your vinegar. It should have a pleasant vinegar smell and taste acidic. If you’re happy with it, bottle it and place a tight cap on the bottle.