Step 1: Remove the Cover Below the Handle


This cover is the most difficult item to remove and replace. Youll see why as we go thru this repair. First, with the handle fully-open, use your sharp pointed object to carefully pull the small plastic covers out. They slide out quite easily but its difficult to get them started, hence the need for a very fine point. On reflection, a plastic thumb-tack would probably work better than a knife. If you do use a knife, however, please be careful! Holding the blade wrapped in a dish towel would help prevent injury, as well as keeping the spare hand on top of the machine, away from the knife.
Once you have the plugs out, note they are angled – the tall end goes up when you reinstall them.
Remembering that there are sharp blades below this cover (i.e. dont stick your fingers down there!), remove the two screws, being careful not to lose them, then tilt the cover backwards slightly, and it will pull up. Do not force it, once you have it tilted back, it will slide off quite easily. Getting it back on is a challenge, but well get to that later.
Step 2: The Offending Item


With the cover removed, the part that is causing your problem is visible. The clear hose on the left is the supply from the water heater, and feeds into the coffee pack through a rubber hose. If you look down behind that round plate, you will see the blade that feeds the water into the pack. There is another blade below this, for the water exiting the pack – you can see part of the drain system below the inlet hose in the first picture.
Break a toothpick in half, and use the sharp end to poke into the three holes in the upper blade. Again, be VERY careful working in there. You will probably feel the obstruction – dried coffee grounds – break free as you wiggle it around. Now close up the machine, plug it in, replace the water reservoir, and run just plain water into a glass, measuring cup, or light-colored cup. The machine should function normally, and you should see the debris that you removed flushed out into the container. If so, youre good to go – proceed to step () to replace the cover.
If, however, the machine still can not pump water, then you will need to either repeat the procedure, or remove the blade for cleaning.
How to Unclog a Keurig Vue without taking it apart.
FAQ
How do I clean my Keurig Vue with vinegar?
How do you disassemble a Keurig?
Before disassembly, ensure your Keurig is unplugged and has had time to cool down. This will prevent any potential electrical hazards or burns. The first component to remove is the water reservoir. Lift the lid and gently lift the reservoir out of its housing. Next, remove the K-cup holder assembly by pulling it upwards.
Do you need to take apart a Keurig?
How to take apart a Keurig. If you’re experiencing issues with your Keurig machine, whether it’s not brewing correctly, leaking water, or any other problems, you may need to take it apart. Disassembling your Keurig can sound daunting, but with our handy guide, you’ll learn how to take apart a Keurig quickly.
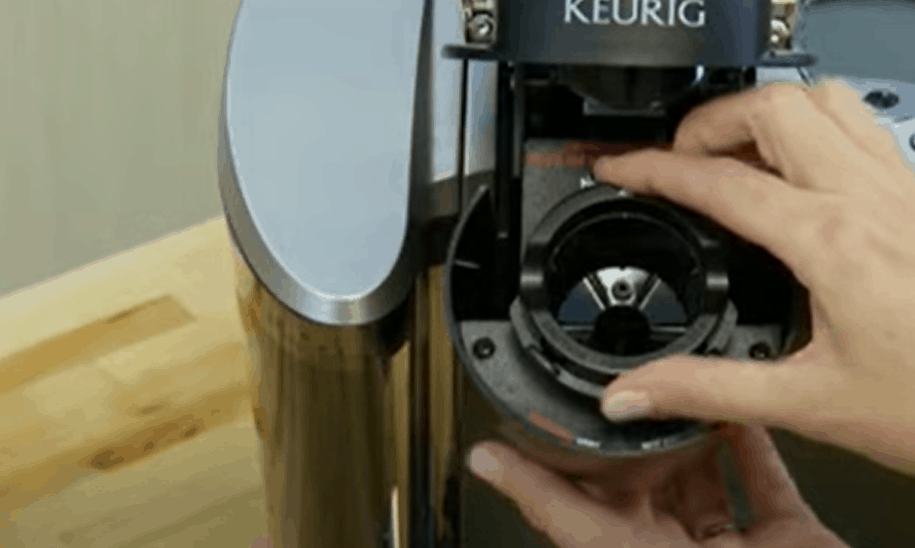
How do you remove a K-Cup from a Keurig?
If you open the top up as if you were going to insert a k-cup you will find some more screws that need to be removed. There are two on either side of the needle and one on each side of the handle. By removing these screws you will be able to take the handle off your Keurig relatively easily.
How do you remove a Keurig handle?
By removing these screws you will be able to take the handle off your Keurig relatively easily. Once you get the proper screws removed you can then gently lift the handle and lid directly off the top of the unit. You may need to slightly close the lid to lift of off both pieces at the same time.