Whether you’re making a classic cheesecake, or a flavorful variation like lemon cheesecake, amaretto cheesecake, or pecan pie cheesecake, it’s helpful to know the what, why, and how of baking a cheesecake in a water bath. For picture-perfect, tall, and smooth cheesecake, you don’t want to skip this imperative step. Use my video tutorial as a guide.
Why Should I Bake Cheesecake in a Water Bath?
We’re essentially adding steam to the baking and cooling steps. Why do we do this? Is it because this is a high-maintenance dessert that demands a spa treatment? Well, actually, sort of!
Cheesecake loves a humid environment, and we want to give it the best chance of baking up smooth, creamy, tall, and crack-free. Here’s why:
- Cheesecakes Are Egg-Heavy: Eggs need a moist and humid environment to properly rise and avoid drying out or burning.
- Prevent Cracks in the Surface: The steam from the hot water will lift the cheesecake up slowly and evenly, reducing the risk of cracks on the surface. You can read more about this in this post on How to Prevent Cracks in Cheesecake.
- Prevent Sinking: Starting the cooling process in the oven, still in the water bath, makes for a slow and even cool-down, which helps prevent the cheesecake from sinking back down as it cools. Cheesecakes are not fans of sudden temperature changes. (Chocolate soufflé is… they like to sink!)
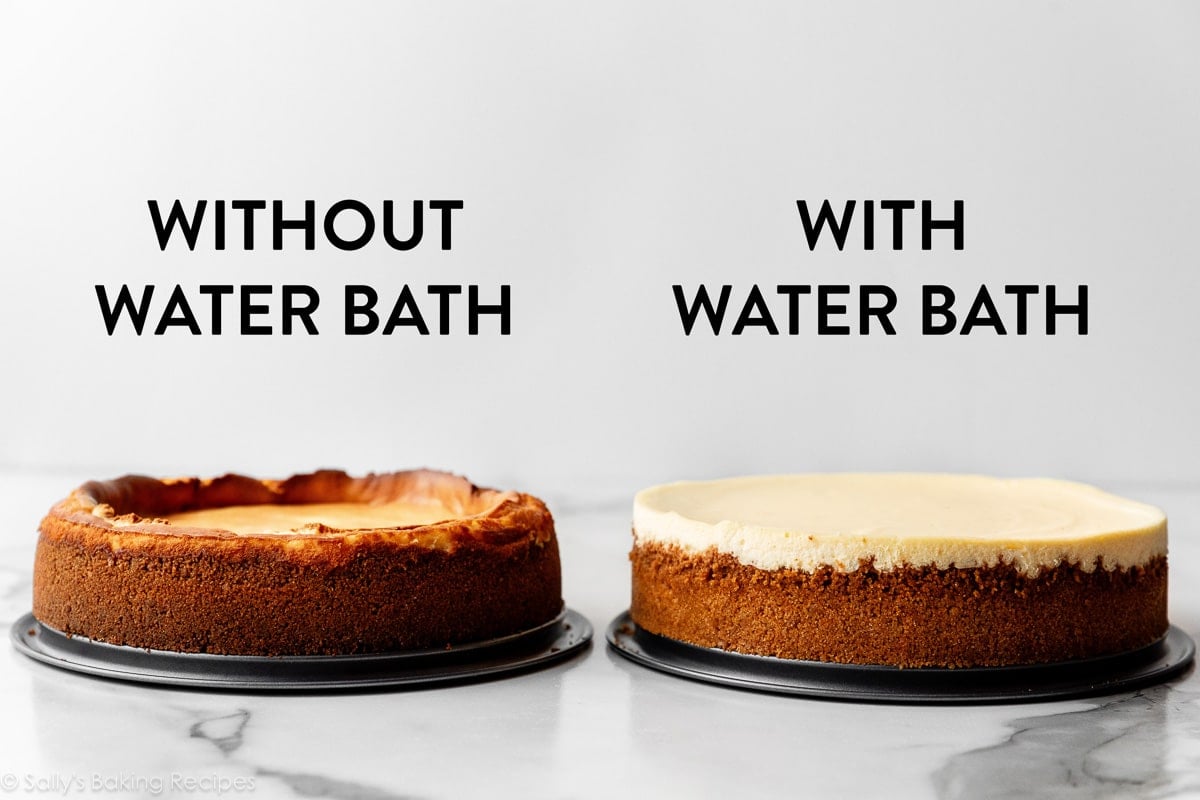
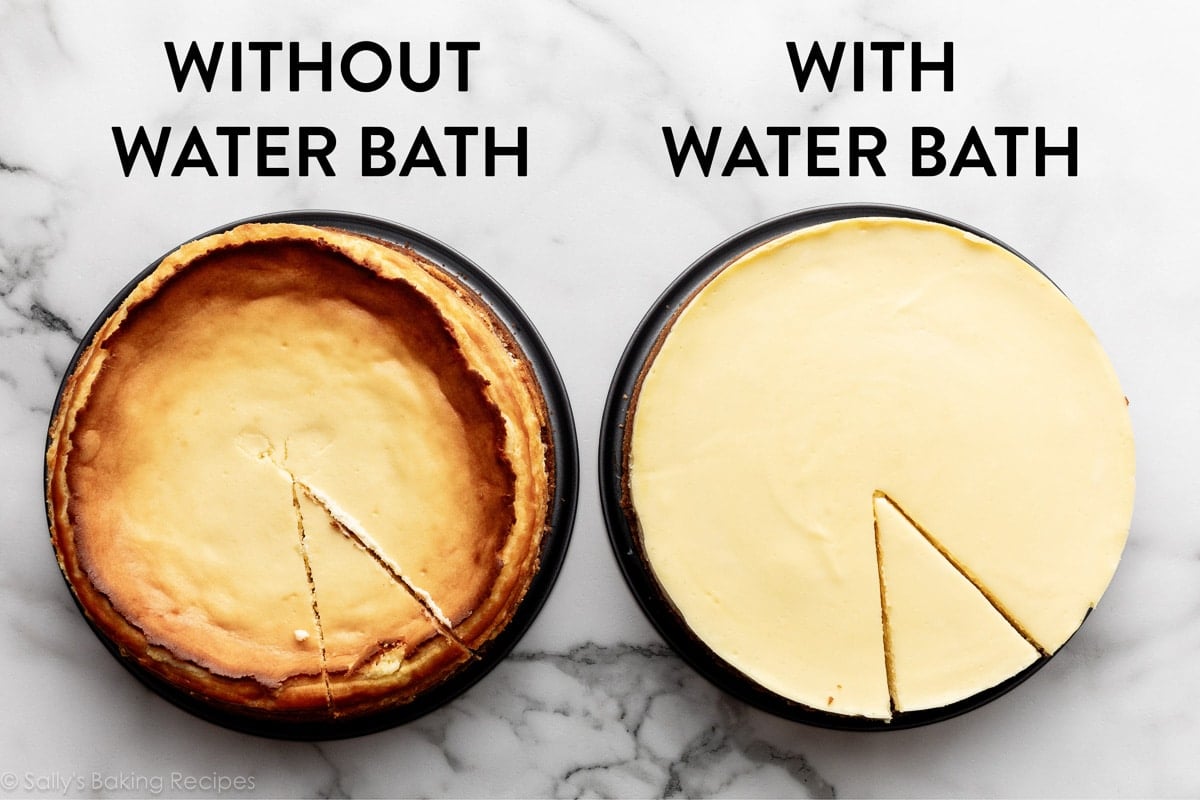
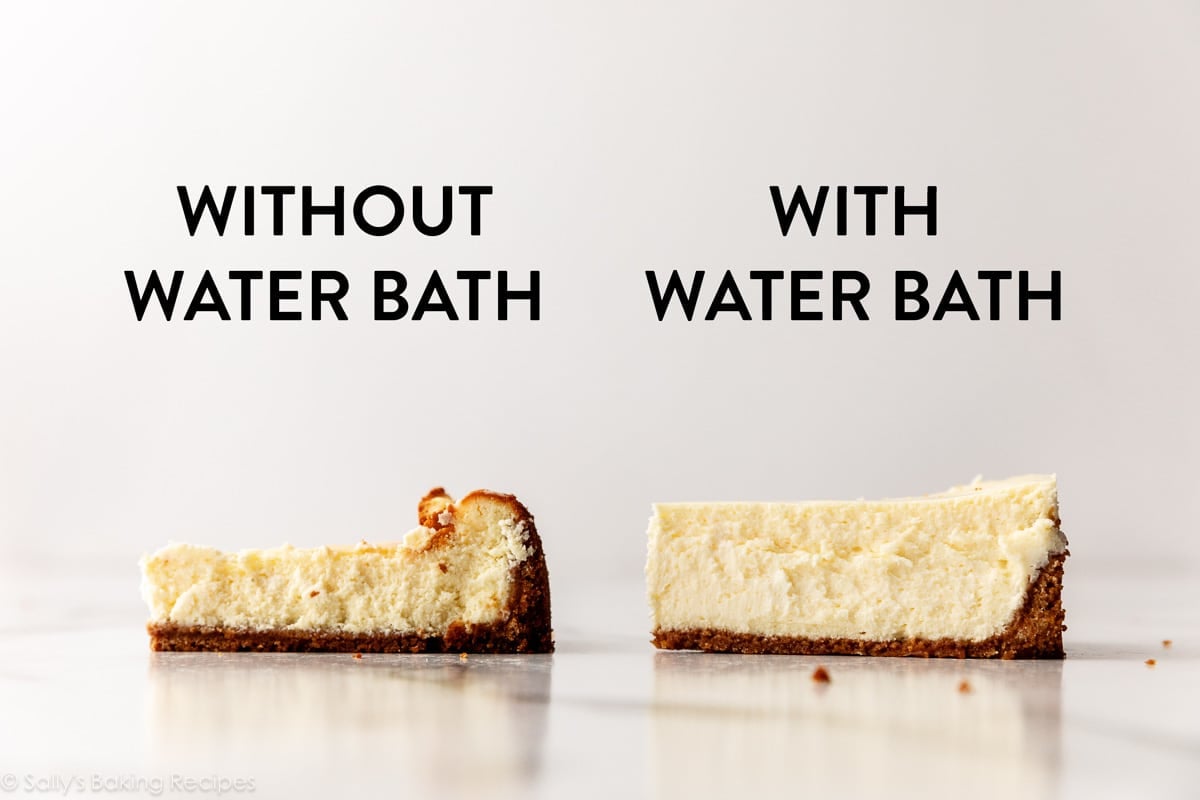
Check out the photos below. As you can see, taking a few extra minutes to prepare a water bath for your cheesecake is well worth it. Look at these differences, using the same exact cheesecake recipe.
I’m going to walk you through 2 different methods for baking a cheesecake in a water bath, and both work exceptionally well.
How to Make a Traditional Water Bath
Here’s what you need:
- Quality springform pan (I use and love this one)
- Aluminum foil (I recommend heavy duty aluminum foil)
- Large roasting pan
- Boiling water (I use a kettle to make pouring easier)
And here’s how to do it:
- Tear or cut two pieces of foil and lay one on top of the other. After you’ve shaped your crust inside (and pre-baked the crust, if your cheesecake recipe calls for this step), place the springform pan on the double-layer sheet of foil. Fold up the sides of the foil, tightly wrapping the exterior of the cheesecake pan on the bottom and up the sides. If you pre-baked the crust, be extra careful if the pan is still hot! This foil wrap prevents water from seeping in through your springform pan.
- Boil water. You need enough to fill your large pan with about an inch of water, so I usually boil a full kettle.
- Place the foil-wrapped springform pan inside your large roasting pan. Pour and spread your cheesecake batter into the prepared crust. Place the roasting pan on the middle or lower-middle rack in your preheated oven. (You can also pour the boiling water into the roasting pan outside of the oven, and carefully transfer the pan to the oven—just be careful not to spill or splash!)
- Working quickly but carefully, pour hot water into the roasting pan, so that the wrapped springform pan is surrounded by hot water, about 1 inch deep. I usually fill with water once placed in the oven to bake because it is hard to transfer a water-filled roasting pan with a cheesecake inside of it into the oven. But, again, you can do it either way!
- Quickly shut the oven door, and bake the cheesecake.
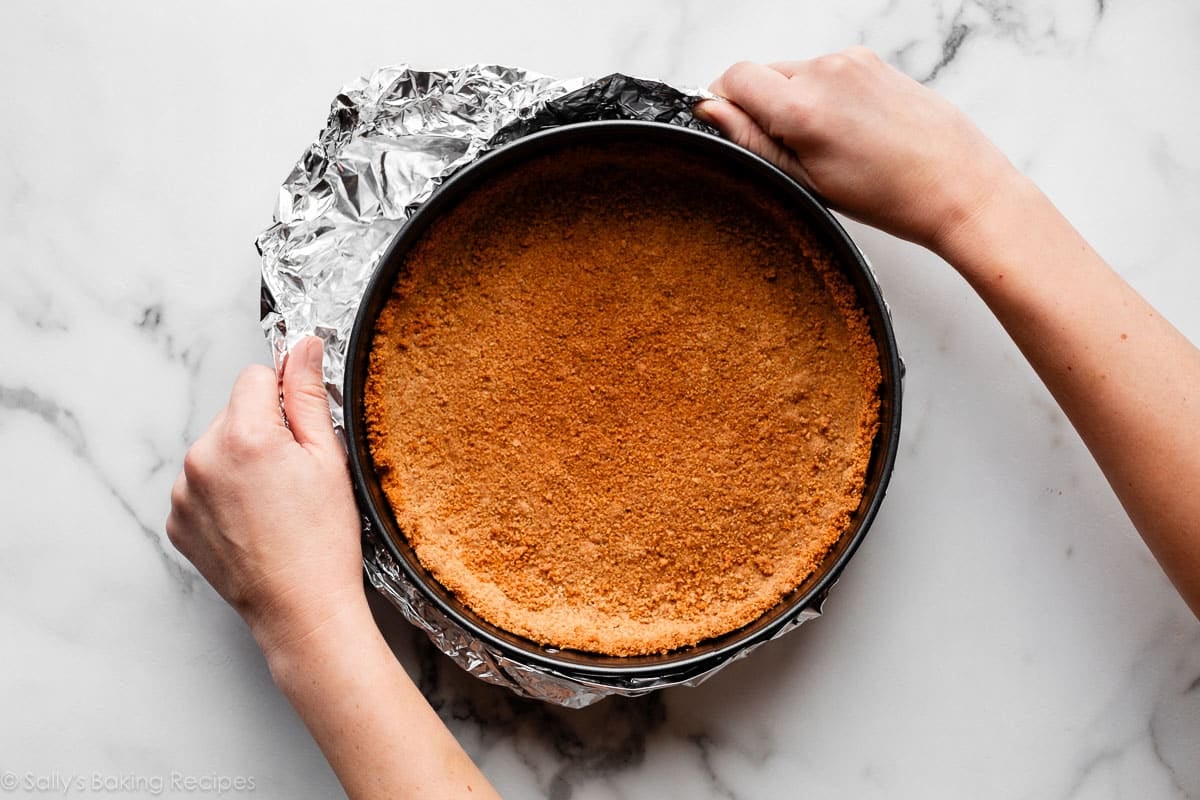
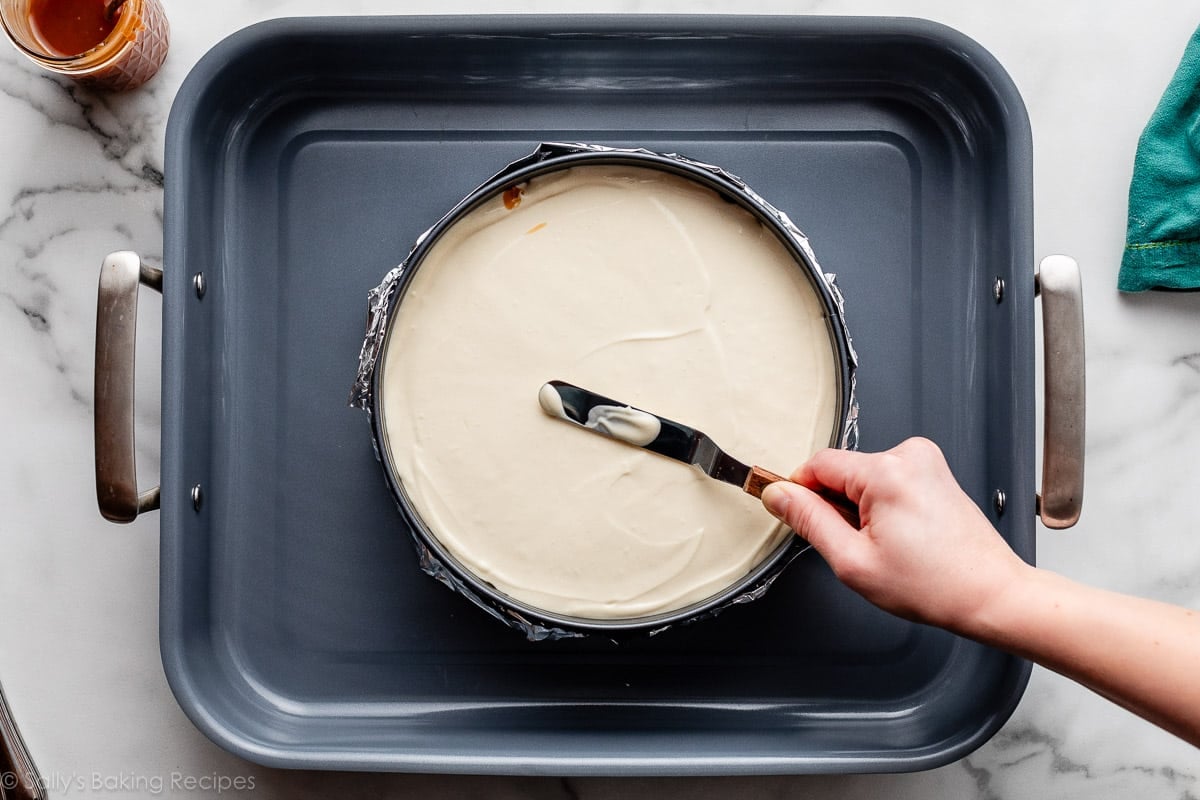
Like I mentioned, you can either place the roasting pan (with the cheesecake in it) in the oven now, and then pour in the boiling water, OR you can pour the boiling water in the roasting pan and transfer it to the oven. I took this following photo outside of the oven just to show you this step. In my video below, I do this while the pan is IN the oven. Again, either way is fine.
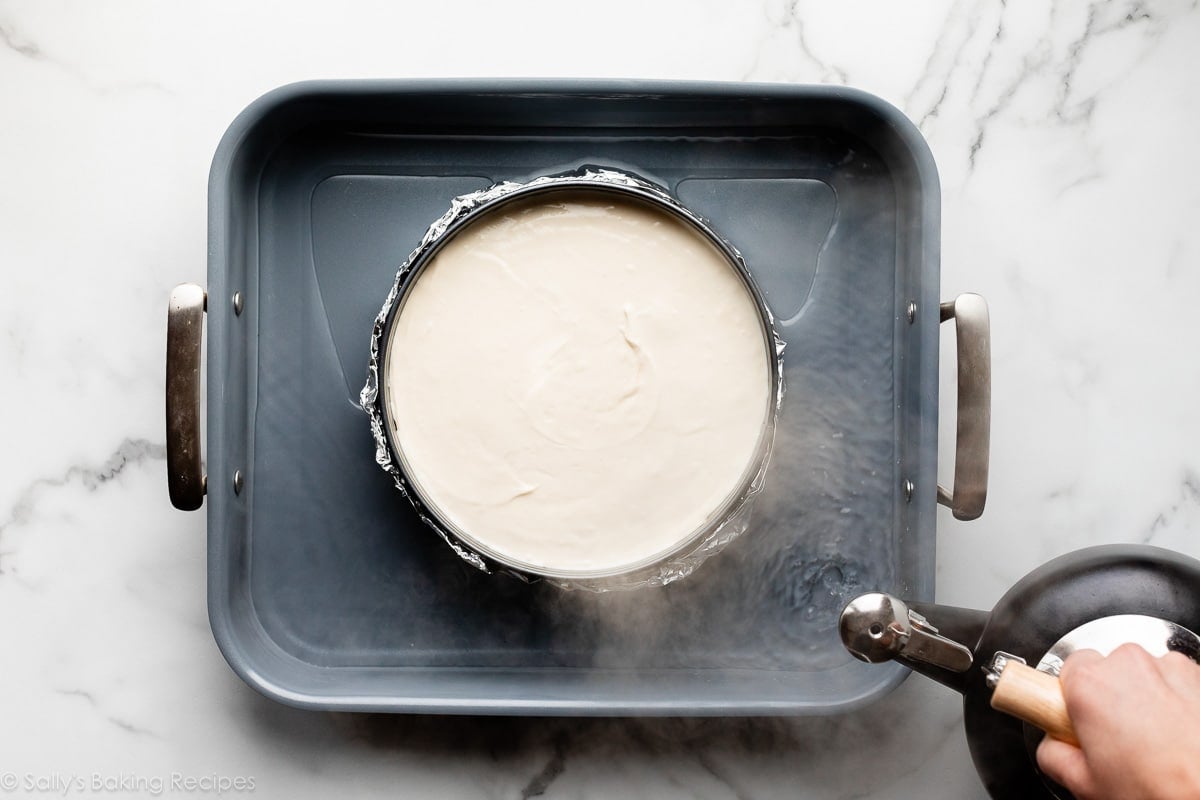
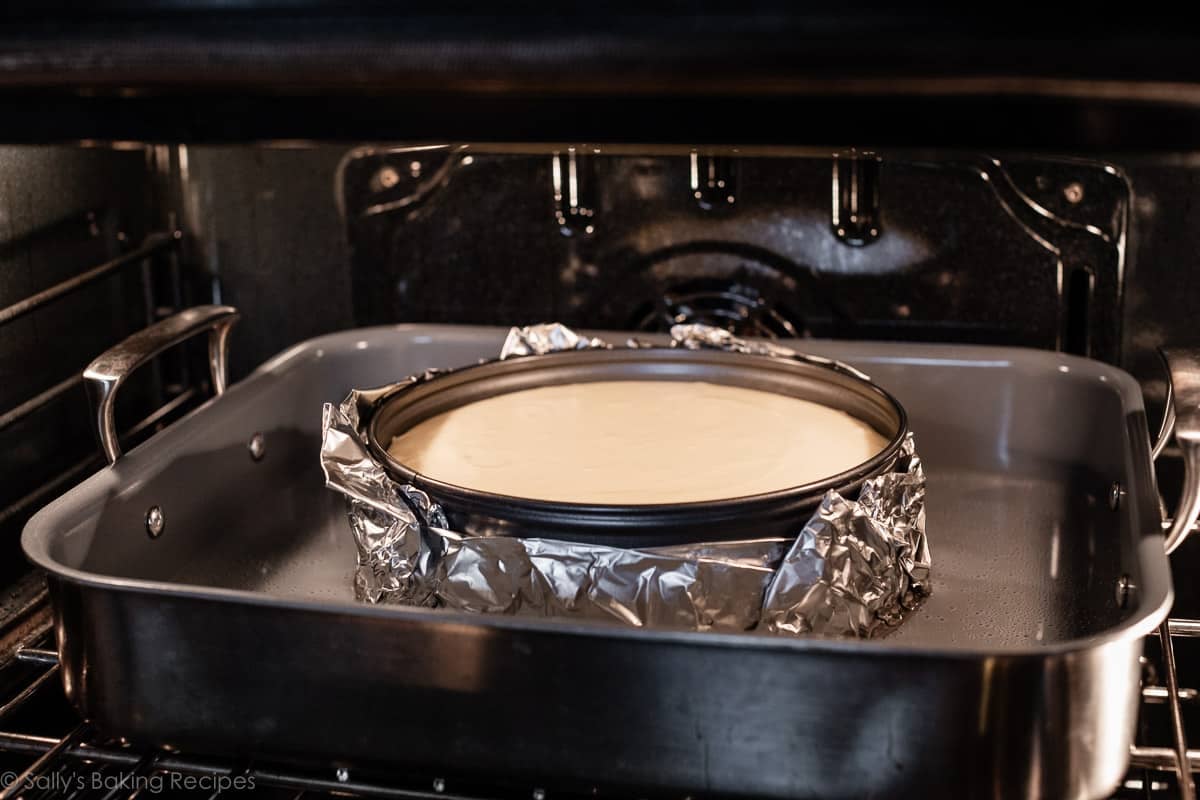
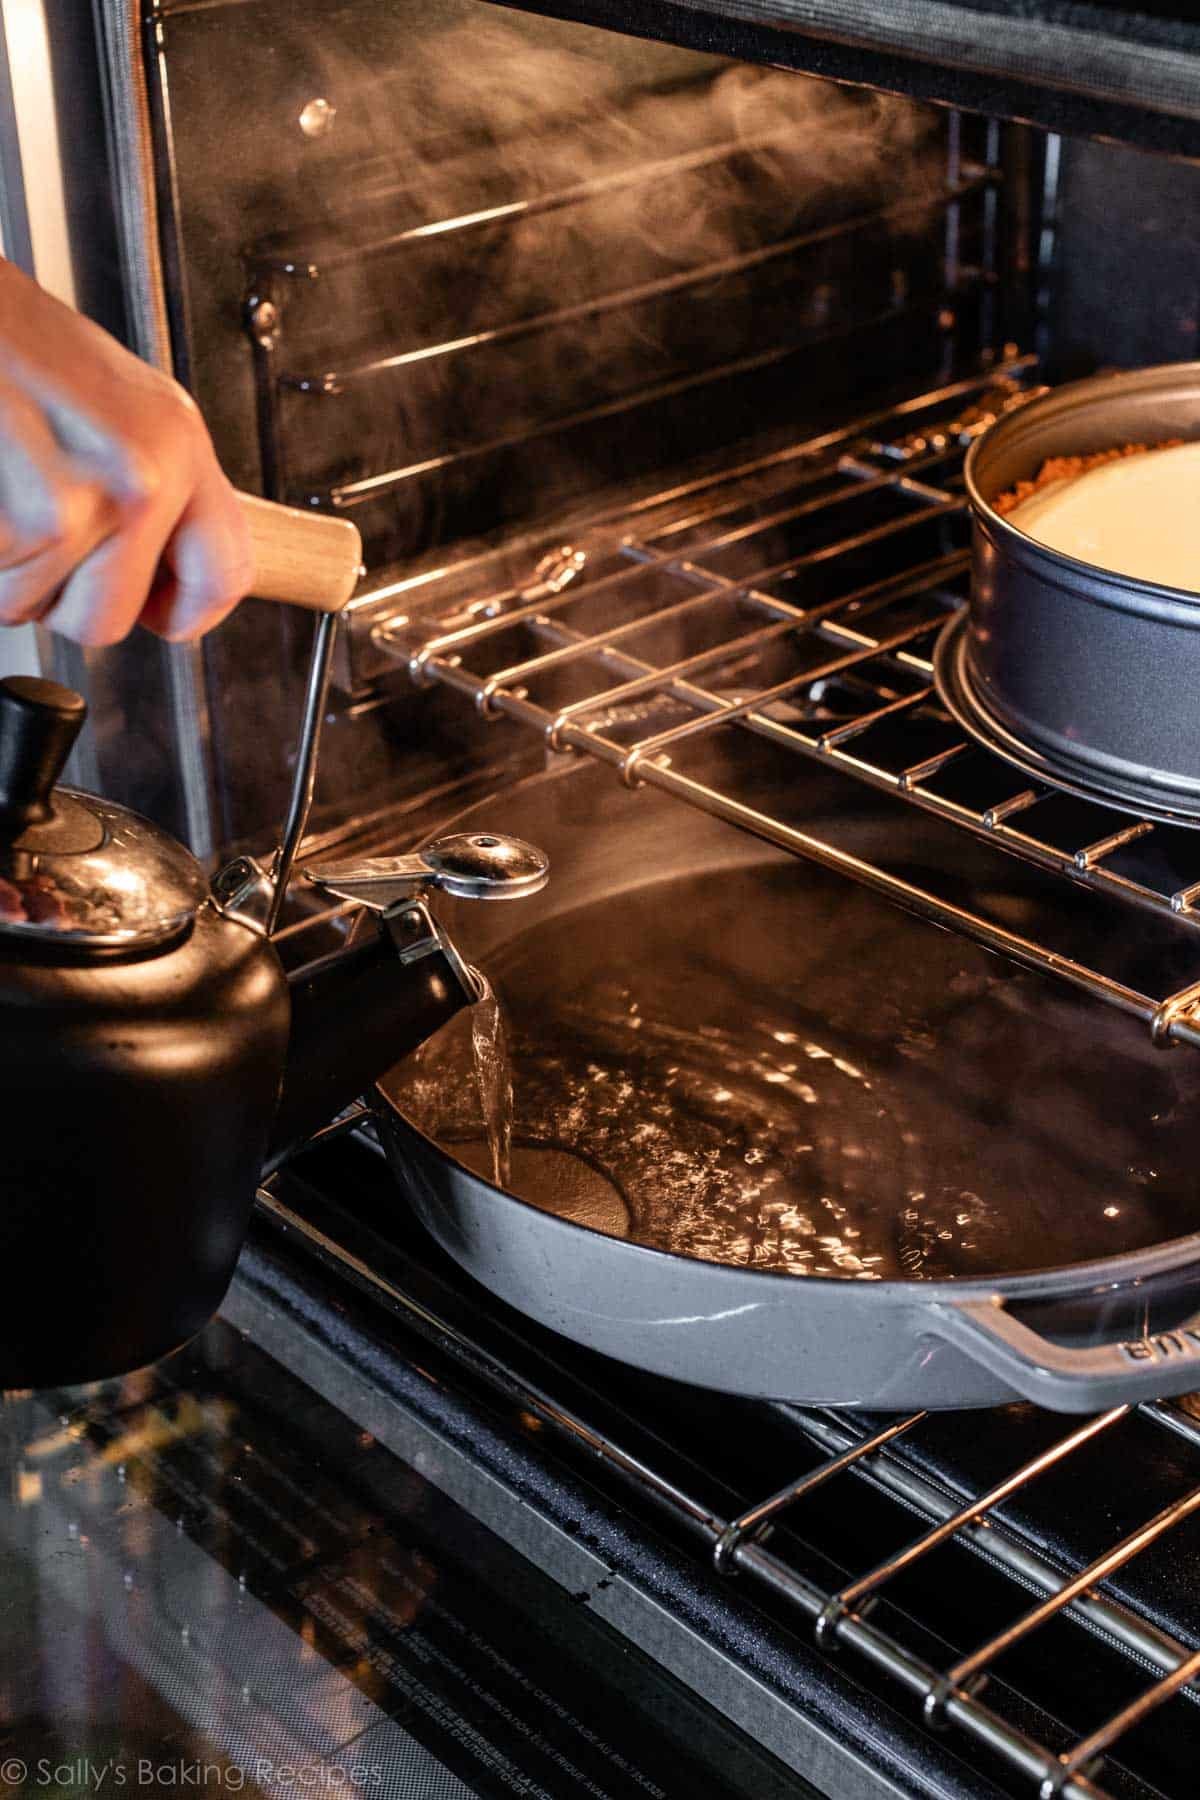
If you don’t want to risk water leaking into your springform pan, I have an alternate water bath method that works wonderfully. You still need a large oven-safe pan, but it will go on a bottom rack of the oven, below the rack the cheesecake is on.
Here’s what you need:
And here’s how to do it:
- Boil water. You need enough to fill your large pan with about an inch of water, so I usually boil a full kettle.
- Place your cheesecake on the middle oven rack.
- Immediately place the large oven-safe pan you’re using on the bottom oven rack.
- Pour hot water into the empty pan on the bottom rack, so that it’s about 1 inch deep.
- Quickly shut the oven door, and bake the cheesecake.
This unique water bath adds steam to the oven without having the cheesecake sit inside the water itself. This method can also be used to add steam to baking artisan bread, for a crispier crust.
How to Freeze Cheesecake
FAQ
What is the difference between 7 inch and 10-inch cheesecake?
What is the most common cheesecake size?
How full should a cheesecake pan be?
How big should a cheesecake Pan be?
It should be large enough to hold the complete round. Springform pan: Most cheesecake recipes call for a 9- to 10-inch springform pan. Foil: This is key to waterproof your cheesecake. Preheat oven to the temperature required for your recipe. Wrap springform pan (or other pan) in two layers of heavy-duty aluminum foil.
Is cheesecake a healthy food?
Vegan cheesecake has healthy ingredients and can be adjusted according to food preferences. A recipe with rice milk and seeds is a great suggestion.
Can I make a 9 inch cheesecake with a 10 inch Pan?
Wrong pan size: If you only have a 10-inch pan and you want to make a recipe for a 9-inch cheesecake, it’s fine to use the pan you have. Changing the pan size when making cheesecake will affect the height of the cheesecake and its cooking time (thinner cheesecakes will cook a bit more quickly), but not its flavor or texture.
Should cheesecake be chilled or at room temperature?
Cheesecake is meant to be served chilled or at room temperature, primarily because it’s only after chilling and fully setting that it gains its velvety, silky texture. If you cut into a cheesecake while it’s still warm from the oven, the texture will be very firm and somewhat custard-like, and you’ll despair that you’ve done something wrong.
