Apple Pie Filling takes less than 15 minutes to make and has a great homemade flavor.
Tender chunks (or slices) of apples are perfectly sweet-tart simmered in a simple cinnamon sauce. They take just minutes to prep and taste so much better than canned!
They can be used in pies or tarts or replace a can of apple pie filling in any recipe. Scoop it over ice cream, yogurt, or cake for an easy treat.
Hey there pie lovers! If you’ve ever found yourself wrist-deep in apple slices wondering, “Does apple pie filling need to be cooked before baking?”—you ain’t alone. I’ve been there, staring at a pile of Granny Smiths, debating whether to toss ‘em straight into the crust or give ‘em a quick simmer. Lemme tell ya, this question has sparked more kitchen arguments than pineapple on pizza! Some swear by precooking for that perfect, non-soggy slice, while others say raw is the way to keep that fresh apple bite. So, what’s the deal? Spoiler it don’t need to be cooked, but there’s some darn good reasons to consider it. Stick with me as we slice into this juicy dilemma and figure out what works best for your pie game.
Why Even Think About Cooking Apple Pie Filling?
Before we get into the nitty-gritty, let’s chat about why this question even pops up. Apple pie is like the holy grail of desserts—flaky crust, sweet-tart filling, and that warm, cozy vibe. But, man, it’s easy to mess up. Ever cut into a pie and got a soupy mess or apples that crunch like you’re biting into a raw carrot? Yeah, not cute. That’s where precooking comes in as a potential lifesaver. Here’s why I think it’s worth considering right off the bat:
- No More Soupy Disasters: Precooking lets those apples release their juices early. You can thicken that liquid with a bit of cornstarch or whatever, so your pie ain’t swimming when it’s done.
- Texture You Can Control: Want soft, melt-in-your-mouth apples? Cooking ‘em first gets you there. You decide how tender they get before they even hit the oven.
- Flavor That Pops: Simmering apples with sugar and spices like cinnamon amps up the taste. It’s like caramelizing the goodness before the bake—yum!
- Say Goodbye to Gaps: Ever had that sad empty space between the top crust and filling? Precooking shrinks the apples down so your pie don’t look half-empty after baking.
- Even Baking, Every Time: Raw apples can cook unevenly in the oven. Precooking evens things out, so no weird hard bits in the middle.
I remember the first time I skipped precooking—Thanksgiving, big family dinner, and my pie was basically apple soup with a crust. Heartbreaking! After that flop, I started messing around with precooking, and dang, it changed the game for me. But, hold up—it ain’t all sunshine and rainbows. There’s reasons some folks skip this step, and we’ll get to that too.
The Case for Skipping Precooking: Keep It Raw, Y’all
Now I gotta be fair. Not everyone’s on the precook train, and they’ve got some solid points. If you’re all about that fresh-from-the-orchard vibe you might wanna skip the stovetop. Here’s why some bakers (and maybe you) might roll with raw apple filling
- Freshness You Can Taste: Raw apples keep that crisp, lively bite. It’s like biting into fall itself—super refreshing against a buttery crust.
- Less Fuss, More Pie: Let’s be real—precooking adds time and dishes to clean. If you’re in a rush or just lazy (no shame!), tossing raw apples with sugar and spices is quicker than quick.
- Natural Juices Galore: Cooking in the oven lets the apples release their juices naturally as they bake. Some folks love that juicier, less controlled texture.
I’ve tried it both ways and I get the appeal of raw. There’s somethin’ special about that crunchy contrast if you pick the right apples. But, fair warning—if you go raw you’re gambling with sogginess unless you got some tricks up your sleeve. We’ll talk fixes for that later.
Does It Need to Be Cooked? The Straight Answer
So, back to the big question—does apple pie filling need to be cooked? Nah, it don’t. You can absolutely make a killer pie with raw filling, and plenty of folks do. Old-school recipes often just pile in the apples and call it a day. But here’s the thing: precooking ain’t mandatory, but it’s like buying insurance for your pie. It cuts down on the risk of a watery mess or undercooked chunks. If you’re new to baking or just wanna play it safe, I’m team precook. If you’re a rebel who loves a gamble (or that fresh bite), raw might be your jam.
Picking the Right Apples: The Real MVP of Your Pie
Before we dive deeper into how to handle your filling, let’s talk apples. Not all apples are created equal, and pickin’ the wrong ones can tank your pie faster than you can say “soggy crust.” The best pies come from a mix of sweet and tart, with apples that hold their shape when cooked. Here’s my go-to guide for apple pickin’:
- Sweet and Sturdy: Go for Honeycrisp or Braeburn. They’re sweet as heck and don’t turn to mush in the oven. Perfect for a balanced, structured filling.
- Tart and Tough: Granny Smith is your gal. These green beauties add a zingy kick and keep their form, even after a long bake.
- Mix It Up: My secret? Use a combo—say, 3 parts sweet (like 7 Honeycrisps) to 1 part tart (2 Granny Smiths). You get depth of flavor and a filling that don’t collapse.
- Avoid the Mushy Ones: Steer clear of Red Delicious or anything too soft. They’ll disintegrate into applesauce, and nobody wants that in a pie.
I learned this the hard way after using some random apples from the store once. Total disaster—filling was like baby food. Stick with the good stuff, and you’re halfway to pie heaven.
How to Precook Apple Pie Filling: My Foolproof Way
If you’re sold on precooking (or at least wanna try it), let me walk ya through how I do it. It’s easier than it sounds, I promise. There’s a couple ways to go, but I stick to the stovetop ‘cause it’s fast and I got control. Here’s the step-by-step:
- Prep Them Apples: Peel, core, and slice about 4-5 pounds of apples (8-9 big ones). Keep the slices even, ‘bout ¼ inch thick, so they cook the same.
- Get the Pan Ready: Grab a big, deep skillet or pot. Melt a tablespoon of butter over medium heat—smells amazing already, right?
- Mix the Goodies: Toss in your apple slices, ½ cup brown sugar (for that deep flavor), ¼ cup regular sugar, a teaspoon of cinnamon, a pinch of nutmeg, a dash of allspice, a sprinkle of salt, and 2 tablespoons of lemon juice. Stir it up nice.
- Cook ‘Em Down: Let it simmer for 12-15 minutes, stirring now and then. You want the apples tender but not falling apart. If you like ‘em softer, go a bit longer.
- Thicken It Up: Mix 2 tablespoons of cornstarch with 2-3 tablespoons of water, then stir it into the apples. This soaks up the juices so your pie ain’t a lake. Simmer another 3 minutes ‘til it’s thick. Adjust cornstarch if your apples are extra juicy.
- Cool It Off: This part’s key—let the filling cool completely before you put it in the crust. Hot filling will melt your dough and make a mess. Spread it in a shallow bowl to speed things up.
I usually taste-test at this stage (chef’s privilege, ya know) and tweak the sweetness or spices if needed. That’s the beauty of precooking—you know it’s gonna be bangin’ before it even hits the oven.
Another Option: Oven Roasting
If you got time and wanna get fancy, you can roast your apples instead. Crank your oven to 350°F, toss the sliced apples with sugar, spices, and lemon juice, spread ‘em on a baking sheet, and roast for 20-25 minutes ‘til tender. It brings out a deeper, caramelized vibe, but honestly, I usually stick to the stovetop for speed.
Baking Your Pie: Don’t Mess This Up
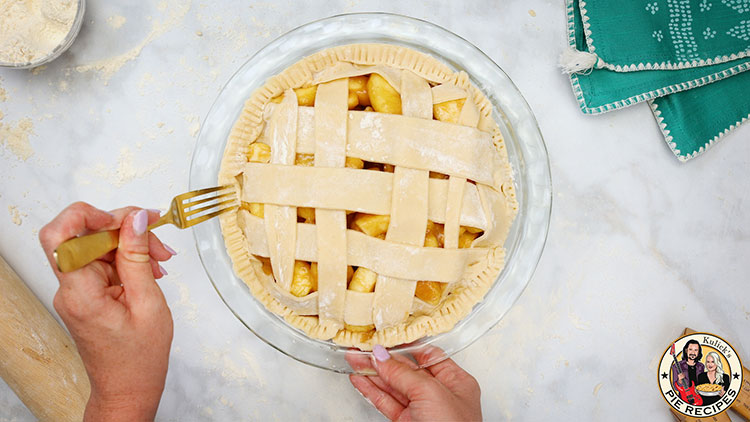
Whether you precook or not, baking the pie right is where the magic happens. If you precooked, your filling’s ready to rock—just pour it into your bottom crust (I’m obsessed with a flaky buttermilk one, but store-bought works too). Dot it with a bit of butter for richness, slap on the top crust or do a lattice if you’re feelin’ artsy, and seal the edges tight with a fork.
Bake at 400°F for 20 minutes, then drop to 375°F for another 30-35 minutes ‘til it’s golden and bubbly. Pro tip: shield the edges with foil or a pie shield after the first 20 minutes so they don’t burn. And for the love of all things pie, let it cool for at least 3 hours before slicing. I’ve cut in too soon before, and it’s like a fruit landslide—don’t do it!
If you went raw, same baking temps, but you might need a bit longer—check that the apples are tender through the slits in the crust. And toss a baking sheet under your pie either way to catch drips. Ain’t nobody got time to clean a sticky oven.
Tips to Avoid a Soggy Bottom (No One Likes That)
Soggy crust is the enemy, y’all. Whether you precook or not, here’s how to keep that base crisp and dreamy:
- Blind Bake If You’re Worried: If you didn’t precook, consider baking the bottom crust solo for 10-15 minutes before adding filling. It sets up a barrier against moisture.
- Thicken That Filling: Cornstarch or a bit of flour in the mix (even with raw apples) soaks up juices. Don’t skip this.
- Don’t Overload: Too much filling = too much juice. Keep it level with the crust, not piled sky-high.
- Cool Precooked Filling: I said it before, but if you precooked, hot filling will ruin your crust. Patience, my friend.
I’ve had my share of soggy bottoms (heh, sounds weird out loud), and these tricks saved me. A crispy crust is non-negotiable for a pie worth braggin’ about.
Make-Ahead Magic: Save Your Sanity
One thing I love about pie-making is you can prep ahead, especially if you precook. Here’s how we roll at my house when holidays hit:
- Filling in Advance: Precook the apples up to 3 days ahead. Cool it, store in an airtight container in the fridge, and you’re golden.
- Dough Done Early: Make your crust dough up to 5 days ahead and chill it, or freeze for a couple months. Just thaw overnight in the fridge before using.
- Bake Ahead: Since the pie needs hours to cool anyway, I often bake the whole thing 1-2 days before a big event. Keeps fine at room temp, covered.
- Freezing FYI: You can freeze a baked pie for up to 3 months—thaw at room temp. Or freeze just the filling for 2 months. Don’t freeze unbaked, though; it gets weird.
This stuff’s a lifesaver when I’m juggling a million dishes for family gatherings. Prep ahead, and you won’t be cryin’ in the kitchen on game day.
So, What’s My Take? Precook or Nah?
Alright, after all this chit-chat, where do I land? I’m gonna be real with ya—I’m a precook convert. After too many pies turned into apple soup or had rock-hard bits, I switched to cooking my filling first, and I ain’t looked back. It’s a bit more work, sure, but the control over texture and the guarantee of no sogginess is worth it for me. Plus, tasting and tweaking the filling before baking feels like cheatin’—in a good way!
That said, I respect the raw apple crew. If you got fresh, peak-season apples and love that crunch, go for it. Just be ready to battle some juice. Either way, it’s your pie, your rules. Experiment and see what vibes with your taste buds.
Wrapping It Up: Bake Your Best Pie Yet
So, does apple pie filling need to be cooked? Nope, it’s not a must, but precooking can save you from a lotta heartbreak. It’s all about what you’re after—soft and foolproof or fresh and feisty. Pick your apples smart, follow the steps that fit your style, and don’t skimp on the cooling time. Me and my crew have botched enough pies to learn these lessons the hard way, so trust us on this.
Got a pie story—epic win or total fail? Drop it in the comments; I’m all ears! Or if you try precooking after reading this, lemme know how it turns out. Let’s keep the pie love alive, fam. Now, go grab them apples and get bakin’—your kitchen’s callin’!
Homemade is Best (and SO easy!)
I looooove Apple pie filling but not just for filling pie crust! It’s great over anything from yogurt to cake to oatmeal.
- Homemade always tastes 1000x better! Delicious apple flavor with a hint of warm spices.
- The apples come out tender and not soggy.
- Making this apple pie filling is less expensive than canned (and has a homemade flavor).
- Needs just a handful of ingredients.
- Ready in about 10-15 minutes, it’s so easy to make.
The Best Apples for Pie Filling
Much like when baking apple pie, you’ll want apples that stand up well so you don’t end up with applesauce! We think granny smith apples are the best for pie filling because they have a tart flavor which means the filling isn’t overly sweet.
Try any of the following: braeburn, golden delicious, honeycrisp.
Other ingredients needed in this recipe are sugar, water, spices and cornstarch (this makes the sauce portion).
3 Ways to Make Apple Pie #baking
FAQ
Should apple pie filling be cooked first?
Can you eat raw pie filling?
Yes the filling will be contaminated.
Do you need to bake canned pie filling?
Should you cook pie filling before baking?
This cooking process creates a thicker fruit filling. This, then prevents the juices from ruining your pie as they have been solidified in the pot. It will also prevent a soggy crust or juices bursting through the pie vents in the crust as well.May 10, 2025