Hey there, folks! If you’re anything like me, the smell of a fresh apple pie baking in the oven is pure nostalgia—heaven on a plate, right? But who’s got time to peel and slice apples every dang time a craving hits? That’s where canning apple pie filling comes in clutch. We’re talkin’ about a game-changer here: whip up a big batch now, can it up, and you’ve got ready-to-go filling sittin’ on your shelf for months. No more last-minute stress for holiday pies or random Tuesday dessert hankerings. Let’s dive into this “can apple pie filling recipe” that’ll have your pantry lookin’ like a pro’s stash.
I’ve been messing around with this recipe for years, tweaking it ‘til it’s just right, and trust me, it’s a winner Whether you’re new to canning or you’ve been at it forever, I’m gonna walk ya through every step in plain ol’ English. We’ll cover what you need, how to do it, and all the little tricks to make sure your jars seal tight and taste amazing So, grab a cup of coffee (or heck, a cider), and let’s get to it!
Why Can Your Own Apple Pie Filling?
Before we get to the nitty-gritty let’s chat about why this is worth your time. Store-bought pie filling? Meh it’s okay, but it’s often loaded with weird stuff and lacks that homemade punch. When you can your own, you control everything—how sweet, how spicy, and what kinda apples go in. Plus, it’s a fantastic way to use up a bumper crop of apples in the fall. Got a tree in the yard or hit up a killer deal at the farmer’s market? Can that goodness and enjoy it all year.
- Saves Time Later: Prep once, and you’ve got pie filling ready for multiple desserts.
- Tastes Better: Fresh apples and your own spice mix beat canned junk any day.
- Feels Accomplished: There’s somethin’ mighty satisfying about seein’ those jars lined up, knowin’ you made ‘em.
Alrighty, let’s roll up our sleeves and get into the recipe. I’m gonna lay it out clear as day so even if you’ve never canned a thing in your life you’ll nail it.
The Ultimate Canned Apple Pie Filling Recipe
This recipe makes about 7 quart jars of apple pie filling, which is enough for roughly 7 nine-inch pies. Two quarts usually fill one pie, dependin’ on how stuffed you like it. Adjust the batch size if you want less or more, but I’ll give ya the full scoop here.
What You’ll Need: Ingredients
Here’s the lineup for your shopping list or pantry raid. I like to keep it simple, but don’t skimp on quality—fresh apples make all the difference.
- Apples: About 6 quarts of peeled, cored, and sliced apples (that’s roughly 19-20 pounds before prepping). Go for crisp, tart ones like Granny Smith, or mix with a sweeter variety like Golden Delicious for balance.
- Sugar: 5 ½ cups of the white stuff. You can dial this back a bit if your apples are sweet or you’re watchin’ sugar, but don’t cut it too much—it helps with preservation.
- Clear Jel: 1 ½ cups. This ain’t your regular cornstarch; it’s a special thickener made for canning. Don’t swap it out—other starches can mess up under heat and ain’t safe for shelf storage.
- Cinnamon: 1 teaspoon, or more if you’re a spice nut like me.
- Nutmeg: 1 teaspoon. Gives that warm, cozy vibe. Optional, but I love it.
- Apple Juice: 5 cups. Adds flavor and keeps the acidity right for safe canning.
- Water: 2 ½ cups. Balances the juice.
- Lemon Juice: ¾ cup, bottled kind preferred for consistent acidity. Fresh works too, but measure careful.
- Salt: Just a pinch, like 2 teaspoons, if you wanna enhance flavors (optional in my book).
Equipment You’ll Need
Canning ain’t just throwin’ stuff in a jar. You need the right gear to make sure it’s safe and seals proper. Here’s what I always got handy:
- Water Bath Canner: Big pot with a rack for processing jars. If you ain’t got one, a pressure canner can double for water bath—just don’t lock the lid tight.
- Canning Jars: 7 quart-sized or 14 pints, dependin’ on how you wanna store. Make sure they’re for canning—no old mayo jars, please!
- Lids and Rings: Fresh lids for each batch; rings can be reused if they ain’t bent.
- Jar Lifter and Funnel: Lifter gets hot jars out safe; funnel keeps mess off the rims.
- Ladle and Bubble Tool: For fillin’ and gettin’ air out.
- Apple Peeler-Corer-Slicer: Optional, but dang, it saves time. I do it by hand sometimes for thicker slices.
- Large Pots: Two of ‘em—one for blanching apples, one for makin’ syrup.
- Knife and Peeler: If you’re goin’ old-school on the apples.
Got all that? Sweet. Now, let’s get to the fun part—makin’ this stuff.
Step-by-Step: How to Can Apple Pie Filling
I’m breakin’ this down into easy chunks so you don’t miss a beat. Canning’s got a rhythm to it, and once you get the hang, it’s smooth sailin’. Follow along close, ‘specially on safety bits.
1. Prep Your Gear
Start by gettin’ your workspace ready. Wash them jars, lids, and rings in hot soapy water, then sterilize by boilin’ ‘em in a big pot of water for 10 minutes. Keep ‘em hot in the water or a low oven (about 200°F) ‘til you’re ready to fill. Get your canner filled with water and heatin’ up too—not boilin’ yet, just warm.
2. Prep Them Apples
Peel, core, and slice your apples into about ½-inch thick pieces. Too thick, and they might not process right; too thin, and they turn to mush. I aim for 6 quarts of sliced apples, which takes a good pile of whole ones. To keep ‘em from brownin’ while you work, toss slices into a pot with a solution—my fave is 2 teaspoons salt in a quart of water. Don’t worry, you drain it later and won’t taste salt.
3. Blanch the Apples
This step’s a must—blanchin’ heats the apples a tad and gets air out so they don’t mess up in the jar. Work in batches: boil 5-6 cups of sliced apples in water for just 1 minute, then drain and cover to keep warm. Do all your apples like this. I use a big stockpot with a basket to make it easy to lift ‘em out.
4. Make the Syrup
In another big pot, mix your apple juice, water, sugar, Clear Jel, cinnamon, and nutmeg. Stir it good over medium heat ‘til it thickens up and gets bubbly—don’t stop stirrin’ or it’ll scorch. Once it’s thick, add the lemon juice and boil for 1 more minute. This syrup’s gotta be just right for safety, so don’t mess with the juice-water-lemon ratio, okay?
5. Combine Apples and Syrup
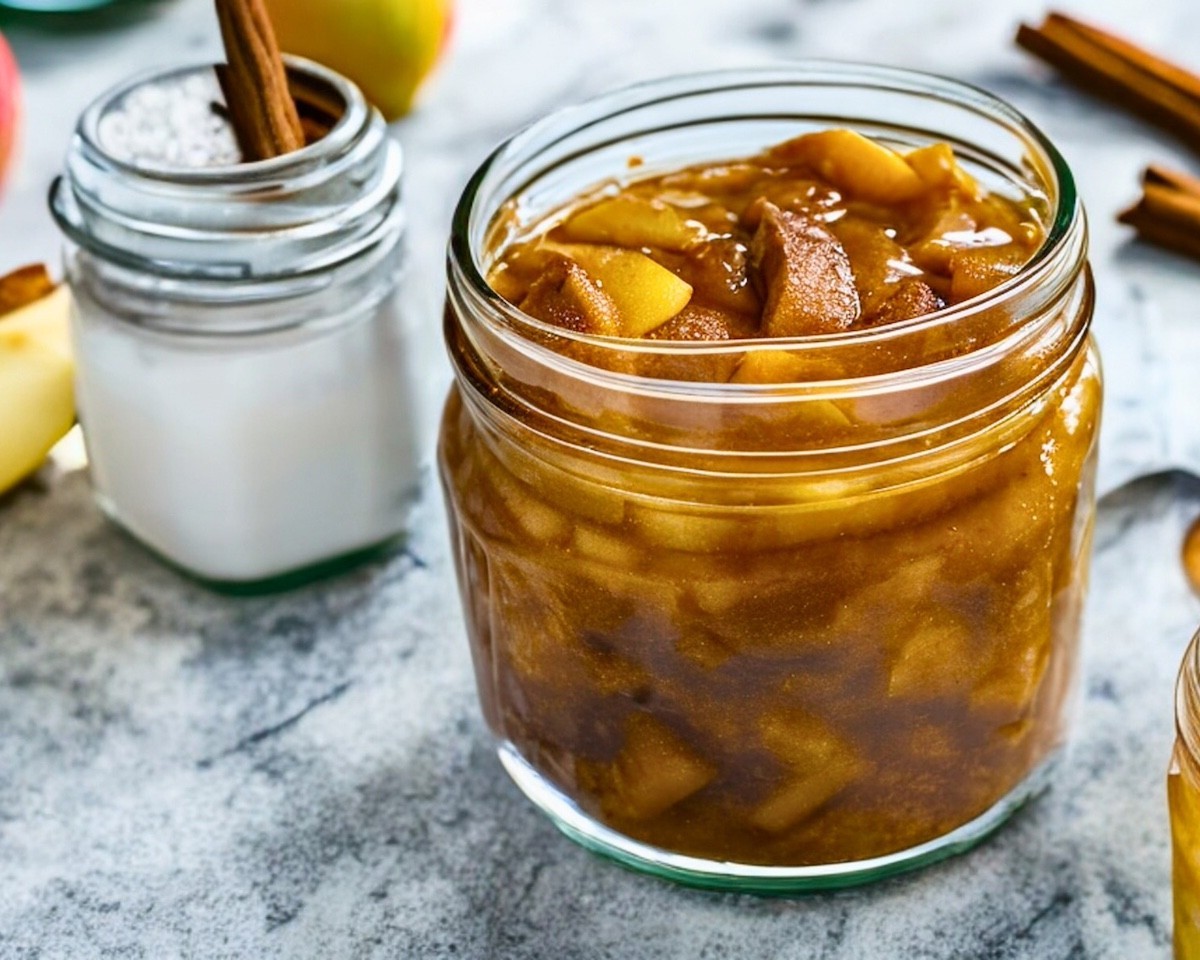
Gently fold them warm apples into the hot syrup. Stir easy so you don’t mash ‘em. This mix is what’s goin’ in your jars, and it should look like pie filling already—smells awesome too!
6. Fill the Jars
Using a ladle and funnel, fill each hot jar with the apple mix. Leave a full 1-inch headspace at the top—don’t skimp here, ‘cause the filling swells when processin’. Run a bubble tool or thin knife around the inside to get out trapped air. Check headspace again; top off with syrup if needed, or pull out a slice if it’s too full. Wipe jar rims real good with a clean, damp cloth—any sticky bits can mess up the seal.
7. Seal and Process
Pop on the lids and screw the rings on finger-tight—not super tight, just snug. Place jars in your warm canner, makin’ sure they don’t touch. Once all jars are in, bring water to a full boil, cover, and start timin’. Process based on your altitude:
| Altitude (feet) | Processing Time (Pints or Quarts) |
|---|---|
| 0 – 1,000 | 25 minutes |
| 1,001 – 3,000 | 30 minutes |
| 3,001 – 6,000 | 35 minutes |
| Above 6,000 | 40 minutes |
8. Cool and Store
When time’s up, turn off heat, take off the lid, and let the canner sit 5 minutes. Lift jars out (still in the rack if possible) and let ‘em rest above water another 5 minutes. Then set ‘em on a thick towel, a few inches apart, to cool for 12 hours. Don’t mess with ‘em durin’ this time. After coolin’, check seals—lids should be sucked down with no pop. Remove rings, label with date, and store in a cool, dark spot.
And there ya have it! You’ve just canned apple pie filling like a champ. Now, let’s talk some tips and tricks, ‘cause I’ve learned a few things the hard way over the years.
Tips for Canning Success
I wanna make sure you avoid the headaches I’ve had, so here’s some nuggets of wisdom for ya:
- Pick the Right Apples: Tart and crisp is the way to go. Granny Smith’s my go-to, but mixin’ with somethin’ sweeter like Rome or Stayman works fab. Soft apples like Red Delicious? Nah, they turn to goop.
- Don’t Skip Clear Jel: I know it’s tempting to use cornstarch or somethin’ else, but only Clear Jel’s safe for canning. Others break down under heat and can spoil. If you can’t find it, can plain apples and thicken later when you bake.
- Headspace Matters: That 1-inch gap ain’t just a suggestion. Too little, and your filling might ooze out durin’ processin’—what a sticky mess that is!
- Blanchin’ Ain’t Optional: It gets air out of the apples, which helps prevent overflow (called siphonin’). Skip it, and you might lose liquid or get weak seals.
- Altitude Adjust: Double-check your altitude and process longer if you’re up high. Safety first, peeps.
Troubleshootin’ Common Hiccups
Even with the best plans, stuff can go sideways. Here’s how to handle it if your canning adventure gets wonky.
- Filling Oozed Out: If jars look like they leaked after processin’, don’t panic. It’s called siphonin’, often from not enough headspace or skippin’ blanchin’. Wash jars off, check seals—if they’re tight, they’re still good to store. Just use ‘em sooner rather than later.
- Apples Settled Too Much: Sometimes apples shrink in the jar, leavin’ extra space. Pack ‘em tight as you can without crushin’, and make sure to blanch proper to release air beforehand.
- Too Much Liquid: If your filling looks soupy when you open a jar, next time reduce water a smidge if you’re adjustin’—but don’t mess with safety ratios. Or drain a bit before usin’ in a pie.
- Seal Didn’t Take: If a lid pops when you press it after coolin’, it didn’t seal. Stick that jar in the fridge and use within a week, or reprocess with a new lid if you catch it early.
Creative Ways to Use Your Canned Apple Pie Filling
Sure, pies are the obvious go-to, but there’s a heap of other yummies you can whip up with this stash. I’ve tried a bunch, and here’s my faves:
- Apple Crisp: Dump a quart of filling in a dish, top with a quick oatmeal-brown sugar-butter crumble, and bake ‘til golden. Easy peasy.
- Turnovers: Grab some puff pastry, spoon in filling, fold, and bake. Breakfast or dessert, sorted.
- Pancake Toppin’: Warm up some filling and pour over pancakes or waffles. Add a dollop of whipped cream if you’re feelin’ fancy.
- Cake Fillin’: Layer it between cake rounds for an apple-packed surprise. I did this for a birthday once, and folks went nuts.
- Ice Cream Buddy: Heat a bit of filling and drizzle over vanilla ice cream. Sounds weird? Try it—it’s amazin’!
How Long Does It Last?
If you’ve sealed ‘em right, these jars can hang out on your shelf for up to a year for the best quality. They might be safe longer if seals hold, but texture and flavor can dip. I always aim to use mine within 12 months, rotatin’ older jars to the front so they don’t sit forever. Check seals before usin’—if anything looks off or smells funky, toss it, no questions asked.
A Lil’ Story From My Kitchen
I gotta share this ‘cause it still cracks me up. First time I canned apple pie filling, I was a hot mess—apples everywhere, sticky floors, and I forgot to wipe a rim. Guess what? That jar didn’t seal, and I had to eat a whole pie’s worth in a week. Me and my kids didn’t complain, but man, I learned quick to clean them rims proper! Every batch since, I’m like a hawk on details, and it’s paid off with perfect jars every fall. Hope my flub gives ya a chuckle and a reminder to take your time.
Wrappin’ It Up
Canning apple pie filling ain’t just a kitchen task—it’s a way to bottle up the best of apple season and keep that cozy feelin’ ready anytime. With this recipe, you’re set to stock your pantry with somethin’ way better than store-bought, and you’ll impress the heck outta family and friends when you whip out a pie in no time flat. Remember to follow safety steps, use the right stuff like Clear Jel, and don’t be afraid to experiment with how you use the filling.
Got questions or a cool way you’ve used your canned stash? Drop a comment—I’d love to hear! And if this helped ya out, share it with a buddy who’s got apples comin’ out their ears. Let’s keep this canning party goin’ strong. Catch ya later for more kitchen shenanigans!
Canning APPLE PIE FILLING And Making Apple Pies
FAQ
How to use a can of apple pie filling?
- Cinnamon Roll Dutch Apple Pie. Prep: 20 min. …
- Apple-Cream Cheese Monkey Breads. …
- Apple Cream Cheese Crunch Bars. …
- Apple Spice Cookie Pies. …
- Apple Cinnamon Roll Bake. …
- 2-Ingredient Apple Pie Cups. …
- Apple Spice Jumbo Pie Cupcakes. …
- Caramel Apple-Marshmallow Tarts.
Should I add anything to canned pie filling?
Corn starch is a key ingredient for avoiding a runny pie! Even though some canned blueberry pie filling will have corn starch as an ingredient, you should still add corn starch because the lemon juice liquid alters the original texture of the canned filling slightly, but the cornstarch will help it thicken.
Can I can apple pie filling?
Yes, you can safely can apple pie filling for year-round use, but it requires a specific water bath canning process with the right ingredients, including lemon juice and Clearjel as preservatives, and proper processing times to prevent spoilage and ensure safety. The process involves preparing jars, blanching apples, making a thickened syrup with Clearjel, combining the apples and syrup, filling the jars, and then processing them in a boiling water bath canner.
What can I make with canned pie filling?
- 1/30. Cherry Crisp Recipe. 4.857143 | 21 Reviews. …
- 2/30. Lemon Blueberry Trifle. 4.7619047 | 21 Reviews. …
- 3/30. Cherry Chewbilees. …
- 4/30. Lemon Angel Cake Bars. …
- 5/30. Cherry Dew Dumplings. …
- 6/30. Cake & Berry Campfire Cobbler. …
- 7/30. Black Forest Dump Cake. …
- 8/30. Puffed Apple Pastries.