Hey there, fellow baking enthusiasts! If you’ve ever sliced into an apple pie expecting a burst of juicy goodness only to find a dry, sad mess, I feel ya. There’s nothing more disappointing than putting in all that effort—peeling, slicing, rolling out dough—and ending up with a pie that’s more like cardboard than comfort food. But don’t chuck your rolling pin just yet! At our little baking corner, we’ve cracked the code on why your apple pie ain’t juicy and how to fix it up real nice. Let’s dive into the nitty-gritty of getting that perfect, drippy filling that makes everyone beg for seconds.
The Big Culprit: Why Your Pie’s Dry as a Desert
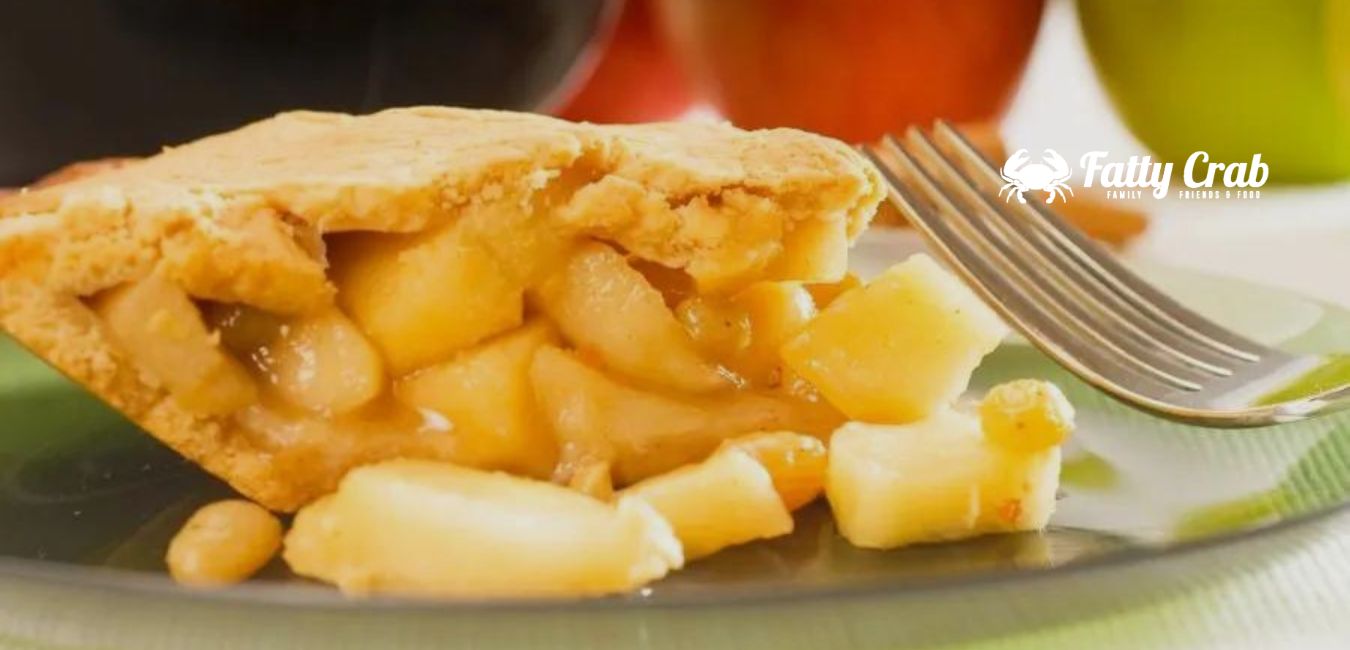
Let’s cut straight to the chase. The main reason your apple pie lacks that luscious juice is cuz it’s not holding onto moisture during baking. Sounds simple, but there’s a bunch of sneaky factors at play here. Maybe you picked the wrong apples, or you went overboard with something that soaks up all the wet stuff. Could be your baking game’s a bit off, or you didn’t prep them apples right. Don’t worry—I’m gonna break this down so easy even your grandma’s old oven could get it right.
Before we get into the fixes, let me paint ya a picture. A juicy apple pie ain’t just about wet filling; it’s a balance. When you heat up them apples, they release natural juices. Sugar melts into that, making a syrupy magic, and something in there’s gotta thicken it just enough so it don’t spill everywhere when you cut a slice. Mess up that balance, and boom, you got a dry pie. So, let’s fix this mess step by step.
Pick the Right Apples: Your Juicy Foundation
First things first, the apples you choose are the heart of your pie. Not all apples are created equal, ya know. Some turn to mush and flood your crust, while others stay stiff and leave you with zero juice. I’ve made the mistake of grabbing whatever’s in the fruit bowl and regretted it big time.
Here’s the deal
- Go for a Mix: Pair up soft, juicy apples with firmer ones. Think of using something sweet and wet like Honeycrisp alongside a tart, sturdy fella like Granny Smith. The soft ones give you that juice, while the firm ones keep the filling from turning into applesauce.
- Avoid Solo Duds: Don’t just use apples that dry out easy. I tried making a pie with only certain red types once, and it was like eating sawdust. Same goes for only mushy kinds—they’ll leave ya with a watery mess instead of juicy goodness.
- Tart is Smart: Tart apples got more of that natural glue inside ‘em that helps hold things together. So, tossing in a few Granny Smiths can save your pie from being a total flop.
Next time you’re at the market, don’t just grab the prettiest apples. Think about how they’ll bake up. Mix and match, and you’ll be halfway to juicy pie heaven.
Thickening Agents: Don’t Suck Up All the Juice!
Alright, let’s talk about what holds that filling together—thickeners. These are the unsung heroes of pie, but if you mess up the amount or type, they can turn on ya and suck every last drop of moisture outta your pie. Been there, done that, and it ain’t pretty.
Here’s what I’ve learned over many a pie disaster:
- Cornstarch is Potent: This stuff gives a nice, clear shine to your filling, but too much and it’s like eating rubber. Start small, maybe a couple tablespoons for a big pie.
- Flour’s Rustic: Good ol’ flour works too, but you need more of it than cornstarch to get the same effect. It’s got a homestyle vibe, though, which I kinda dig.
- Tapioca’s Chewy: This one don’t cloud up your filling and adds a lil’ chew. It’s a solid pick if you’re tired of the usual suspects.
Check out this lil’ cheat sheet for how much to use. I whipped it up after trial and error in my kitchen
| Thickener | Amount per 6-8 Cups of Apples | Pros | Cons |
|---|---|---|---|
| Cornstarch | 2-4 tablespoons | Clear, glossy finish | Can get gummy if overused |
| All-Purpose Flour | 3-6 tablespoons | Rustic texture | Needs more for same effect |
| Tapioca (Instant) | 2-4 tablespoons | No clouding, slight chew | Texture might not be for all |
Word to the wise—start with less. You can’t take it out once it’s in there, and too much will leave your pie drier than a cracker. I once dumped in way too much cornstarch thinking “more is better,” and let me tell ya, it was a weird, gluey mess. Lesson learned.
Pre-Cook Them Apples: Lock in the Flavor
Now, here’s a trick I wish I knew years ago—pre-cooking your apple filling. I used to just toss raw apples in the crust and hope for the best, but that often left me with either a soggy bottom or a dry filling. Pre-cooking changes the game.
Why bother? Well, when you lightly cook your apples on the stove first, some of that extra moisture evaporates before it hits the oven. Plus, it concentrates the apple flavor into something downright heavenly. It also gives your thickener a head start, so it don’t gotta work overtime during baking.
Here’s how we do it at my place:
- Grab a saucepan and toss in your sliced apples, some sugar, a pinch of spice, and your thickener.
- Cook it over medium heat for about 5-10 minutes, stirring now and then, till the apples soften just a tad and the mix thickens a bit.
- Let it cool completely before dumping it into your pie crust. Hot filling plus cold dough equals disaster, trust me.
First time I tried this I was skeptical. But dang the difference was night and day. My pie had this rich, apple-y taste and just the right amount of juice. Try it once, and you’ll never go back.
Baking Like a Boss: Temp and Time Matter
Let’s chat about baking, cuz this is where a lotta pies go wonky. If your oven’s too hot or too cold, or if you yank the pie out too soon, you’re setting yourself up for a dry disappointment. I’ve burned crusts and undercooked fillings more times than I care to admit, but I got it figured out now.
Here’s the lowdown:
- Sweet Spot Temp: Aim for around 375 degrees Fahrenheit. Too low, and your apples release too much juice without thickening up. Too high, and the crust chars before the inside’s done. 375 is the Goldilocks zone.
- Shield That Crust: To keep the edges from burning early, slap some aluminum foil over ‘em for the first half of baking—say, 30-40 minutes. Then peel it off for the last stretch to get that golden glow.
- Time It Right: Don’t pull your pie out the second it looks pretty. Wait till you see the filling bubbling like crazy through the vents or edges. That means it’s hot enough to thicken up. Give it at least 10 extra minutes after that bubbling starts. I’ve baked pies for near two hours sometimes, and they turn out just dandy.
One time, I got impatient and took my pie out early cuz the top looked golden. Big mistake. The inside was like raw apple soup, no juice, just weird texture. Patience is your pal here.
Cool It, Don’t Rush It
Now, I know the smell of fresh apple pie can drive ya nuts, but don’t go slicing into it straight outta the oven. Cooling is key to getting that juicy filling to set just right. Cut too soon, and all your hard work spills out or looks dry cuz it ain’t had time to gel.
Here’s my rule of thumb:
- Let your pie chill on the counter for at least 3-4 hours. Overnight is even better if you got the willpower.
- If you want it cold, pop it in the fridge after it cools naturally. Don’t shove a hot pie in there—that’s a recipe for soggy crust.
- Wanna serve it warm? Reheat just a slice in the microwave for a few seconds. Don’t overdo it, or the crust gets tough.
I remember my first pie, I couldn’t wait and cut into it hot. Filling everywhere, no structure, total mess. Now, I plan ahead and let it rest. Trust me, it’s worth the wait for that perfect, juicy bite.
Extra Tips to Juice Up Your Pie Game
Still worried your pie might not drip with goodness? Here’s a few more tricks I’ve picked up along the way:
- Splash of Lemon: Toss a tablespoon or two of lemon juice in with your apples. It don’t add juice directly, but it perks up the flavor so it feels juicier. Plus, keeps ‘em from browning.
- Sugar Play: Use a mix of regular sugar and a bit of brown sugar for deeper, caramel vibes. Sugar pulls moisture from apples, so don’t skimp too much or you’ll lose that syrupy feel.
- Vent That Crust: Make sure your top crust has slits or holes. Steam’s gotta escape, or it traps moisture weirdly and can mess with juiciness. I like cutting a lil’ design for fun.
- Blind-Bake Bottom: If your bottom crust always ends up soggy instead of supporting a juicy fill, bake it solo for a few minutes before adding apples. Keeps it crisp.
Common Q’s I Get About Juicy Pies
Over the years, folks have asked me tons of stuff about fixing dry pies. Here’s some quick answers to the biggies:
- Why’s my filling spilling over in the oven? You mighta overfilled it or forgot vents. Leave a lil’ space at the top and cut slits for steam. Too much sugar can boil over too.
- Can I use frozen apples? Yup, but thaw and drain ‘em good first. They let out extra water, so maybe add a tad more thickener.
- How do I know it’s done? Look for a golden crust and bubbling filling. Stick a toothpick in—if the juice ain’t watery, you’re golden.
- What if I ain’t got cornstarch or flour? In a pinch, try potato starch or even some quick oats. Texture might be a bit off, but it’ll do.
My First Dry Pie Disaster (And How I Fixed It)
Lemme tell ya a story to wrap this up. Way back when I started baking, my first apple pie was a total bust. I used whatever apples I had—think they were some old, dry ones from the back of the fridge. Didn’t add enough sugar, no thickener, baked it too hot, and sliced it five minutes after it came out. It was like eating apple-flavored cardboard. My family tried to be nice, but I could tell they were forcing it down.
After that flop, I got stubborn. I read up, experimented, and started mixing apples like a mad scientist. I played with thickeners till I found my fave balance. Pre-cooking became my secret weapon, and I stopped rushing the cool-down. Now, my pies are the talk of every holiday table. Last Thanksgiving, my cousin literally licked the plate—gross, but I took it as a win.
So, why’s your apple pie not juicy? Could be the apples, the thickener, how ya prep, bake, or cool it. But with these tips, you’re armed to turn that around. Pick a mix of juicy and firm apples, measure your thickener careful-like, pre-cook for flavor, bake at the right temp for long enough, and let it rest. Do that, and you’ll have a pie so juicy it’ll make your mouth water just looking at it.
Got a pie story or a trick of your own? Drop it in the comments—I’m always up for learning something new. Now, go get baking, and let’s make them pies drip with goodness! “`
The Biggest Mistakes Everyone Makes When Baking Apple Pie
FAQ
Why is my pie so dry?
- Overmixing : If you mix the dough too much, it develops gluten, which can make the crust tough.
- Too Much Flour : Adding too much flour can lead to a dry crust.
- Insufficient Fat : Fat (like butter or shortening) adds tenderness.
- Not Enough Liquid
- Chilling the Dough
- Baking Temperature
- Using Cold Ingredients
What is the most common mistake people make when making apple pie?
Using the wrong amount of filling
One major mistake occurs on either end of the spectrum: using too much filling or not enough. One results in a pie with a soggy bottom crust and still-raw apple in the middle, and the other has a hollow top with very little apple after baking.
What is the secret to a good apple pie?
- Keep Your Ingredients Cold.
- Stick With an All-Butter Crust.
- Make a Butter-Flour Paste.
- Use Vodka (or Don’t)
- Fold in Liquid With a Spatula.
- Choose Tart Apples.
- Go Easy on the Seasoning.
- Par-Cook Your Apples.
What makes apple pie soupy?