This page contains affiliate links, and that means that I may earn a commission if you buy something, at no extra cost to you. You can find my full disclosure policy here.
The Farberware Classic Yosemite 8-Cup Percolator provided great value for money with its good quality stainless steel coffee pot and inner percolator. It’s also very user-friendly, I could brew anywhere between 3-8 cups of coffee with it, and it also comes with a lifetime warranty.
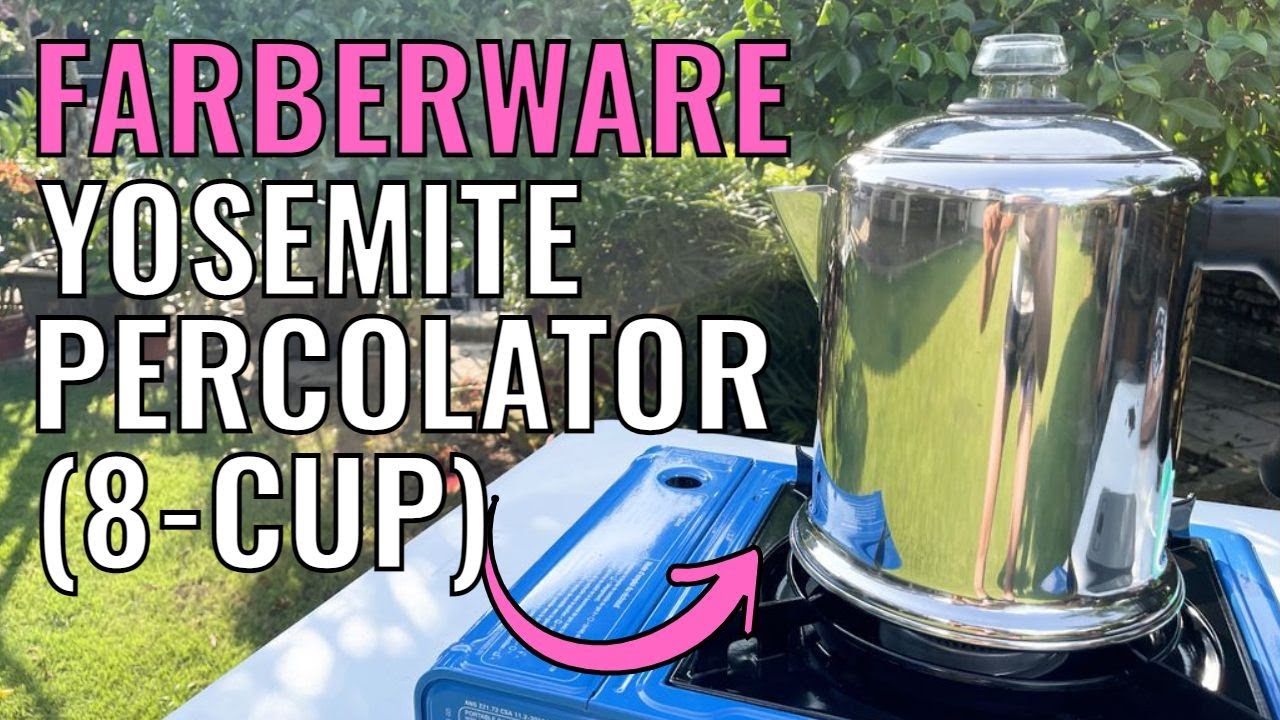
While it’s not the highest quality camping percolator on the market (there are a few flaws with it), I definitely got more than what I paid for it. Brewing coffee in my Farberware Yosemite Percolator on a camping stovetop.
The Farberware Yosemite Percolator came in a really nice box, which looked like this: The unboxed packaging of the Farberware Yosemite Percolator.
And all the componentry was nicely wrapped up and packaged. For more details on the unboxing, you can check out the YouTube video above.
In the box, you get the Farberware stainless steel coffee pot with a removable lid, a stem with a base, a spring, a filter basket, a spreader, a perking knob with a plastic ring, and some instructions.
I usually use 6 ounces of water for 1 cup of coffee. I grind my medium roast coffee into a coarse grind, I use 10 or 11 grams of grounds for 1 cup of coffee, and I pour it into the filter basket.
Next, I place the stem, spring, filter basket and spreader into the coffee pot, close the lid, and place the Farberware Percolator on the stove. My personal preference is to bring the water to a boil on medium heat, and when it starts boiling, you can see the water perking in the transparent knob on the top of the Farberware Percolator.
After, I usually lower the heat slightly to medium low heat, and wait about 7 minutes, before turning off the heat entirely.
Then, I let the percolator sit for a few extra minutes to allow the water in the filter basket to drain out and the grounds in the coffee to settle at the bottom, before pouring it out to drink.
This is just how I do it and how I use all my percolators, but feel free to do whatever suits you best.
For brew time, I looked at the time to first perk, which is the amount of time it takes for the water to start boiling.
At a 3-cup capacity, or 18 ounces, it took the Farberware Percolator 5 minutes for the water to boil.
These are estimates and can change depending on different factors like the temperature of your water, the surrounding temperature, the amount of heat you use, and stuff like that. I used tap water at room temperature, and brought it to a boil on medium heat.
After the water started boiling, I let the coffee percolate for about 7 minutes on medium-low heat.
This Farberware Yosemite Stainless Steel Percolator is marketed as an 8-cup coffee percolator, which I found to be pretty accurate if each cup is 6 ounces. When I filled it with 48 ounces of water, it was just slightly below the hole of the spout.
When I tried brewing just 1 cup of coffee, or 6 ounces, here’s what my “brew” looked like. Just water with some grounds.
This is because there wasn’t enough water to go up the stem and spread over the grounds. My 11 grams of coffee grounds were hardly used.
When I tried brewing 2 cups of coffee, or 12 ounces, the brew looked and tasted diluted.
When I brewed 3 cups of coffee, or 18 ounces, the Farberware Percolator works perfectly and brews a real tasty coffee.
Farberware actually recommends having the percolator at least half full, which is about 4 cups, but I found that 3 cups was fine for me. So, minimum capacity for the Farberware Percolator is about 3 or 4 cups, and maximum capacity is 8 cups.
As for the filter basket, when I filled it to the brim, maximum capacity is about 93 grams, or 3.3 ounces of coarse coffee grounds. I felt that it’s enough for the maximum of 8 cups of coffee.
The Farberware Percolator has 3 markings on the outside of the coffee pot. They’re just behind the handle, so a bit of a weird placement.
From the inside, you can see the markings clearly when there’s a good amount of light at the right angle. But when I shift the Farberware coffee pot slowly, the markings get harder to see from other angles. The bottom marking, which says 4 cups, measures about 28 ounces. The middle marking, which says 6 cups, measures about 40 ounces. And the top marking, which says 8 cups, measures about 52 ounces, and is also the water level just touching the bottom of the spout hole.
The handle of the Farberware Percolator is nicely sized and comfortable to hold. It’s not the most heat-resistant though, so this part nearer the pot gets warm, sometimes even hot.
But the rest of the handle is okay on medium heat. Farberware actually says that their handles may get hot, and to use potholders, so yeah, not the most heat resistant.
The Farberware Percolator comes with a transparent perking knob, so you can tell when the water starts boiling, and also the color of your coffee.
The lid of the Farberware Percolator has 3 small protrusions on the side, which makes it fit tightly on the coffee pot, so I did not have to hold the lid down when pouring out the coffee. When I first got this Farberware Percolator, it was really quite a tight fit, but it got looser over time.
And lastly, because I used a coarse grind, only a very minimal amount of grounds got into my last cup of coffee. One great thing about the Farberware Percolator is that there’s a spring underneath the filter basket that presses the basket against the lid when closed. This prevents grounds from overflowing out of the filter basket and getting into your coffee. If you find grinds in your coffee though, maybe you use a finer grind or something, you can either wet the filter basket or use coffee filter paper to line the basket.
To clean up, just toss the grounds and run water through all the components of the Farberware Percolator. They can be taken apart easily for a good washing. I found that percolating water is more effective at getting rid of the coffee bean oils. It’s also mostly dishwasher safe except for the perking knob and the spring.
One thing to note here is that the lip of the Farberware Percolator is rolled inwards. After washing, when I placed the coffee pot upside down, water gets trapped in the lip.
So, I usually drain out as much water as possible through the spout; the hole’s a little bit small, but it works okay. After, there’s only a few small drops of water left in the pot, so I just use a towel to dry it, or if I’m feeling lazy, I just let it air dry. I know a lot of people did not like this feature, but for me personally, it’s not really a big issue.
The Farberware coffee pot and lid are made of stainless steel. The outside has a mirror finish, the finish on the inside is good too, and I don’t see much staining after the past few weeks of use.
The stem (pause), filter basket (pause), and spreader are made of the same stainless steel as the pot, and they’re pretty sturdy. When the lid is closed, the percolator sits firmly inside the pot and makes absolutely no sound even when I shake it.
The perking knob is made of glass, but it’s not that thick, with a less than 2mm thickness. It’s easy to attach and detach it from the lid though. There’s this plastic ring to keep the knob in place, you can’t screw the perking knob in tightly without this ring, but I don’t think the plastic comes into contact with the hot coffee at all. My glass knob has been pretty user-friendly and it’s never loose when I use it.
The handle is made of hard plastic, and is attached firmly to the pot with 4 welds on the inside. I also haven’t had any issues of the handle becoming loose, though there’s this screw on the outside, and instructions say to use a screwdriver to tighten this if the handle gets loose.
Ideally, I would like to have the base of my percolator as one solid piece of steel, but the Farberware Percolator seems to have 2 pieces of steel welded together. I never had any issues with leaking though.
After a couple months of using this, the lid of my Farberware Percolator has become less of a tight fit, but still works great. I also did not notice any rust, the glass perking knob is still in one piece, and the handle is still firmly attached to the pot.
As for cons, I found that the handle can get quite hot when using high heat or larger flames. Also, I wish the glass knob could be thicker, which would increase its lifespan and durability.
I was actually blown away by how much value I was getting with this percolator. For the size, it’s one of my least expensive percolators, and is by far, the least expensive stainless steel percolator that I have.
But even though it’s not expensive, the build and finish is of good quality, it’s extremely user-friendly, and I could brew anywhere between 3 to 8 cups of coffee. In fact, my Farberware Percolator gives me the most versatility in terms of capacity, compared to the rest of my percolators. I placed the Farberware Classic Yosemite 8-Cup Percolator on a table outdoors.
And that’s not all. This inexpensive, high-quality percolator even comes with a lifetime warranty from Farberware, which is incredible. As far as value for money is concerned, this Farberware Percolator beats all my other percolators hands down.
How does the Farberware Percolator stack up against other popular camping percolators in other aspects though? To find out, you can click here: The 9 Best Camping Percolators: I Bought & Tested Them All (complete with YouTube video). This is a picture of me looking at the 9 best camping percolators from left to right: Coleman 12-Cup Stainless Steel Percolator, Farberware Yosemite 8-Cup Percolator, Stansport Enamel 8-Cup Percolator, GSI Outdoors 8-Cup Enamelware Percolator, Primula Today 9-Cup Aluminum Percolator, Stanley Camp 6-Cup Percolator, Coletti Bozeman 9-Cup Camping Percolator, Bialetti 6-Cup Moka Express, and the GSI Outdoors Glacier 3-Cup Percolator.
After filling the pot with the amount of water you desire, the stem, spring, coffee-filled basket, and its cover all stack inside. Clip the lid on, place on a burner, and keep an eye for when water starts bubbling up into the glass knob on top.
These are estimates and can change depending on different factors like the temperature of your water, the surrounding temperature, the amount of heat you use, and stuff like that. I used tap water at room temperature, and brought it to a boil on medium heat.
The handle is made of hard plastic, and is attached firmly to the pot with 4 welds on the inside. I also haven’t had any issues of the handle becoming loose, though there’s this screw on the outside, and instructions say to use a screwdriver to tighten this if the handle gets loose.
The Farberware Percolator comes with a transparent perking knob, so you can tell when the water starts boiling, and also the color of your coffee.
Farberware actually recommends having the percolator at least half full, which is about 4 cups, but I found that 3 cups was fine for me. So, minimum capacity for the Farberware Percolator is about 3 or 4 cups, and maximum capacity is 8 cups.
This Farberware Yosemite Stainless Steel Percolator is marketed as an 8-cup coffee percolator, which I found to be pretty accurate if each cup is 6 ounces. When I filled it with 48 ounces of water, it was just slightly below the hole of the spout.
Making Coffee With a Farberware Stainless Steel Yosemite Coffee Percolator
FAQ
Do you put hot or cold water in a percolator?
How do I know when my percolator is done?
How long do you let coffee perk in a percolator?
What is the best percolator for Yosemite?
The Farberware Classic Yosemite 8-Cup Percolator provided great value for money with its good quality stainless steel coffee pot and inner percolator. It’s also very user-friendly, I could brew anywhere between 3-8 cups of coffee with it, and it also comes with a lifetime warranty.
How much water is in a Farberware Yosemite percolator?
This Farberware Yosemite Stainless Steel Percolator is marketed as an 8-cup coffee percolator, which I found to be pretty accurate if each cup is 6 ounces. When I filled it with 48 ounces of water, it was just slightly below the hole of the spout. Here’s the water level below the spout hole of the Farberware Percolator (48 ounces).
How much does a Farberware Yosemite percolator cost?
The Farberware Yosemite 8-Cup Coffee Percolator is a large stovetop percolator that can boil enough coffee for a pretty large crew — up to 40-ounces at a time — and it will only set you back $25. There’s even a larger 12-cup version available!
How do you use a coffee percolator?
For electric percolators, plug the unit in and heat the water following the manufacturer’s directions. Step 4: Perk! Percolate the coffee for 7-10 minutes, depending on the desired strength. Remove the percolator from the heat. Using oven mitts, remove the coffee grounds basket and discard the spent grounds.