Hey there kitchen warriors! Ever thought about turning that boring ol’ garlic into somethin’ downright magical? Well, I’m here to spill the beans on how to pickle garlic in apple cider vinegar. This ain’t just a preservation trick—it’s a game-changer for your meals addin’ a tangy, mellow kick that’ll have everyone askin’ for seconds. Whether you’re a newbie or a seasoned chef, I’ve gotcha covered with a simple, step-by-step guide to make your own jar of this zesty goodness. Let’s dive right in and get those taste buds dancin’!
Why Pickle Garlic? The Quick Lowdown
Before we get our hands dirty let’s chat about why you’d wanna pickle garlic in the first place. Trust me it’s worth the lil’ effort
- Flavor Transformation: Raw garlic can be sharp and punchy, but pickling mellows it out into a tangy, slightly sweet delight that’s perfect for snacks or cookin’.
- Longer Shelf Life: Got a surplus of garlic? Picklin’ keeps it good for months, so no more wastin’ those bulbs.
- Health Perks: Garlic’s got stuff like allicin for fightin’ off bugs (the germ kind, not the crawly ones), and apple cider vinegar brings gut-friendly vibes. Win-win!
- Versatility: Use it in salads, sandwiches, or straight outta the jar. It’s a secret weapon for flavor.
Alright, now that you’re hyped, let’s get to the meat of it—how we at [Your Blog Name] turn garlic into pure gold.
The Basic Recipe: Pickling Garlic in Apple Cider Vinegar
I’m gonna lay out the simplest way to do this. No fancy equipment needed, just some patience and a love for good eats. Here’s how we roll:
What You’ll Need
- Fresh Garlic: About 5-6 bulbs or 1 cup of cloves. Go for firm, unblemished ones—fresh is best.
- Apple Cider Vinegar: 1 cup. Raw, organic if you’re feelin’ fancy, but any with 5% acidity works.
- Water: ½ to 1 cup, filtered if possible, to dilute the vinegar a tad.
- Salt: 1 tablespoon, pickling or kosher salt for that clean brine.
- Sugar (Optional): 1-2 tablespoons if you want a touch of sweetness to balance the tang.
- Herbs & Spices (Optional): Think peppercorns, red pepper flakes, or a sprig of rosemary. Get creative!
- Glass Jars: Pint-sized, sterilized. Old mayo jars work if they’re clean.
- Saucepan: Non-reactive, like stainless steel. No aluminum, y’all—vinegar don’t play nice with it.
Step-by-Step Process to Pickle Like a Pro
- Prep Your Garlic: Peel them cloves. Yeah, it’s a pain, but soak ‘em in hot water for 30 minutes to loosen the skins. You can leave ‘em whole for max health benefits or puncture lightly with a knife for quicker flavor soakin’.
- Make the Brine: In your saucepan, mix the apple cider vinegar, water, salt, and sugar if usin’. Bring it to a boil, stirrin’ till everything dissolves. This hot liquid is gonna be your garlic’s new best friend.
- Sterilize Them Jars: Wash your jars and lids with hot, soapy water. For extra safety, boil ‘em in water for 10 minutes. Don’t skip this if you’re plannin’ long-term storage.
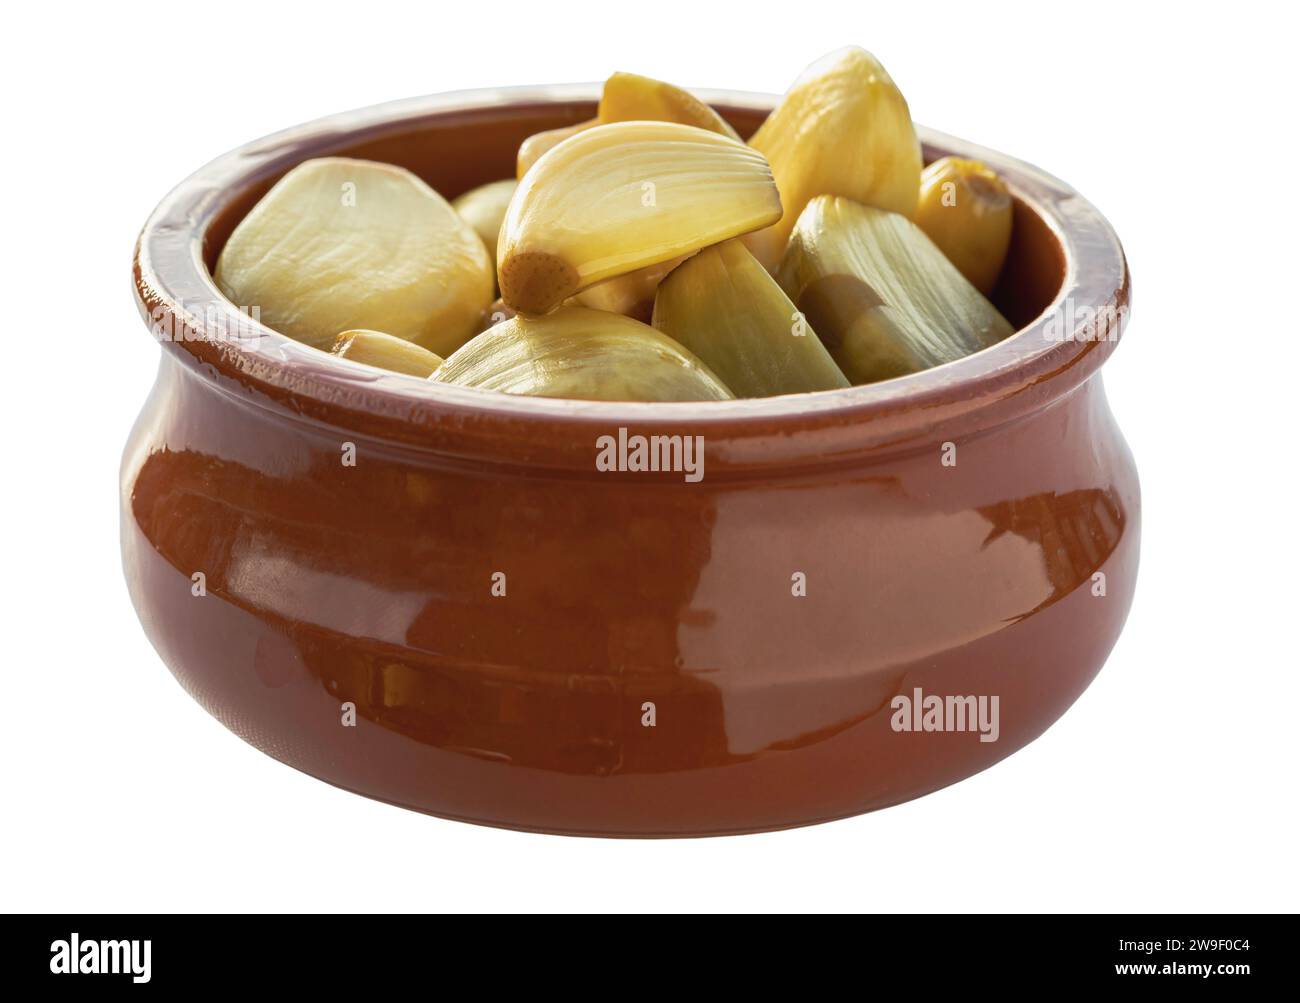
- Pack It Up: Stuff the peeled garlic into the jars, leavin’ about ½ inch of space at the top. Toss in any herbs or spices now if you’re jazzin’ it up.
- Pour the Brine: Carefully pour that hot brine over the garlic till it’s fully submerged. Still keep that ½ inch headspace. Tap the jar gently to release any sneaky air bubbles.
- Seal and Cool: Pop the lids on tight. If you’re doin’ a boiling water bath (more on that below), process now. Otherwise, let ‘em cool to room temp before storin’ in the fridge.
- Wait It Out: Let the jars sit for at least 2 weeks—longer if you can stand it. The flavors need time to meld and get all cozy. Trust me, patience pays off here.
Quick Tip on Storage
If you processed your jars in a boiling water bath (submerge in boilin’ water for 10 minutes), you can store ‘em in a cool, dark place for up to a year. No bath? Keep ‘em in the fridge and eat within 3-6 months. Always check for weird smells or mold before divin’ in.
There ya go, the basic blueprint! But wait, there’s more to this pickling party. Let’s dig into why apple cider vinegar is the star and how to tweak this recipe to your likin’
Why Apple Cider Vinegar? The Secret Sauce
You might be wonderin’, why not just use regular white vinegar? Well, lemme tell ya, apple cider vinegar (or ACV as I call it) brings somethin’ special to the table. It’s got a fruity, slightly sweet tang that pairs perfect with garlic, unlike the harsh bite of white vinegar. Plus, it’s often packed with good-for-ya stuff like enzymes and probiotics, especially if you grab the unfiltered kind with the “mother” in it. That’s the cloudy stuff that’s basically health gold.
When pickin’ your ACV, go for at least 5% acidity to make sure it preserves right. Organic or not, that’s up to you, but I like knowin’ my vinegar’s from apples grown without nasty chemicals. It just feels… cleaner, ya know?
Pickin’ the Right Garlic: Don’t Skimp Here
Not all garlic is created equal, folks. Here’s what to look for when you’re at the market or pullin’ from your garden:
- Freshness First: Grab bulbs that are firm with tight skins. Soft spots or sprouts? Nope, pass on those—they’ll mess with the flavor.
- Type Matters: Hardneck varieties like Porcelain or Rocambole got a bold, spicy kick that’s awesome for pickling. Softneck ones like Silverskin are milder but still tasty.
- Size It Up: Medium cloves are the sweet spot. Too big, and they overpower; too small, and they’re a hassle to peel.
Here’s a lil’ table to help ya choose:
| Garlic Type | Flavor Vibe | Best For |
|---|---|---|
| Hardneck | Strong, Spicy | Pickling, Roasting |
| Softneck | Mild, Sweet | Raw Dishes, Everyday |
| Black Garlic | Sweet, Balsamic | Fancy Spreads, Gourmet |
Stick with fresh, firm stuff, and you’re golden. Oh, and don’t even think about usin’ sprouted garlic—it can turn bitter and weird in the jar.
Customizin’ Your Pickled Garlic: Make It Yours
Now, this is where the fun really starts. The basic recipe is solid, but why not add some flair? Here are some ideas me and my kitchen buddies have tried:
- Herb It Up: Toss in fresh rosemary, thyme, or dill. A sprig or two gives a nice earthy vibe.
- Spice Things Up: Want heat? Add red pepper flakes, sliced jalapeños, or dried chili peppers. I once threw in a habanero—whew, talk about a firecracker!
- Sweet Twist: Swap sugar for honey or maple syrup for a different kinda sweetness. Just a drizzle goes a long way.
- Mix n’ Match: Combine spices like peppercorns or mustard seeds for depth. It’s like a flavor puzzle—experiment till it’s just right.
Don’t be scared to play around. Half the fun is tastin’ your creation and goin’, “Dang, I made that!”
How to Use Your Pickled Garlic: Endless Ideas
Once your garlic’s ready, you ain’t just stuck eatin’ it plain (though it’s darn good that way). Here’s how I sneak it into meals:
- Salad Booster: Chop it up and toss into greens for a zesty punch.
- Sandwich Star: Slice thin and layer on burgers or subs. It’s a game-changer.
- Dip Magic: Blend into hummus or cream cheese for a spread that’s next-level.
- Pasta Pop: Add to sauces or sprinkle on top for extra oomph.
- Charcuterie Champ: Serve on a board with meats and cheeses. Looks fancy, tastes better.
I’ve even tossed it into marinades or pizza toppings. It’s like a secret ingredient nobody sees comin’. What’s your go-to dish to spice up? Try it and lemme know!
Common Hiccups and How to Fix ‘Em
Pickling’s pretty easy, but sometimes stuff goes sideways. Here’s some pitfalls I’ve stumbled into and how to dodge ‘em:
- Garlic Not Submerged: If cloves poke out of the brine, they can spoil. Push ‘em down or add more liquid.
- Cloudy Brine or Funky Smell: That’s a sign somethin’s off. Toss the batch—don’t risk it.
- Blue or Green Garlic: Freaky, right? It’s just a harmless reaction with the vinegar. Still safe to eat, promise.
- Weak Flavor: Didn’t wait long enough. Give it at least 2 weeks, or add more spices next time.
- Jar Didn’t Seal: If you did the water bath and the lid pops when pressed, it ain’t sealed. Fridge it and eat soon.
Oh, and don’t reuse the brine. I tried once, thinkin’ I’d save a buck, and it just wasn’t worth the contamination risk. Fresh batch every time, y’all.
Storage Smarts: Keepin’ It Fresh
How you store your pickled garlic matters a bunch. If you went the boiling water bath route, a cool, dark cupboard is fine for up to a year. No bath? Straight to the fridge, where it’ll last 3-6 months easy. Once opened, always refrigerate and use within a few weeks. And hey, always use a clean fork to fish out cloves—don’t go contaminatin’ your hard work with dirty utensils.
Pro tip: Label your jars with the date. I forgot once and had no clue if a jar was 2 months or 2 years old. Better safe than sorry!
Why You Gotta Try This Now
If you ain’t convinced yet, lemme hit ya with one last push. Pickling garlic in apple cider vinegar isn’t just about makin’ food last—it’s about creatin’ somethin’ unique that’s all yours. Every jar’s a lil’ experiment, a burst of flavor waitin’ to elevate your cookin’. Plus, it’s dead simple. Grab some garlic, some vinegar, and get to it. Your future self will thank ya when you’ve got this tangy treat on hand for any meal.
So, what’re ya waitin’ for? Head to your kitchen, whip up a batch, and share your results with us at [Your Blog Name]. Got a crazy flavor combo or a pickling mishap story? Drop it in the comments—I’m all ears! Let’s keep this foodie adventure rollin’ together. Happy picklin’, fam!
Step 3: Sorting the Garlic

Sort out any wilted or soft cloves of garlic.
You can cut off any bad spots and still use the clove.
You can use cloves that have started to grow however they can turn green from chlorophyll in the growing garlic.
They look a little funkey until the chlorophyll is bleached by the vinegar.
Step 2: Peeling the Garlic


This is an amazingly easy way to peel garlic.
Break up a bunch of garlic and place it in a jar.
Close the lid and shake the jar vigorously until you see the skins coming loose.
Poor it out onto a bowl and separate the cloves from the skins.
Do this until you have 2 pounds or 1 kg of good garlic.
How To Pickle Garlic In White Vinegar For Cheap And Easy! | The Frugal Chef
FAQ
What happens when you mix garlic with apple cider vinegar?
Fermenting or pickling garlic in apple cider vinegar not only preserves but is said to help eliminate most of the complications from eating the garlic raw. It also opens up a whole new world of delicious ways to eat garlic.
Is pickled garlic in vinegar good for you?
Pickled garlic is good for you, and is often praised for retaining many of the health benefits of fresh garlic, such as its antioxidant properties, potential to improve heart health, and its antimicrobial and anti-inflammatory effects.
How long does garlic last in apple cider vinegar?
Pour apple cider vinegar into the jar until garlic is fully submerged under the glass weight. Add a tight fitting lid and store in the refrigerator up to 6 months. Use raw garlic in homemade condiments, marinades, salad dressing and home remedies.
How to preserve garlic in vinegar for a long time?
I filled 10 half pint jars with garlic. Once the vinegar has boiled, pour it over the garlic and screw the lids on tight. Let the jars come to room temperature on the counter overnight and then store in the refrigerator. This will keep in the refrigerator for up to a year.
How much vinegar do you need to make pickled garlic?
Most pickled garlic recipes use a good bit more than 50% vinegar since garlic has a pretty intense flavor. Extra vinegar helps balance out the pickles so that they have enough acidity to stand up to the pungent flavor of whole garlic cloves. In each of these pickled garlic recipes, you’ll need enough peeled garlic to fill the jars.
How do you make pickled garlic?
Making pickled garlic isn’t all that different from any other homemade pickle, and there are a lot of possible variations. The main thing is that the pickling brine needs to be at least 50% vinegar at 5% acidity. The vinegar is what’s responsible for preservation in pickled garlic recipes, and just about all the other ingredients are flexible.
How do you make apple cider vinegar pickling jars?
To make apple cider vinegar pickling brine, set a medium saucepan on high heat, pour in the apple cider vinegar and pickling salt, and bring to a boil.
How do you pickle garlic in a jar?
To pickle garlic in a jar, first boil the garlic cloves in brine for 5 minutes to make them very mellow. Then, ladle the cloves and brine into the jars. This recipe makes about four 8-ounce jars of pickled garlic.
What kind of vinegar should I use for pickling?
Vinegars: Distilled white vinegar always works well for pickling, but apple cider vinegar is a good choice if you’d like a bit more flavor. I like to use a mix of 1/2 a cup each. Spicy: Add thin slices of hot chile peppers like jalapeños or serranos to the jar before adding the hot brine.
How do I choose the best garlic for pickling?
Before you start your pickling process, ensure that you have selected fresh quality heads of garlic that are free from bruising or soft spots. You also want to select firm cloves that are uniform in size since this will make them easier to put into jars uniformly without any gaps forming between them during the pickling process.