Cook the apples with the water in a covered pot over medium-low heat for about 1 hour, or until all liquid has been absorbed. Stir occasionally. Add the sugar, butter and cinnamon, mixing well; set aside to cool. Unfold the pie crust and break into 8 equal pieces like pie slices. Place 1 heaping tablespoon of fruit on each round of dough, leaving a 1/2-inch border all around. Dip your finger in water and moisten the edges of the crust, then place a second round on top of the filling and press the edges of the crust, then place a second round on top of the filling and press the edges to seal. Dip the tines of a dinner fork in flour and crimp the edges to ensure a proper seal.
Pour the oil into a cast-iron skillet to a depth of a little less than 1/2 inch. (This would be 11/2 cups oil in a 10-inch skillet.) Heat over medium-high heat. When the oil is hot, place 3 to 4 pies in the skillet and cook for about 2 minutes on each side, or until golden brown. Drain on paper towels. Repeat until all the pies are cooked, or wrap and freeze some of the uncooked pies for another day.
Hey there fellow food lovers! If you’re lookin’ to whip up somethin’ that’ll take you straight back to grandma’s kitchen you’ve landed in the right spot. Today, I’m spillin’ the beans on how to cook dried apples for fried pies that’ll make your taste buds dance. These little handheld pockets of joy ain’t just dessert—they’re a hug in food form, packed with sweet, spiced apple goodness and a crispy, golden crust. So, grab your apron, and let’s get cookin’ with some old-school vibes!
I remember the first time I bit into one of these bad boys. The smell of cinnamon hittin’ the air, the sizzlin’ sound of dough hittin’ hot oil—it’s pure magic. And the star of the show? Dried apples, turned into a lush, gooey filling that’s just right for stuffin’ into pies. If you’ve never used dried apples before, don’t sweat it. I’m gonna walk ya through every step, from rehydratin’ those lil’ suckers to fryin’ up a batch of pies that’ll have everyone beggin’ for more.
Why Dried Apples Are the Bomb for Fried Pies
Before we dive into the nitty-gritty, let’s chat about why dried apples are where it’s at for fried pies. Back in the day, folks didn’t have fridges or fancy storage. They dried their apples to keep ‘em good through winter, and lemme tell ya, it’s a game-changer. Here’s why we love ‘em:
- Long-Lastin’ Goodness: Dried apples don’t spoil quick, so you can stash ‘em in your pantry for months.
- Flavor Punch: Dehydratin’ concentrates the apple’s natural sweetness. Once you cook ‘em down, it’s like apple pie on steroids.
- Perfect Texture: When done right, they turn into a thick, jammy filling that holds up inside a hot, fried crust without turnin’ to mush.
- Nostalgia Factor: There’s somethin’ ‘bout usin’ dried fruit that just screams old-timey comfort food, don’t ya think?
Now, usin’ dried apples ain’t the same as fresh ones. Fresh apples got a lotta water, so they cook down different. Dried ones need some lovin’ to bring ‘em back to life, and that’s what we’re gonna focus on. Let’s get to the heart of this—how to cook those dried apples so they’re pie-ready.
Step 1: Gettin’ Your Dried Apples Ready to Roll
Alright let’s start with the basics. You’ve got a bag of dried apples sittin’ there lookin’ all shriveled and sad. Don’t worry, we’re gonna turn ‘em into somethin’ amazing. Here’s how to prep ‘em for fried pies, step by step.
What You’ll Need
| Ingredient | Amount | Notes |
|---|---|---|
| Dried Apples | 2 cups | About two 4.5 oz packages works |
| Water | 3 cups or more | Enough to cover the apples fully |
The Process
- Grab a Pot: Get yourself a medium-sized pot or saucepan. Nothin’ fancy, just somethin’ that can hold the apples and water.
- Add the Apples and Water: Toss in your 2 cups of dried apples, then pour in about 3 cups of water. Make sure them apples are fully submerged. If they ain’t, add a splash more.
- Simmer Time: Put the pot on medium heat, cover it with a lid, and let it simmer. You’re lookin’ at about 30 to 40 minutes for most dried apples to soak up that water and get soft. Stir every now and then so they don’t stick to the bottom.
- Check the Texture: After ‘bout half an hour, peek in. The apples should be plump and tender, not hard. If they still feel tough, keep simmerin’ and add a bit more water if it’s all gone. Don’t rush this—patience is key!
- Drain and Cool: Once they’re soft, drain off any extra water. Let ‘em cool down a bit, then give ‘em a rough chop if they’re in big pieces. You want a nice, chunky texture for pie fillin’.
Pro Tip from Me
Don’t overcook ‘em to the point they turn into applesauce You want some bite left so your pie filling ain’t just a watery mess I’ve made that mistake before, and trust me, it’s a bummer when your pie leaks everywhere.
Step 2: Turnin’ Those Apples into Pie Fillin’ Heaven
Now that your apples are rehydrated, it’s time to jazz ‘em up. This is where the magic happens—addin’ sugar, spices, and a lil’ butter to make a filling that’s sweet, spiced, and downright irresistible.
What You’ll Need
| Ingredient | Amount | Notes |
|---|---|---|
| Rehydrated Apples | All from above | Should be about 2 cups worth |
| White Sugar | 3/4 cup | Adjust if you like it less sweet |
| Brown Sugar | 1/4 cup | For that caramel-y depth |
| Butter | 3 tablespoons | Unsalted or margarine works |
| Ground Cinnamon | 1/2 teaspoon | Or more if you’re a cinnamon nut |
| Ground Nutmeg | 1/2 teaspoon | Adds a warm, cozy kick |
| Salt | 1/2 teaspoon | Just a pinch to balance sweetness |
The Process
- Back to the Pot: Throw your rehydrated apples back into the pot. No need to clean it unless it’s a mess.
- Sweeten the Deal: Add in the white sugar, brown sugar, cinnamon, nutmeg, and salt. Stir it all up so the apples get coated nice and even.
- Butter It Up: Toss in the butter and turn the heat back to medium. Let it melt and mix with the sugars and spices.
- Cook and Mash: Keep cookin’ for another 5 to 10 minutes, stirrin’ often. Mash the apples a bit with your spoon as you go. You’re aimin’ for a thick, pie-fillin’ consistency—not too smooth, not too chunky.
- Taste Test: Give it a lil’ taste. Need more sugar? A dash more cinnamon? Adjust now before it cools. Then set it aside to cool completely. Hot fillin’ will mess up your dough later, so don’t skip this.
My Two Cents
I’ve found that the brown sugar gives it a deeper, almost molasses-like flavor that pairs awesome with the apples. And don’t skimp on the spices—cinnamon and nutmeg are what make it smell like fall in your kitchen. If you’re feelin’ wild, toss in a pinch of cloves or allspice for an extra zing.
Step 3: Makin’ the Dough for Your Fried Pies
Now, I know the main gig here is cookin’ dried apples, but you can’t have fried pies without the dough, right? I’m gonna give ya a quick rundown on makin’ a simple, sturdy crust that’ll hold that apple fillin’ without bustin’ open in the fryer. This ain’t no flaky pie crust—it’s more biscuit-like, built to handle the heat.
What You’ll Need
| Ingredient | Amount | Notes |
|---|---|---|
| All-Purpose Flour | 4 cups | Sifted if you’re feelin’ fancy |
| Shortening | 1 cup | Or butter if that’s your jam |
| Salt | 1 teaspoon | For a lil’ flavor boost |
| Water | 1 cup, more or less | Till the dough comes together |
The Process
- Mix the Dry Stuff: In a big ol’ bowl, mix your flour and salt. Give it a quick stir.
- Cut in Shortenin’: Add the shortening and cut it into the flour with a pastry cutter or your fingers till it looks like coarse crumbs. Don’t overdo it—little chunks are fine.
- Add Water: Pour in water, a lil’ at a time, mixin’ till a dough forms. You want it soft but not sticky.
- Roll It Out: On a floured counter, roll the dough to about 1/4 inch thick. Cut into circles—bout 7 inches across if you want big pies, smaller if you’re makin’ minis. I use a bowl as a cutter; works like a charm.
- Fill and Seal: Spoon about 2 tablespoons of your cooled apple fillin’ into the center of each circle. Wet the edges with a dab of water, fold over, and press with a fork to seal ‘em tight.
Heads Up
If your dough tears easy, you might’ve rolled it too thin or not added enough water. Don’t stress—just patch it up and keep goin’. Ain’t nobody judgin’ your pie’s looks once they taste it!
Step 4: Fryin’ Up Them Pies
We’re in the home stretch now! With your apples cooked and your pies stuffed, it’s time to fry ‘em up to golden perfection. This part’s quick, so stay sharp.
What You’ll Need
| Ingredient | Amount | Notes |
|---|---|---|
| Oil | Enough for 1/2 inch deep | Canola or vegetable works great |
The Process
- Heat the Oil: In a big skillet, pour in oil till it’s about half an inch deep. Heat it to around 370°F if you’ve got a thermometer. No thermometer? Drop a tiny bit of dough in—if it sizzles right away, you’re good.
- Fry with Care: Lower the pies in gently—I use two spatulas to avoid splashin’. Fry a couple at a time so you don’t crowd the pan. Cook till golden brown on one side (bout 2-3 minutes), then flip and do the other side.
- Drain ‘Em: Pull the pies out with a slotted spoon and let ‘em drain on paper towels. Sprinkle with powdered sugar while they’re still warm for that extra sweetness.
- Dig In: Let ‘em cool just enough so you don’t burn your tongue, then bite in and enjoy that crispy, apple-y goodness!
Watch Out
Hot oil ain’t no joke. Keep kids and pets outta the kitchen while you’re fryin’, and don’t let the oil get too hot or it’ll burn your pies before they cook through.
Why This Method Rocks for Dried Apples
Lemme tell ya why cookin’ dried apples this way is the bee’s knees. Simmerin’ ‘em slow brings back their moisture without losin’ that intense apple flavor. Addin’ sugar and spices during the second cook means every bite’s packed with warmth and sweetness. I’ve tried shortcuttin’ it by just soakin’ without simmerin’, and it just don’t cut it—the apples stay chewy and tough. This two-step cookin’ is the secret to a fillin’ that’s soft but still got some texture.
Plus, usin’ dried apples over fresh means you ain’t gotta peel or chop a million apples. It’s less mess, and you can make these pies any time of year, not just when apples are in season. I keep a stash of dried apples in my cupboard just for days when I’m cravin’ a taste of home.
Troubleshootin’ Your Apple Fillin’
Sometimes, things don’t go perfect, and that’s okay. Here’s how to fix common hiccups when cookin’ dried apples for pies:
- Too Dry After Simmerin’: If your apples ain’t soft yet, add more water and keep cookin’. Some batches are drier than others, dependin’ on how they were processed.
- Too Mushy: If they’re fallin’ apart too much, you’ve cooked ‘em too long. Next time, cut the simmer time by 5-10 minutes and check early.
- Not Sweet Enough: Easy fix—stir in an extra spoonful of sugar while they’re still hot. Taste as you go till it’s right.
- Too Watery for Pies: If the fillin’s too wet, cook it down a bit more on low heat to thicken. Wet fillin’ will make your dough soggy, and nobody wants that.
Variations to Spice Things Up
Wanna switch it up? Here are a few twists on the classic apple fillin’ that I’ve played with over the years:
- Fall Flavor Blast: Toss in a handful of chopped dried cranberries or raisins with the apples while they cook. Add a bit of orange zest too—it’s like autumn in a pie.
- Boozy Kick: Swap out a cup of water for apple cider or even a splash of bourbon when rehydratin’. It gives a grown-up twist, but don’t overdo it or it’ll get too liquidy.
- Nutty Crunch: Mix in some chopped walnuts or pecans after the fillin’ cools. It adds a lil’ texture that’s mighty fine with the soft apples.
Storin’ and Freezin’ Your Pies
Made too many? No problemo. Here’s how to keep ‘em:
- On the Counter: Fried pies stay good for up to 3 days in an airtight container at room temp. They’re best fresh, though, so eat up quick!
- Freezin’ Uncooked Pies: Assemble your pies but don’t fry ‘em. Lay ‘em on a tray in the freezer for an hour, then pop into a freezer bag. They’ll keep for 3 months. Fry or bake straight from frozen when you’re ready—just add a couple extra minutes to cookin’ time.
- Freezin’ Cooked Pies: I don’t love this as much ‘cause the crust can get soggy, but you can freeze cooked pies too. Reheat in the oven to crisp ‘em back up.
Why Fried Pies Are Worth the Effort
I ain’t gonna lie—makin’ fried pies takes a bit of time. But man, is it worth it. There’s somethin’ special ‘bout bitin’ into a warm, crispy pie that you made with your own two hands. The dried apple fillin’ is sweet and hearty, the crust is golden and flaky, and the whole thing just screams comfort. It’s perfect for packin’ in a lunchbox, sharin’ at a potluck, or just sneakin’ as a midnight snack.
I’ve been makin’ these pies for years, and every time, it feels like I’m keepin’ a lil’ piece of history alive. Back before we had all these modern conveniences, folks relied on dried fruit to get through tough times, and turnin’ that into somethin’ as delicious as a fried pie is pure genius. So next time you’re hankerin’ for somethin’ sweet, skip the store-bought junk and try this out.
Pairin’ Your Pies with Other Goodies
Wonderin’ what to serve with these pies? Here’s a few ideas from my kitchen to yours:
- Whipped Cream or Ice Cream: A dollop of whipped cream or a scoop of vanilla ice cream on the side takes it to dessert heaven. The cold with the warm pie is just chef’s kiss.
- Hot Coffee or Cider: Nothin’ beats sippin’ a steamy mug of coffee or spiced apple cider while munchin’ on a pie. It’s cozy central.
- Breakfast Twist: Got leftover fillin’? Spread it on toast or biscuits for a quick mornin’ treat. I’ve done this more times than I can count, and it’s always a hit.
Final Thoughts from Yours Truly
So there ya have it, folks—a full-on guide to cookin’ dried apples for fried pies that’ll knock your socks off. From simmerin’ those apples back to life, to spicin’ ‘em up just right, to fryin’ up a batch of handheld heaven, I’ve laid it all out for ya. I hope you give this reciepe a try and feel that same warm, fuzzy feelin’ I get every time I make ‘em.
Got questions? Hit me up in the comments or shoot me a message. I’m always down to chat food, especially when it’s somethin’ as soul-soothin’ as fried pies. And if you’ve got your own tricks for cookin’ dried apples, I’m all ears—let’s swap stories! Now go get that skillet hot and make some memories in your kitchen. Happy fryin’!
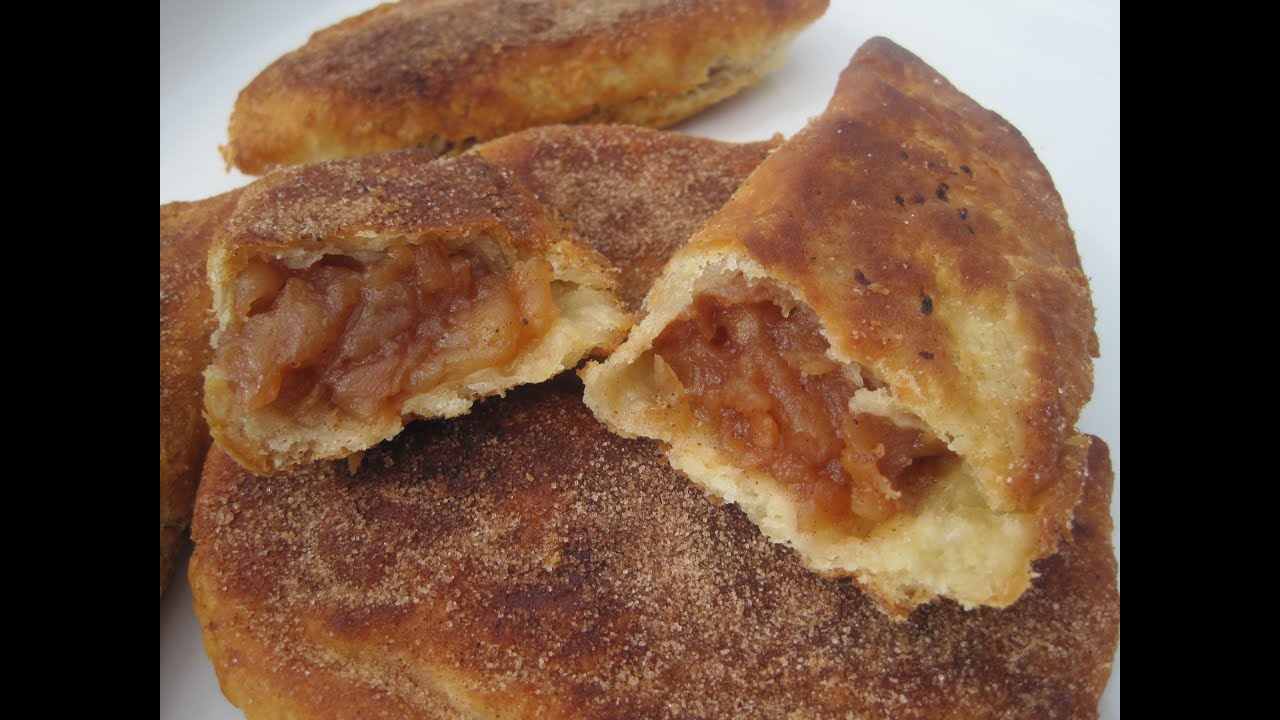
Rehydrating dried apples for Fried Apple Pies
FAQ
How to rehydrate apples for pie?
Although the most popular method for reconstitution is to heat the evaporated apples with 3-5 parts water, apples may be slowly reconstituted using a cold …
How to soften hard apples for pie?
Stir in apples, sugar & water. Cover and cook stirring occasionally for 4-6 minutes or until very slightly softened. In a small dish combine cornstarch and 2 tablespoons water. Add to the pan while stirring and continue to cook until apples are soft (not mushy) and filling is thickened.
What are the best apples for fried pies?
Go-to favorites are Piñata® or Honeycrisp apples because they both stay crisp and sweet even after baking.
How to make dried apples in the oven?
Arrange the apple slices on baking sheets in a single layer. Bake for 1 hour, flip the apple slices, and bake for another hour.Mar 2, 2021