Hey there, pie lovers! Ever got a hankering for a warm, gooey apple pie but ain’t got the time to peel and core a buncha apples? Well, I’ve got your back with this guide on how long to bake apple pie with canned filling. Spoiler alert: it usually takes about 30-45 minutes at 375°F (190°C) to get that crust golden and the filling bubblin’ just right. But there’s more to it than settin’ a timer, and I’m gonna walk ya through every step, tip, and trick to make sure your pie is the talk of the table. So, grab a coffee, and let’s get bakin’!
Why Canned Filling is a Game-Changer
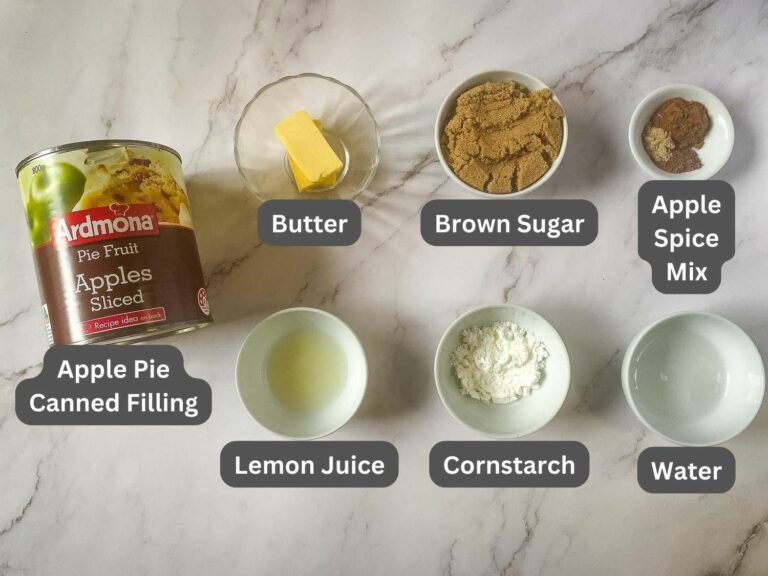
Before we dive into the nitty-gritty, let’s chat about why canned apple pie filling is the bomb. I mean who’s got hours to spend slicin’ apples when you can pop open a can and get the same cozy vibes? Here’s why we love it at our house
- Saves Time: No peelin’, no corin’, no mess. It’s ready to roll straight from the can.
- Already Spiced: Most canned fillings come pre-sweetened and spiced, so you don’t gotta guess how much cinnamon to toss in.
- Consistent Results: You know what you’re gettin’—no weird undercooked apple chunks to ruin your day.
Now let’s get to the main event—how long you gotta bake this bad boy to perfection.
How Long to Bake Apple Pie with Canned Filling: The Basics
If you’re lookin’ for a quick answer, here it is bake your apple pie with canned filling at 375°F (190°C) for 30-45 minutes The goal ain’t to cook the filling—heck, it’s already cooked—but to get that crust nice and golden while heatin’ the filling through. You’ll know it’s done when the crust looks like somethin’ outta a bakery window and the filling’s bubblin’ up like a happy lil’ volcano
But hold up, it ain’t always that simple. A few things can mess with your baking time, and I’m gonna break ‘em down so you don’t end up with a soggy mess or a burnt disaster.
Factors That Affect Baking Time
Not all pies are created equal, ya know? Here’s what can change how long your pie needs in the oven:
- Type of Crust: Got a single crust (just the bottom)? You’re likely closer to 30-35 minutes. Rockin’ a double crust (top and bottom)? Might edge toward 40-45 minutes since there’s more dough to cook through.
- Crust Thickness: If you rolled your dough super thick, it’s gonna take longer than a thin, store-bought one. Thicker crusts can be flakier, but they need patience.
- Oven Quirks: Some ovens run hot, some run cold. If yours ain’t accurate, your pie might bake faster or slower. I always say, get yourself a cheap oven thermometer to double-check.
- Pie Dish Material: Glass dishes hold heat longer and might speed things up a tad. Metal dishes, ‘specially dark ones, brown crusts quicker. Know your dish, folks!
- Filling Type: Some canned fillings got more sugar, which can make things caramelize faster. Might need to watch the edges to avoid burnin’.
Here’s a quick table to keep it straight:
| Factor | Impact on Baking Time |
|---|---|
| Single vs. Double Crust | Single: 30-35 mins, Double: 40-45 mins |
| Thick Crust | Adds 5-10 mins |
| Oven Inaccuracy | Can vary by 5-15 mins |
| Glass Dish | Slightly faster baking |
| Dark Metal Dish | Browns crust quicker |
Step-by-Step Guide to Baking Your Apple Pie
Alright, let’s get down to business. I’m assumin’ you’ve got your canned filling and a pie crust ready—whether it’s store-bought or homemade (props if it’s the latter!). Here’s how we do it at my place:
- Preheat That Oven: Crank it to 375°F (190°C). Don’t skip this—preheatin’ makes sure your crust don’t get soggy. Give it at least 10-15 minutes to get hot.
- Prep Your Pie Dish: Grease a 9-inch pie dish lightly. Roll out your bottom crust and press it into the dish, makin’ sure it hugs the sides nice and tight.
- Add the Filling: Dump that canned apple pie filling right in. Spread it out even-like so no spot’s too thick or thin. If you’re feelin’ fancy, mound it a bit in the center—it’ll settle as it bakes.
- Top It Off (If Double Crust): Roll out a second crust if you’re goin’ for that classic look. Lay it over the filling, trim the edges, and crimp ‘em with your fingers or a fork to seal. Cut a few slits on top for steam to escape—don’t wanna blow the lid off!
- Brush for Beauty: Beat an egg (or use a splash of milk if you ain’t got one) and brush it over the crust edges or top. This gives it that golden shine we all drool over.
- Bake It: Pop it in the oven for 30-45 minutes. Start checkin’ at 30 minutes—look for a golden crust and bubbly filling. If the edges brown too quick, tent ‘em with foil.
- Cool Down: Take it out and let it cool for at least 2-3 hours. I know, it’s torture waitin’, but if you cut it hot, the filling’ll ooze everywhere. Trust me, I’ve learned the hard way.
Tips to Nail That Perfect Pie Every Time
I’ve burned a crust or two in my day, so lemme share some hard-earned wisdom to keep your pie game strong:
- Don’t Skip Preheatin’: A cold oven is a soggy crust’s best friend. Get it hot before the pie goes in.
- Avoid a Soggy Bottom: Blind bake the bottom crust for 5-10 minutes before addin’ filling if you got time. Or place the pie on the lowest oven rack for better heat.
- Check for Doneness: Crust golden? Filling bubblin’? Stick a toothpick in—if it’s hot to the touch, you’re good to go.
- Save the Edges: If your crust edges are gettin’ too dark too fast, cover ‘em with foil or a pie shield. Ain’t nobody likes burnt bits.
- Cool It Right: Let it sit on a wire rack if ya got one. Coolin’ for a few hours sets the filling so it don’t run like a river when you slice.
Customizin’ Your Canned Filling Pie
Now, just ‘cause it’s canned don’t mean you can’t make it your own. Here’s how I like to jazz mine up sometimes:
- Spice It Up: Toss in a pinch of cinnamon, nutmeg, or allspice to the filling before bakin’. Gives it that homemade kick.
- Add a Zing: A squeeze of lemon juice can brighten up the sweetness. Just don’t overdo it—half a teaspoon’s plenty.
- Richness Boost: Stir in a teaspoon of vanilla extract for a lil’ extra depth. Smells amazin’ while it bakes, too.
- Toppin’ Ideas: Serve it warm with a scoop of vanilla ice cream or a dollop of whipped cream. If you’re feelin’ old-school, a drizzle of warm custard does the trick.
Common Mistakes and How to Dodge ‘Em
I’ve messed up plenty of pies, so lemme save ya some grief. Here’s what to watch out for:
- Cuttin’ Too Soon: Slice it hot, and you got a soupy mess. Wait them 2-3 hours, even if it kills ya.
- Not Ventin’ the Top: Forget slits in a double crust, and steam builds up. Next thing ya know, your pie’s exploded. Not pretty.
- Wrong Rack Placement: Too high in the oven, and the bottom stays raw. Stick it low for even heat.
- Overfillin’: Too much filling can spill over and make a sticky oven mess. Keep it reasonable—don’t go crazy pilin’ it in.
What If Things Go South?
Even with the best plans, stuff happens. Here’s how to fix common pie probs:
- Crust Burnin’: If it’s brownin’ too fast, slap some foil over the edges or top. Better late than never.
- Filling Too Watery: Next time, mix in a tablespoon of cornstarch or tapioca starch before bakin’. It’ll thicken up nice.
- Soggy Bottom Blues: If it’s already baked and soggy, not much ya can do. But for next time, blind bake or use a metal dish for better heat transfer.
- Undercooked Crust: If the middle’s doughy but the edges are done, lower the temp to 350°F and give it 5-10 more minutes, tentin’ the edges with foil.
Pairin’ Your Pie with the Perfect Occasion
Apple pie ain’t just dessert—it’s a mood. Here’s when I whip one up:
- Fall Gatherings: Nothin’ says autumn like warm apple pie after a chilly day outside.
- Holiday Feasts: Thanksgiving or Christmas, this pie’s a staple. Add some whipped cream, and it’s festive as heck.
- Lazy Weekends: Got nothin’ to do on a Sunday? Bake a pie just ‘cause. The smell alone’ll make your day.
A Lil’ Story from My Kitchen
Lemme tell ya ‘bout the first time I baked an apple pie with canned filling. I was in a rush for a family potluck, forgot to preheat the oven, and ended up with a crust so soggy it coulda been a pudding. My aunt still ate it, bless her, but I swore I’d never mess up again. That’s when I started playin’ with blind bakin’ and checkin’ my oven temp. Now, my pies get snatched up before I can even grab a slice! Moral of the story? Mistakes happen, but they teach ya how to bake better.
Frequently Asked Questions (Just in Case)
Still got questions? I got answers. Here’s what folks often wanna know:
- What temp should I bake at? Stick to 375°F (190°C). It’s the sweet spot for even cookin’ without burnin’ the filling.
- Can I use a frozen crust? Yup, no prob. Just follow the package for any extra time—might need a few more minutes. Don’t defrost it before fillin’, though, or it’ll get mushy.
- How do I know it’s done? Look for a golden crust and bubbly filling. Toothpick test works too—if it’s hot, you’re golden.
- What if my oven’s off? Grab an oven thermometer. They’re cheap and tell ya if you need to tweak the dial up or down.
- Can I bake in a convection oven? Sure can. Drop the temp by 25°F (so around 350°F) and check it often—convection bakes quicker.
Wrappin’ It Up with a Slice of Advice
Bakin’ an apple pie with canned filling is a breeze once ya know the ropes. Remember, 30-45 minutes at 375°F is your baseline, but keep an eye on that crust and adjust for your oven or dish. Whether you’re a newbie or a seasoned baker, this shortcut lets ya whip up a classic dessert without breakin’ a sweat. So next time you’re cravin’ somethin’ sweet and cozy, don’t overthink it—grab a can, roll some dough, and make magic happen.
Got a pie story or a trick up your sleeve? Drop it in the comments—I’m all ears! And if this guide helped ya out, share it with a friend who needs a dessert win. Now, go bake somethin’ awesome, and lemme know how it turns out!