Hey there, dessert lovers! If you’ve got a box of Omaha Steaks Apple Tarts sittin’ in your freezer, you’re in for a real treat. These little gems, packed with sweet, spiced apple goodness and wrapped in a flaky, golden crust, are the kinda thing that’ll make your kitchen smell like a cozy autumn day. At our lil’ corner of the foodie world, we’re all about makin’ sure you nail this dessert with ease. So, let’s dive right in and figure out how to cook these bad boys to perfection, no fuss, no muss!
I’ve gotta say, the first time I popped one of these tarts in the oven, I was hooked. But, umm, I did botch it a bit by skippin’ a key step (spoiler: preheating matters!). Don’t worry, though—I’m gonna walk ya through every bit of the process, from thawin’ to servin’, so you can avoid my rookie mistakes and get that bakery-level yum on your plate.
What Are Omaha Steaks Apple Tarts Anyway?
Before we get our hands dirty, let’s chat about what makes these tarts so darn special Omaha Steaks Apple Tarts, sometimes called Caramel Apple Tartlets dependin’ on the package, are individual-sized desserts that pack a punch of flavor. We’re talkin’ tender apples, a hint of cinnamon or nutmeg, and sometimes a drizzle of caramel, all hugged by a buttery, flaky pastry They’re the perfect mix of sweet and tart, and honestly, a total crowd-pleaser for family dinners or just a solo indulgence.
These tarts come frozen, ready for you to bake ‘em fresh at home. No need to be a master chef here—they’re designed for convenience without skimpin’ on taste. Whether you’re a baking newbie or a seasoned pro you’ll find these a breeze to whip up with the right tips. So let’s get to the good stuff—how to cook ‘em!
Step-by-Step Guide to Cookin’ Omaha Steaks Apple Tarts
Cookin’ these tarts ain’t rocket science, but a lil’ attention to detail goes a long way. I’m breakin’ it down into easy steps so you can follow along and get that golden, bubbly result every time. Grab your apron, and let’s do this!
1. Thawin’ the Tarts: Start Right or Start Soggy
First things first ya gotta thaw these babies properly. If you skip this or rush it you might end up with a soggy mess instead of a crisp crust. Here’s how we do it at my house
- Fridge Method (Best Option): Pop the number of tarts you wanna cook outta the freezer and into the fridge. Let ‘em sit there for a few hours, or even better, overnight. This slow thaw keeps the pastry nice and firm.
- Room Temp Quick Fix: If you’re in a hurry, leave ‘em on the counter for about 30 to 45 minutes. Keep an eye on ‘em, though—don’t let the crust get too soft or mushy. Ain’t nobody got time for that!
Pro tip from yours truly: Don’t thaw in a super warm spot or for too long at room temp. It’s a surefire way to mess up that flaky texture we’re after.
2. Preheat That Oven: Don’t Skimp on This!
I learned this the hard way—preheatin’ your oven is non-negotiable. If you toss the tarts in a cold oven, they won’t bake evenly, and you’ll be stuck with a sad, undercooked crust. Crank your oven up to 375°F (190°C) and let it get good and hot before you do anything else.
- Got an oven thermometer? Use it! Some ovens run hotter or cooler than the dial says, and we wanna be spot-on for that perfect bake.
- Give it at least 10-15 minutes to heat up. Patience is key here, folks.
3. Prep Your Baking Setup: Keep It Clean and Simple
While the oven’s warmin’ up, let’s get your baking sheet ready. This step ain’t fancy, but it saves you a headache later.
- Line a baking sheet with parchment paper. This keeps the tarts from stickin’ and makes cleanup a snap. No parchment? A light spray of cookin’ oil works too.
- Place the thawed tarts on the sheet, leavin’ a bit of space between each one. This helps the heat get all around ‘em for even cookin’.
4. Bake ‘Em to Golden Glory
Now for the magic moment—bakin’ these beauties! The time and temp can vary a tad dependin’ on if they’re thawed or straight from the freezer. Here’s the breakdown:
| State of Tart | Oven Temp | Baking Time | Notes |
|---|---|---|---|
| Thawed | 375°F (190°C) | 20-25 minutes | Check for golden crust, bubbly filling. |
| Frozen | 375°F (190°C) | 35-40 minutes | May need extra 5-10 mins; watch closely. |
- Thawed Tarts: Pop ‘em in for about 20-25 minutes. Start peekin’ at ‘em around the 20-minute mark. You’re lookin’ for a rich golden-brown crust and a filling that’s gently bubblin’.
- Frozen Tarts: If you didn’t thaw, no biggie. Just bake ‘em for 35-40 minutes. They might need a few extra minutes, but don’t let ‘em burn—keep an eye out!
A lil’ trick I use is to stick a toothpick in the center. If it comes out warm, they’re likely done. And if your oven’s a bit wonky and heats unevenly, give the baking sheet a quick rotate halfway through. Easy peasy!
5. Cool ‘Em Down and Serve
Once they’re outta the oven, don’t dive in just yet—trust me, I’ve burned my tongue doin’ that! Let the tarts cool on the baking sheet for a couple minutes. This helps the filling set a bit so it ain’t a runny mess when you plate ‘em.
- Carefully move ‘em to a servin’ dish with a spatula. They’re delicate lil’ things, so don’t be rough.
- Serve ‘em warm for the best flavor. That’s when the crust is crisp and the apple fillin’ just melts in your mouth.
Bonus Cookin’ Option: Air Fryer Magic
If you’re like me and love usin’ an air fryer for just about everythin’, you’ll be thrilled to know these tarts work great in one too! It’s quicker and gives a super crispy crust if you do it right.
- Preheat your air fryer to 350°F. Takes just a few minutes.
- Arrange the tarts in a single layer in the basket—don’t stack or overlap, or they won’t cook even.
- Cook for about 15-18 minutes if thawed, a bit longer if frozen (maybe 20-22 minutes). Check halfway to make sure they ain’t burnin’.
- Let ‘em cool a smidge before diggin’ in.
I gotta admit, the air fryer’s my go-to when I’m short on time. It’s like a lil’ kitchen wizard for these tarts!
Fancy It Up: Servin’ Ideas to Wow Your Crew
Alright, now that we’ve cooked ‘em, let’s talk about makin’ these Omaha Steaks Apple Tarts look and taste like a five-star dessert. They’re yummy on their own, but a few extras can take ‘em over the top. Here’s what I love doin’:
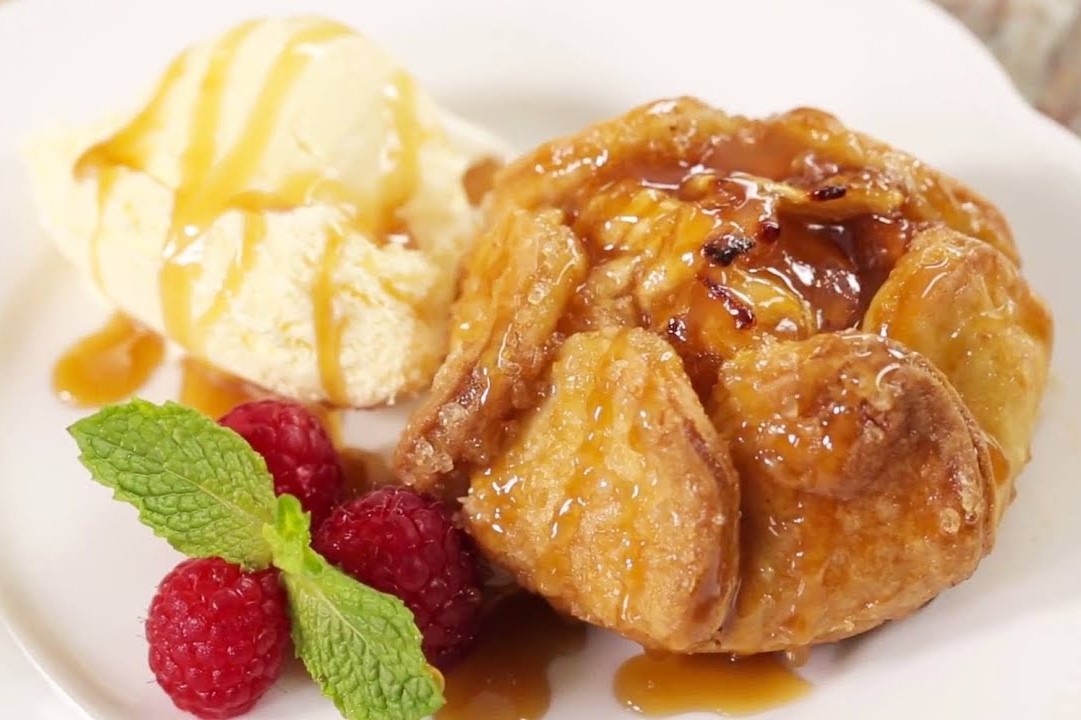
- Ice Cream Pairin’: Plop a scoop of vanilla or caramel ice cream right next to a warm tart. The hot-cold combo is pure heaven. I’ve tried it with butter pecan too, and lemme tell ya, it’s a game-changer!
- Caramel Drizzle: Grab some caramel sauce (store-bought or homemade, no judgment) and drizzle it over the top. It adds a sweet, sticky kick that pairs perfect with the apples.
- Whipped Cream Dollop: A lil’ puff of fresh whipped cream lightens things up. It’s like a fluffy cloud on your dessert plate.
- Powdered Sugar Dust: For a simple but pretty touch, sprinkle some powdered sugar on top. Makes ‘em look straight outta a bakery window.
- Cheese Surprise: Sounds weird, but hear me out—pair it with a slice of sharp cheddar. The sweet-tart apple with salty cheese? Oddly amazin’!
Next time you’re hostin’ a get-together, try one of these. Your guests will think you’ve got some secret baking mojo!
Storin’ Leftovers: Keepin’ That Freshness
Made too many? No worries, we’ve all been there. These tarts can hang out for a bit if you store ‘em right. Here’s how I keep mine fresh:
- Refrigerator: Let ‘em cool completely, then pop any extras into an airtight container. Stick it in the fridge, and they’ll stay good for about 3-5 days. Don’t seal ‘em up while they’re still warm, or you’ll trap steam and get soggy crust. Yuck!
- Freezin’ for Later: If you’ve got a bunch left or wanna save some for a rainy day, freeze ‘em. Wrap each tart tight in plastic wrap or foil to dodge freezer burn, then stash in a freezer-safe container. They’ll keep their quality for 2-3 months. When you’re ready, bake straight from frozen—add a few extra minutes to the cook time.
Reheatin’ Without Ruinin’ ‘Em
Reheatin’ is where a lotta folks go wrong, includin’ me at first. You don’t wanna dry ‘em out or make the crust all floppy. Here’s the best way:
- Oven Method (My Fave): Preheat to 350°F (175°C). Wrap each tart in foil to keep the moisture in, then heat for 10-15 minutes. Unwrap for the last couple minutes if you want extra crisp.
- Microwave (Last Resort): If you’re desperate, nuke ‘em for 20-30 seconds, but be warned—it might soften the crust. Not ideal, but it works in a pinch.
I usually go with the oven ‘cause it keeps that just-baked vibe. Microwavin’ is quicker, sure, but it ain’t the same, ya know?
Common Goofs and How to Dodge ‘Em
Even with somethin’ as simple as these tarts, there’s a few slip-ups that can trip ya up. I’ve made most of these mistakes myself, so lemme save you the trouble with some hard-earned wisdom:
- Messin’ Up the Thaw: Thawin’ too fast or in a hot spot can leave ya with a soggy bottom (not the fun kind!). Stick to the fridge or a quick room-temp rest, and don’t push it.
- Skippin’ Preheat: I’ve said it before, but it bears repeatin’—a cold oven means uneven bakin’. Always preheat to 375°F. Don’t be lazy like I was!
- Overbakin’ Like a Fool: Burnt crust and dry fillin’ ain’t no one’s idea of dessert. Set a timer and start checkin’ a few minutes before the suggested time. Ovens can be sneaky lil’ devils.
- Ignorin’ Instructions: Each batch might have slight tweaks on the package. Give it a quick peek to make sure you’re on track. I’ve ignored this before and paid the price with undercooked centers.
Keep these in mind, and you’ll be golden—literally, with that crust!
Special Diets? A Quick Heads-Up
If you or your peeps got dietary quirks, I gotta be straight with ya—Omaha Steaks Apple Tarts ain’t gonna fit every need. They’re made with regular wheat flour, so gluten-free folks are outta luck. There’s also sugar and butter in there, which might not jive with low-sugar or dairy-free diets. If you’re unsure, double-check the package for the full scoop on ingredients. Better safe than sorry, right?
Where to Snag These Tarts
Wonderin’ where to get your hands on these tasty morsels? We’ve got ya covered. Head over to the Omaha Steaks website for direct orderin’—super handy with home delivery. They often pop up in seasonal deals, especially around holidays, so keep an eye out. Some local grocery spots might stock ‘em in the frozen dessert section too, but availability varies. Check with your nearby store or their online listings to see if they’ve got ‘em in stock.
Why You Gotta Try This Dessert
Lemme tell ya, there’s somethin’ downright heartwarmin’ about pullin’ a batch of Omaha Steaks Apple Tarts outta the oven. The smell alone is worth the effort, and when you bite into that flaky crust with the sweet apple center, it’s like a lil’ hug for your taste buds. Whether you’re servin’ ‘em up for a family shindig or just treatin’ yourself after a long day, these tarts bring a slice of comfort to the table.
I remember the first time we made these for a holiday gatherin’—folks couldn’t stop ravin’ about ‘em, and I felt like a dang pastry chef! It’s those kinda moments that make cookin’ so worth it. Plus, with how easy they are to whip up, you don’t need to spend hours slavin’ away to impress.
Troubleshooting: When Things Go Sideways
Even with the best plans, sometimes stuff just don’t work out. Here’s a quick guide to fixin’ common hiccups I’ve run into:
- Crust Ain’t Crispy: If it’s more doughy than flaky, your oven might not’ve been hot enough. Next time, make sure it’s fully preheated. Or, if it’s already baked, a quick reheat in the air fryer can crisp it up.
- Fillin’ Not Hot: If the center’s cold but the crust looks done, you mighta pulled ‘em out too soon. Pop ‘em back in for 5 more minutes, coverin’ the edges with foil if they’re gettin’ too dark.
- Burnt Edges: Ovens vary, and hotspots happen. If the edges char before the middle’s ready, lower the temp a smidge next time or rotate the tray earlier.
Don’t stress if it ain’t perfect the first go—practice makes perfect, and even a slightly wonky tart tastes pretty darn good!
A Lil’ Extra Love: Customizin’ Your Tarts
Wanna put your own spin on these? I’m all for gettin’ creative in the kitchen. Before bakin’, sprinkle a lil’ crumble toppin’ made of flour, butter, and sugar for added crunch. Or toss in a pinch of extra cinnamon or nutmeg to the fillin’ if you’re feelin’ spicy. After they’re done, toasted pecans or walnuts on top add a nutty vibe that’s just delightful. Play around and make ‘em your own!
Final Bite: Let’s Get Bakin’!
So, there ya have it—everythin’ you need to cook Omaha Steaks Apple Tarts like a total pro. From thawin’ to bakin’, servin’ to storin’, we’ve covered the whole shebang to make sure your dessert game is on point. I’m tellin’ ya, once you get a whiff of these tarts fresh outta the oven, you’ll be hooked just like I am.
Why not give it a shot this weekend? Grab a box, follow these steps, and treat yourself to somethin’ sweet. And hey, if you’ve got pics or stories from your bakin’ adventure, drop ‘em in the comments or share with us over at our socials. We’re dyin’ to see how yours turn out! Happy bakin’, y’all—let’s make some dessert magic!
Omaha Steak Apple Tartlet Recipe
FAQ
How do you cook an omaha steak apple tart?
Preheat your oven to 400 degrees F. Remove tartlets from packaging and place spaced out on an aluminum foil-lined baking sheet. Bake for 18 – 20 minutes.
How to heat up omaha steak apple tartlet?
Microwave: * Remove tartlet from cellophane bag. Place on microwave safe plate. Microwave on HIGH for 60-70 seconds.
How long do you air fry Omaha apple tartlets?
Air fry the tart at 320°F for 16-20 minutes until the apples are tender and the crust is golden.
What is the best way to cook omaha steak?
What is Omaha Steaks caramel apple tartlet?
Omaha Steaks Caramel Apple Tartlet is a delicious dessert that combines the sweet taste of caramel and the tangy flavor of apples in a delectable tartlet. If you are wondering how to cook this mouth-watering treat, you have come to the right place. In this article, I will guide you through the steps to cook
Are Omaha Steaks Apple tartlets good?
Omaha Steaks Apple Tartlets, with their flaky crust and warm, spiced apple filling, offer a delectable dessert experience right in your own kitchen. Cooking them successfully relies on proper handling, preheating, and attention to detail, ensuring a golden-brown crust and a perfectly heated center. Do you like this article?
How do you cook Omaha Steaks Apple tartlets?
Step 1: Preparation Preheat your oven to 375°F (190°C). Line a baking sheet with parchment paper. Remove the Omaha Steaks Apple Tartlets from their packaging and place on the prepared baking sheet, leaving about 2 inches between each tartlet.
How long do Omaha steak Apple tartlets last?
Store them in an airtight container in the fridge for up to 3 days. You can reheat them in the oven at 350°F for about 5 minutes to bring back that perfect crisp. Here, we’ve got you covered with some common questions about the Omaha Steak Apple Tartlet Recipe that people often ask. 1. How do you cook Omaha Steaks Apple Tartlets?
How do you thaw Omaha Steaks Apple tartlets?
Remove the Omaha Steaks Apple Tartlets from their packaging and place on the prepared baking sheet, leaving about 2 inches between each tartlet. Allow the tartlets to thaw slightly at room temperature for about 10 minutes while preparing the apple filling. Step 2: Prepare the Apple Filling Peel the Granny Smith apples, removing all skin.
How long do you microwave Omaha Steaks Apple tartlets?
You can microwave them, but we’ll be honest-baking or air frying gives a way better texture. That said, if you’re in a pinch, microwave on a microwave-safe plate for about 1 to 1.5 minutes. Let it sit for a minute afterward so the filling settles and cools a bit.